What do you do when you go through a divorce, quit your job, and move back to a state you said you wouldn’t? Turn your basement into a make-shift garage and customize a motorcycle of course! I will start this with a bit of backstory. I grew up in the back country of Colorado on motorized vehicles. I first learned to drive a snowmobile when I was 5 and sold my mountain bike to buy a Yamaha Big Wheel when I was 12. I traded that Big Wheel for a go-kart (not a wise choice, but a fun one), and then eventually bought a 1971 Suzuki TS 185, nicknamed The Beast, because you could not kill that thing. Throw in a couple of temperamental snowmobiles in there and you will find my passion as a gear-head.
As you may have guessed, I worked on all of those bikes and snowmobiles on my own due to my interest in small engines, or really anything I could tinker with. It always felt like a great accomplishment to fix something other people would have written off or thrown away. When I wasn’t messing with mechanics, I was out riding as intended. The future, however, would end up putting a halt to that fun for a bit.

Over the years, circumstances forced me to sell all of my toys. I ended up out East, married, and thought life was going pretty well even without my power-sports. But that was all about to change one fateful Thanksgiving night and one day before my birthday. After returning from a party, my then wife told me she had been having an affair. After first thinking we were going to work it out, we ended up separating and eventually divorcing. Fast-forward a couple of months when my job had become an extra source of stress and add to that a torn ACL, I felt it was time for a change.
I moved back to MN (something said I would never do again) during the middle of one of the coldest winters and needed something to occupy my mind. My little brother had upgraded to a newer bike the previous summer and was looking to get rid of his 1981 Yamaha XJ750 Seca. I asked if I could buy it and start tearing it apart. After he agreed, the next part became convincing my parents (who I was living with temporarily at the time) to use their unfinished basement as a garage to avoid the frigid cold. Surprisingly, this took very little persuasion and my mom said go for it.
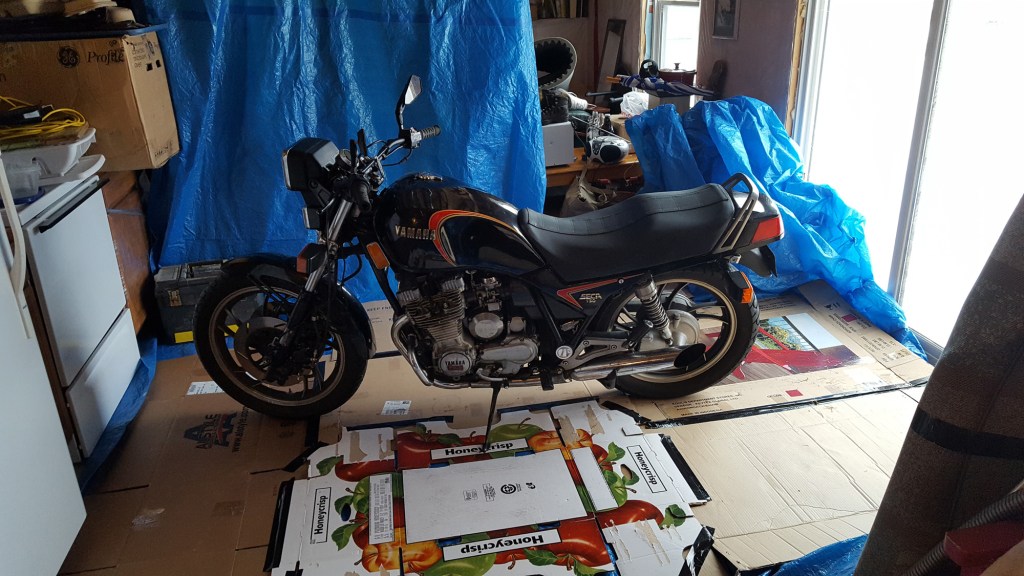
I started by laying down a tarp and then adding boxes on top to make sure any fluids that would leak out (and as anyone who has ever worked on an engine knows, there will always be fluids leaking) would not soak into the concrete. I had to ride the powerless bike down a snow covered hill to get into the backdoor. That resulted in an entertaining wipe-out that luckily caused no damage. Once I was able to roll the bike into the basement, it was time to start figuring out what to do.
This was the first time I had ever planned on actually customizing parts of a bike rather than just fixing the bits that didn’t work. Sure, I had painted my snowmobile hoods with spray paint, but nothing that required me cutting metal or redoing large bits of electrical work. Because of this, I was a bit cautious and wanted to make sure the parts I chose would require the least amount of effort while also looking good.

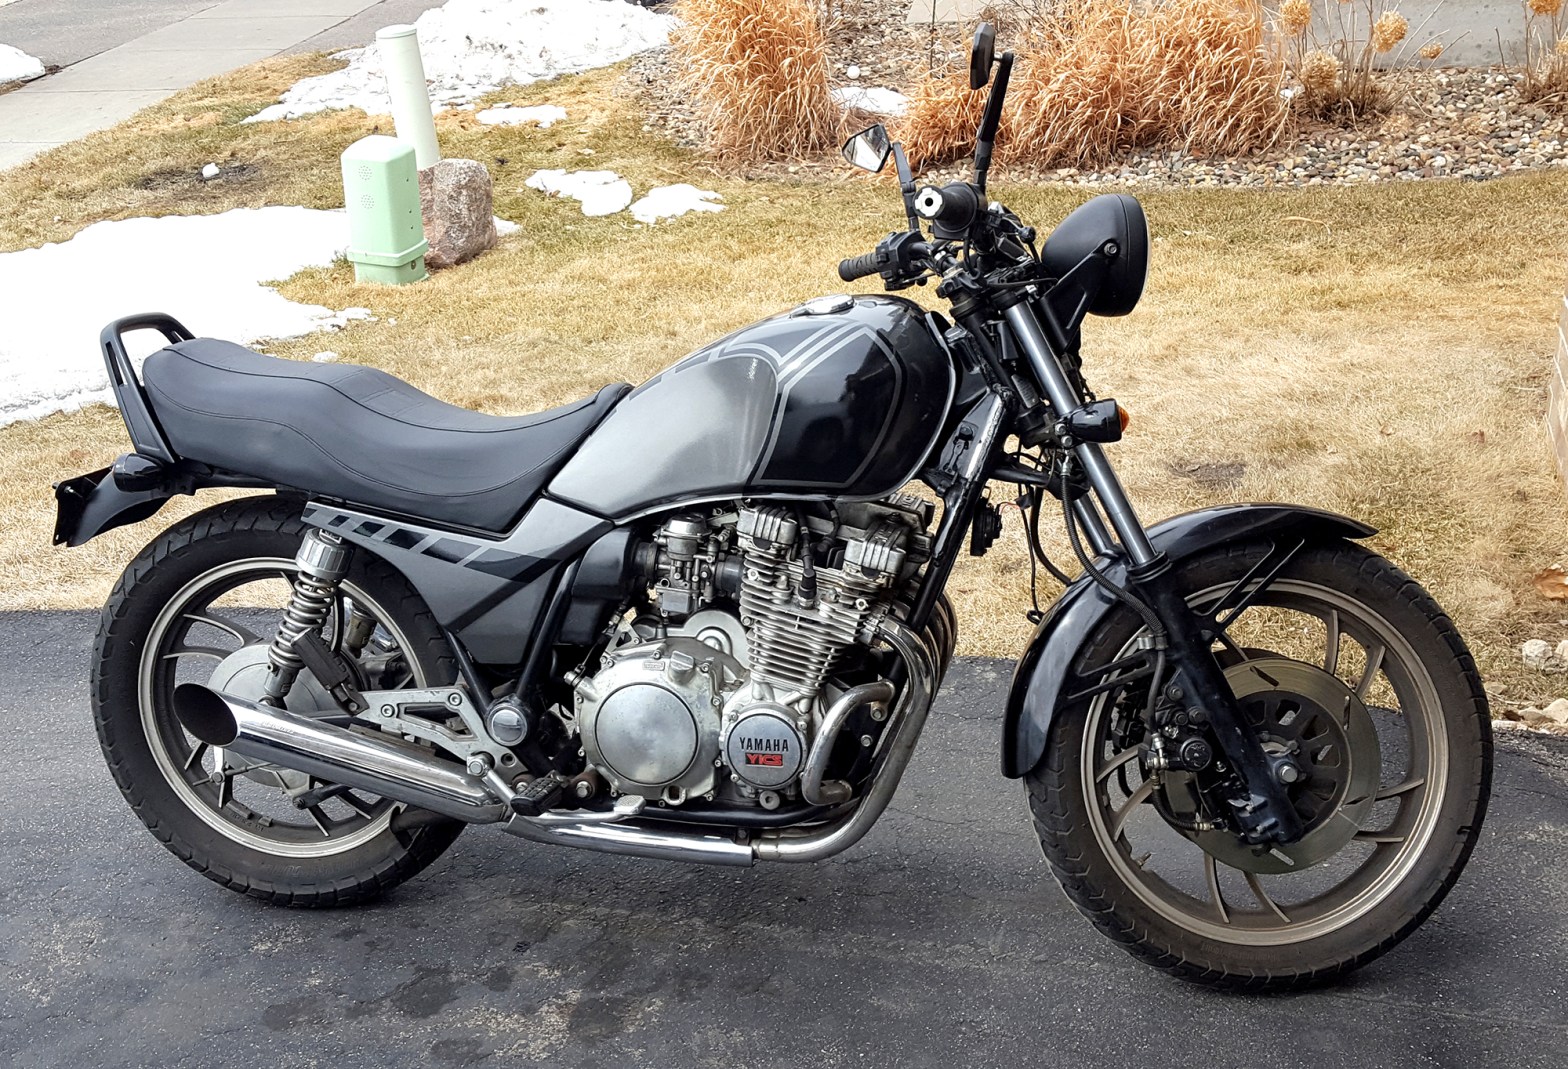
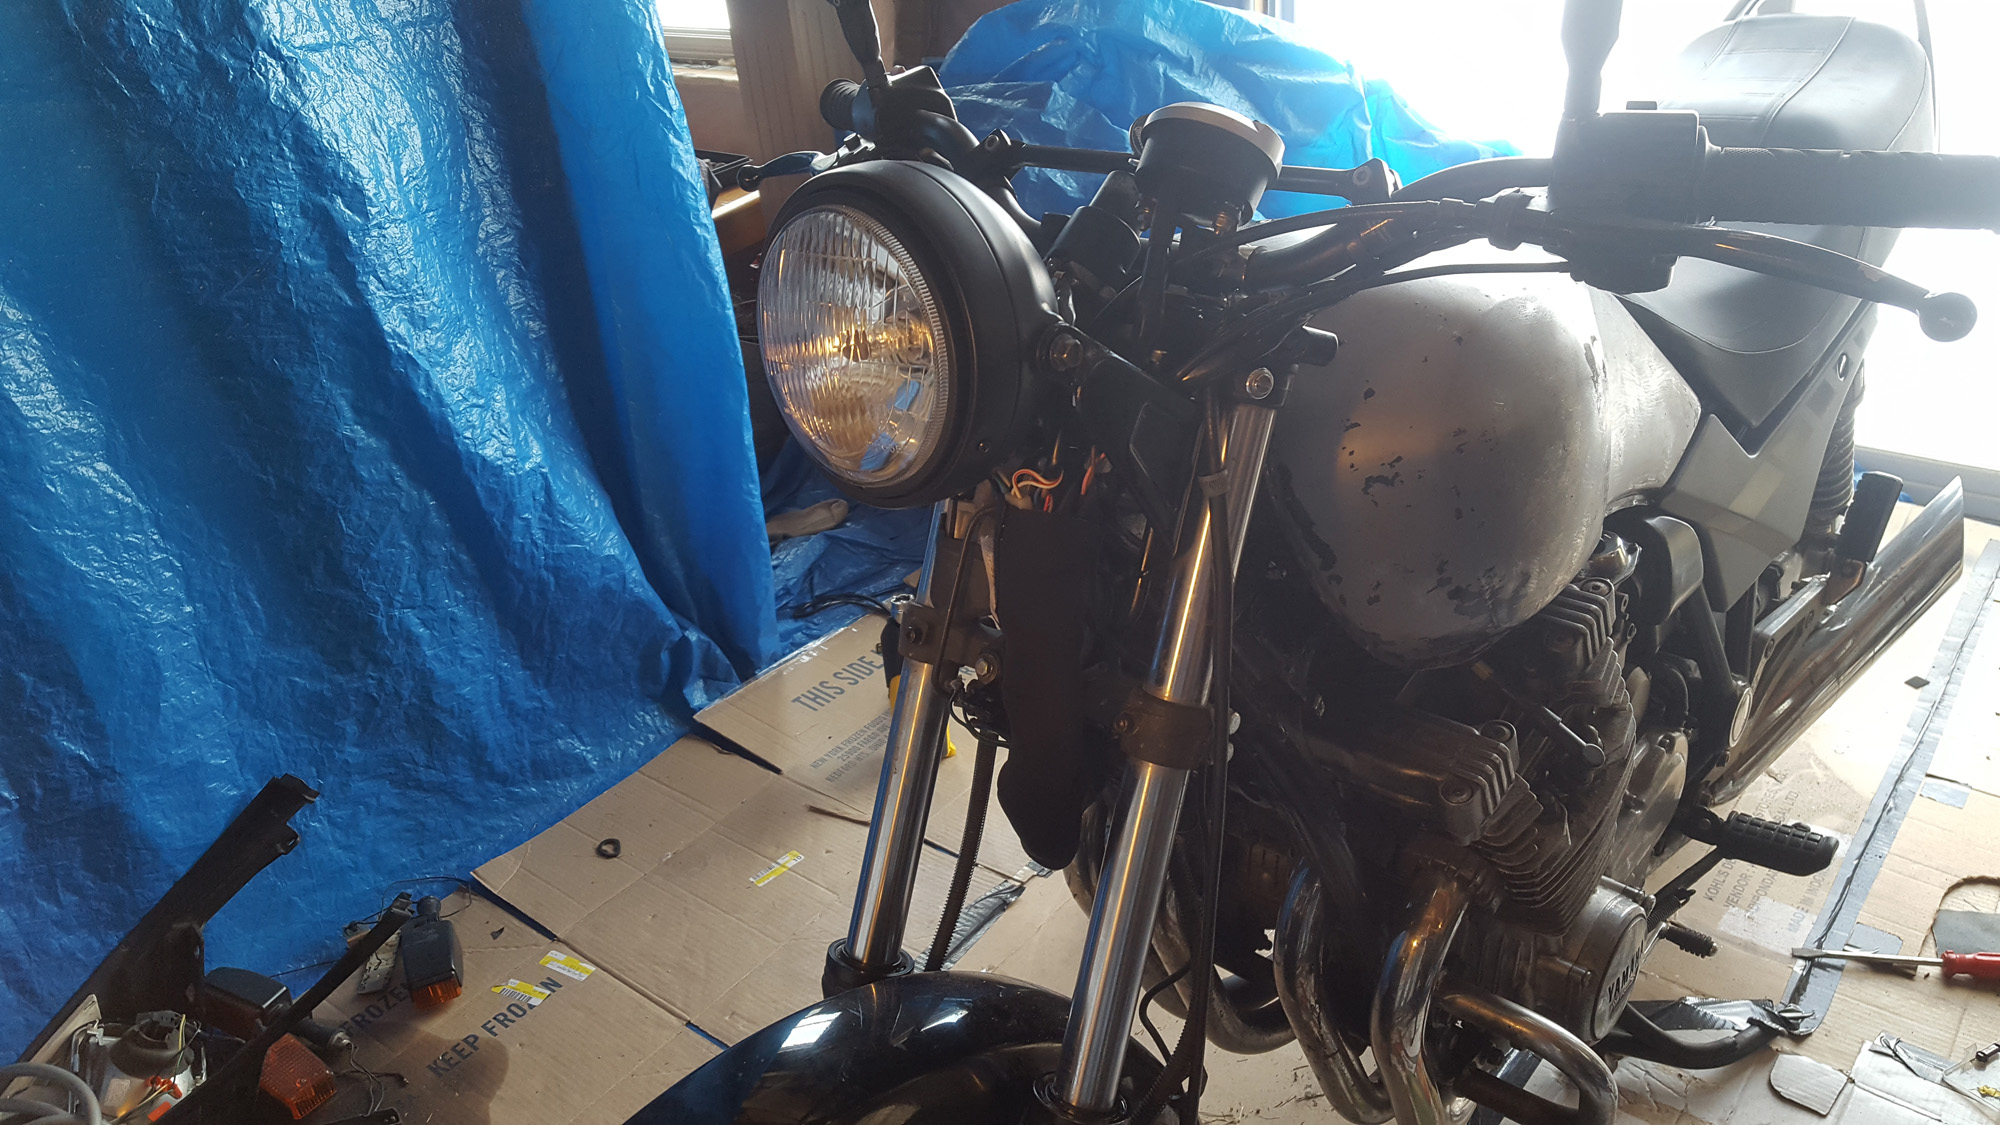
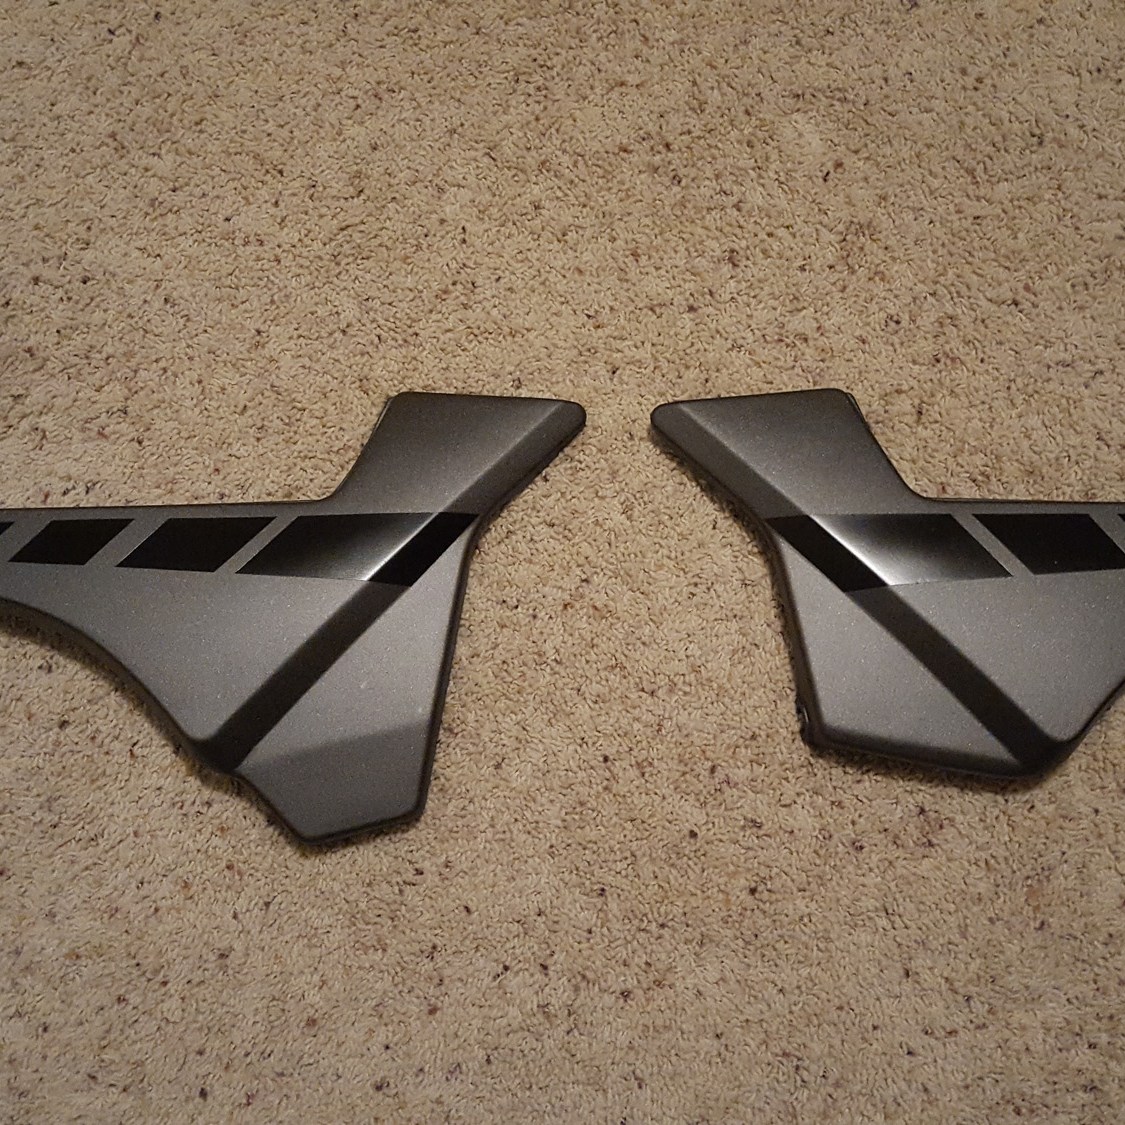
I knew that I hated the rectangle lights. I wanted something that looked a bit more classic rather than 80s retro. I chose a 5 3/4” round headlight that used the same wattage as the original to avoid having to add a new rectifier unit. Bullet turn signals were also chosen using non-LED bulbs so that new relays would not be needed. A generic brake light and some license plate lights capped off the initial parts-needed list.
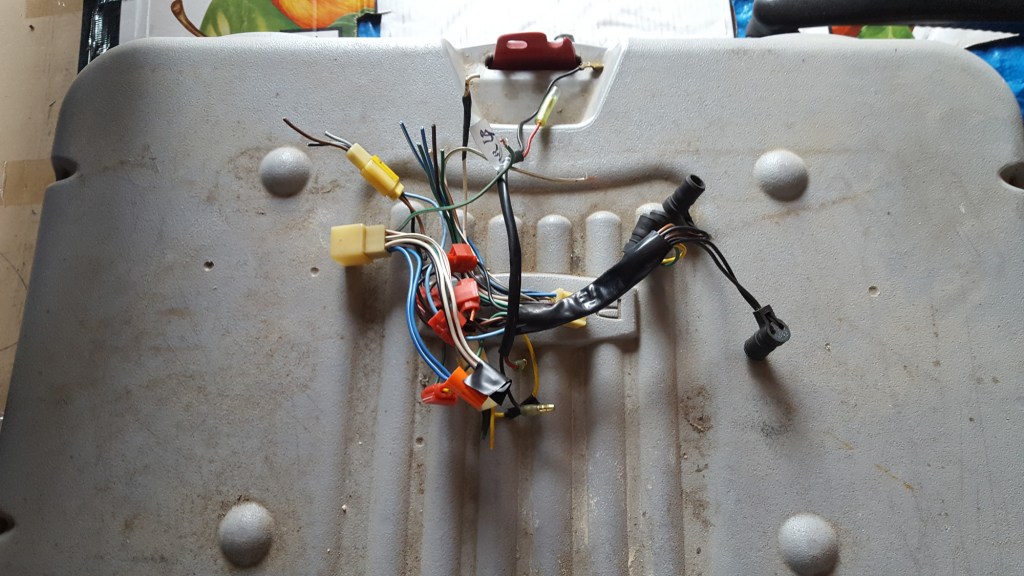
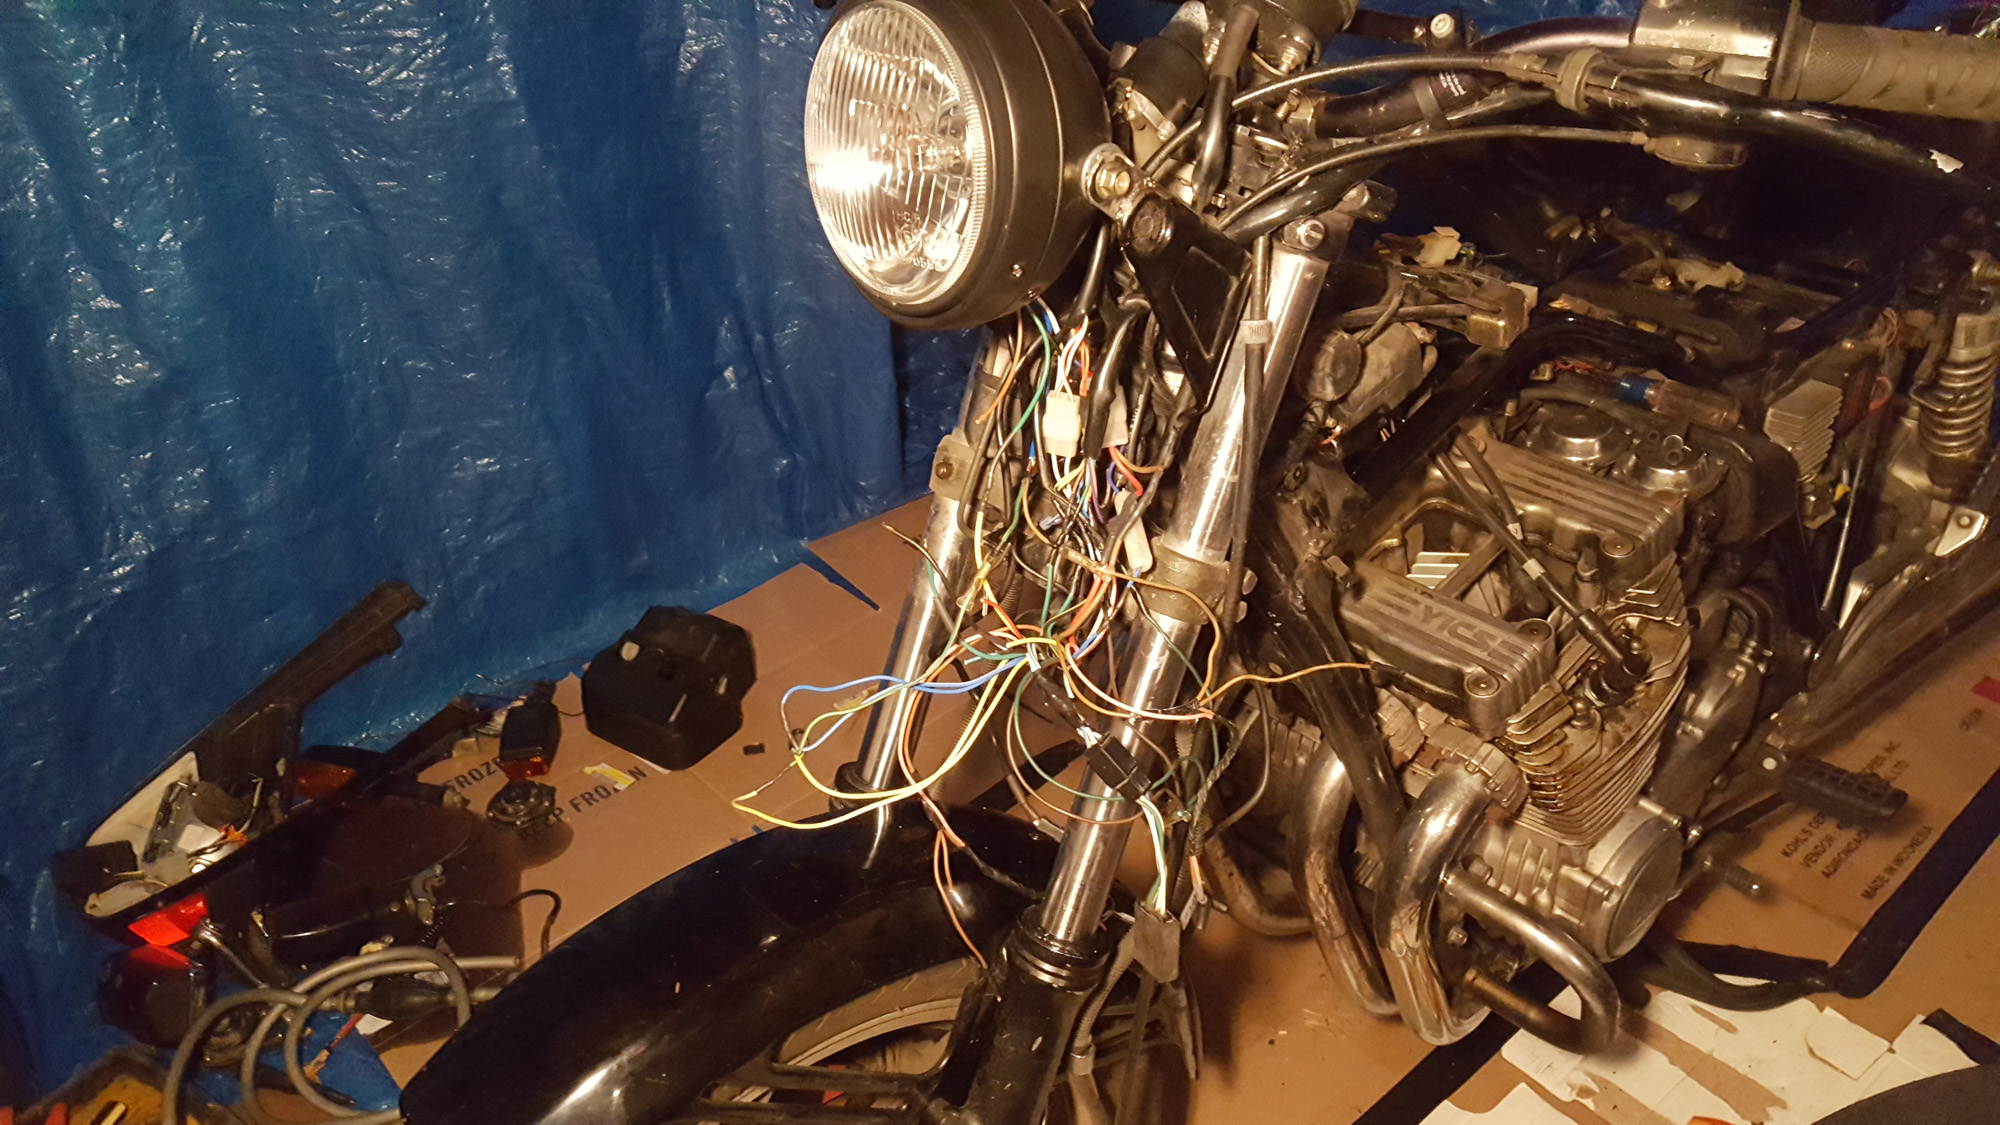
The biggest trick to working on these older Yamaha’s is that they have a ridiculous amount of wiring going to their gauge clusters. These bikes were pretty cutting edge at their time with auto-kill turn signals and many different maintenance warnings. The Seca’s gauges had become affectionately known as the “Atari” for the size and amount of lights on it. Luckily for me, part of this electrical was already done by my brother who had switched over to a new all-in-one digital gauge. The down-side was that all the wires were still there and tucked away in the headlight box. Upon opening it up, the only way I could describe the entangled mess was a rats nest of wires, old electrical tape and connectors.


Since I would be eliminating the headlight unit and replacing it with a much smaller housing, I needed to first reduce all the wires and make sure I only kept what I needed. I was able to find a diagram of the electronics and started to figure what was needed and what I could bypass. I didn’t need oil lights, auto-kill turns, kickstand lights, or any other luxury indicator. I stripped it down to just the headlight, turns, and ignition circuit and basically cut everything else.
Now that I had the wires all out of the way, I started fabrication on the mounts I needed for the headlight and brake light. Luckily the new turn signals could use existing mounts on the bike and didn’t need too much work to get mounted. I used some 1” x 1/8” inch steel you can pick up at just about any hardware store. That was welded to existing brackets and hole were drilled for their respective light. Once all the lights were in place, I could start connecting wires and figuring out the best way to hide them without having to redo the whole wiring harness.


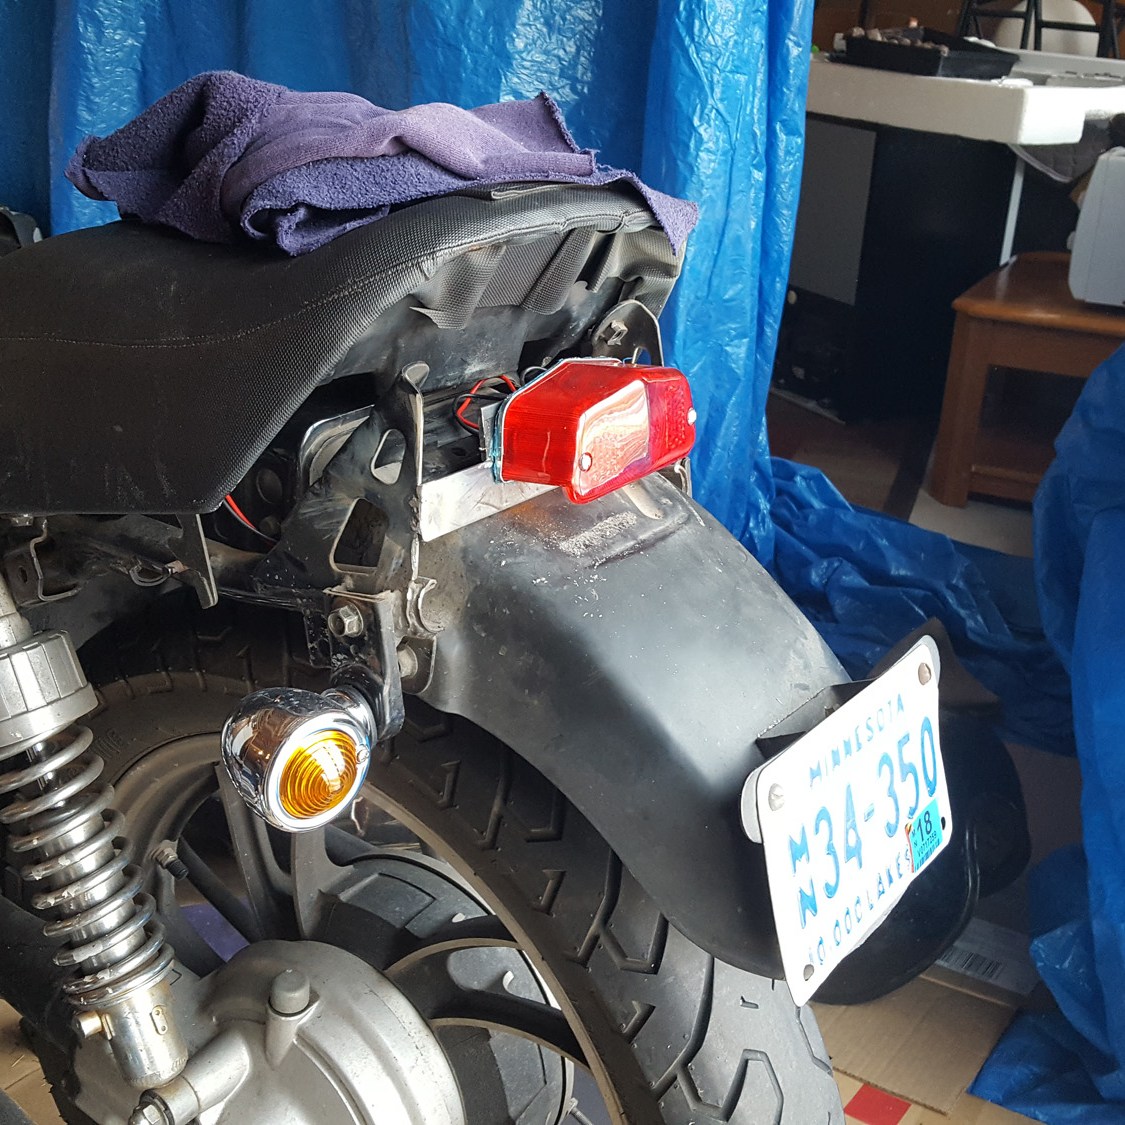
I soldered all my connections together which saved a ton of space. The old connectors were extremely bulky. I then used some neoprene wire wrap that I found on Amazon to hide all the wires and zip-tie them to the triple tree. While not the cleanest of looks, it was a vast improvement over the original.
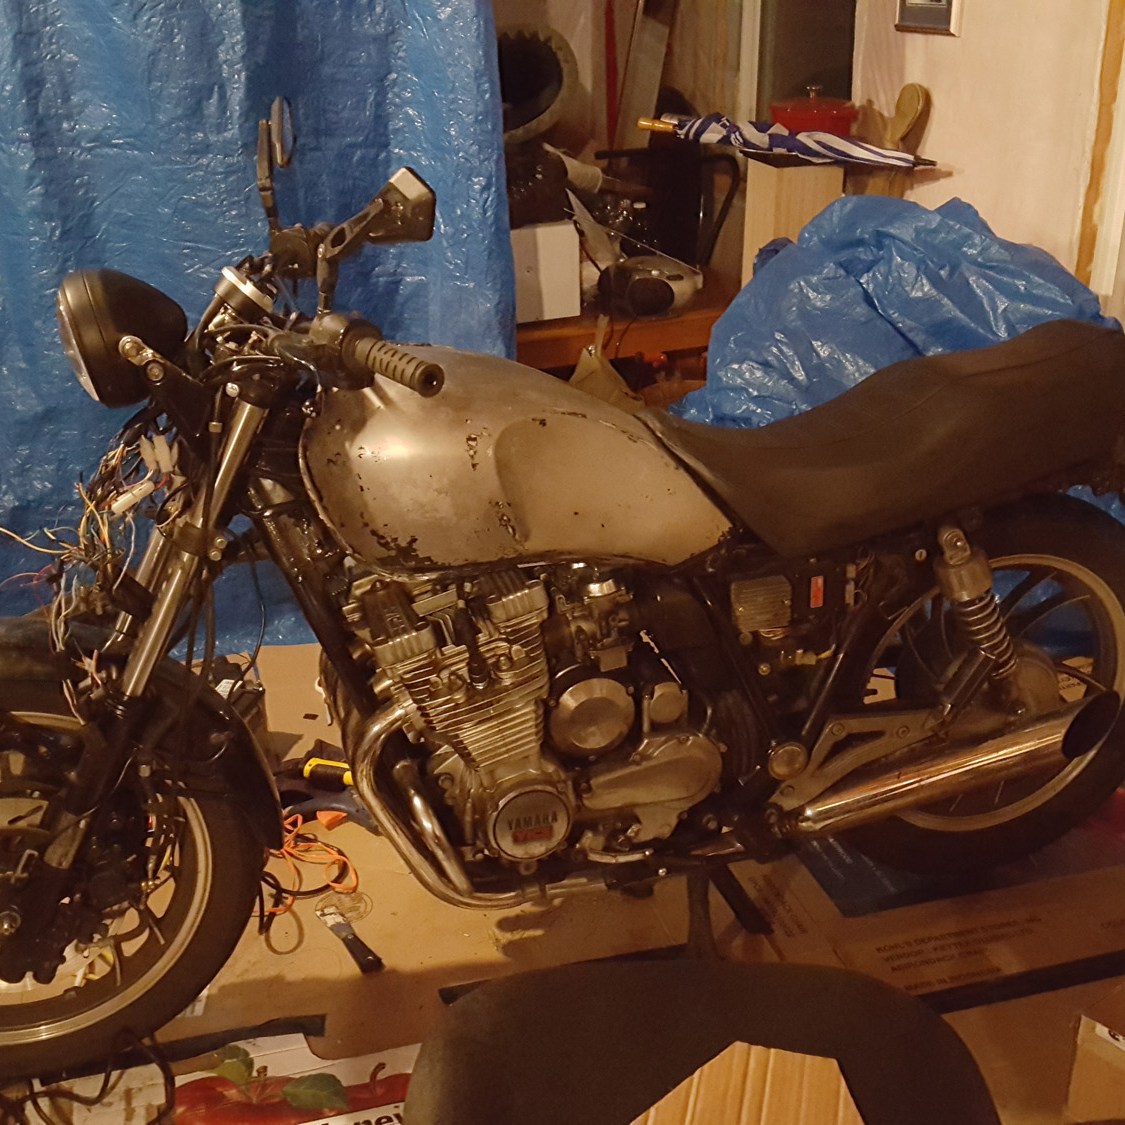
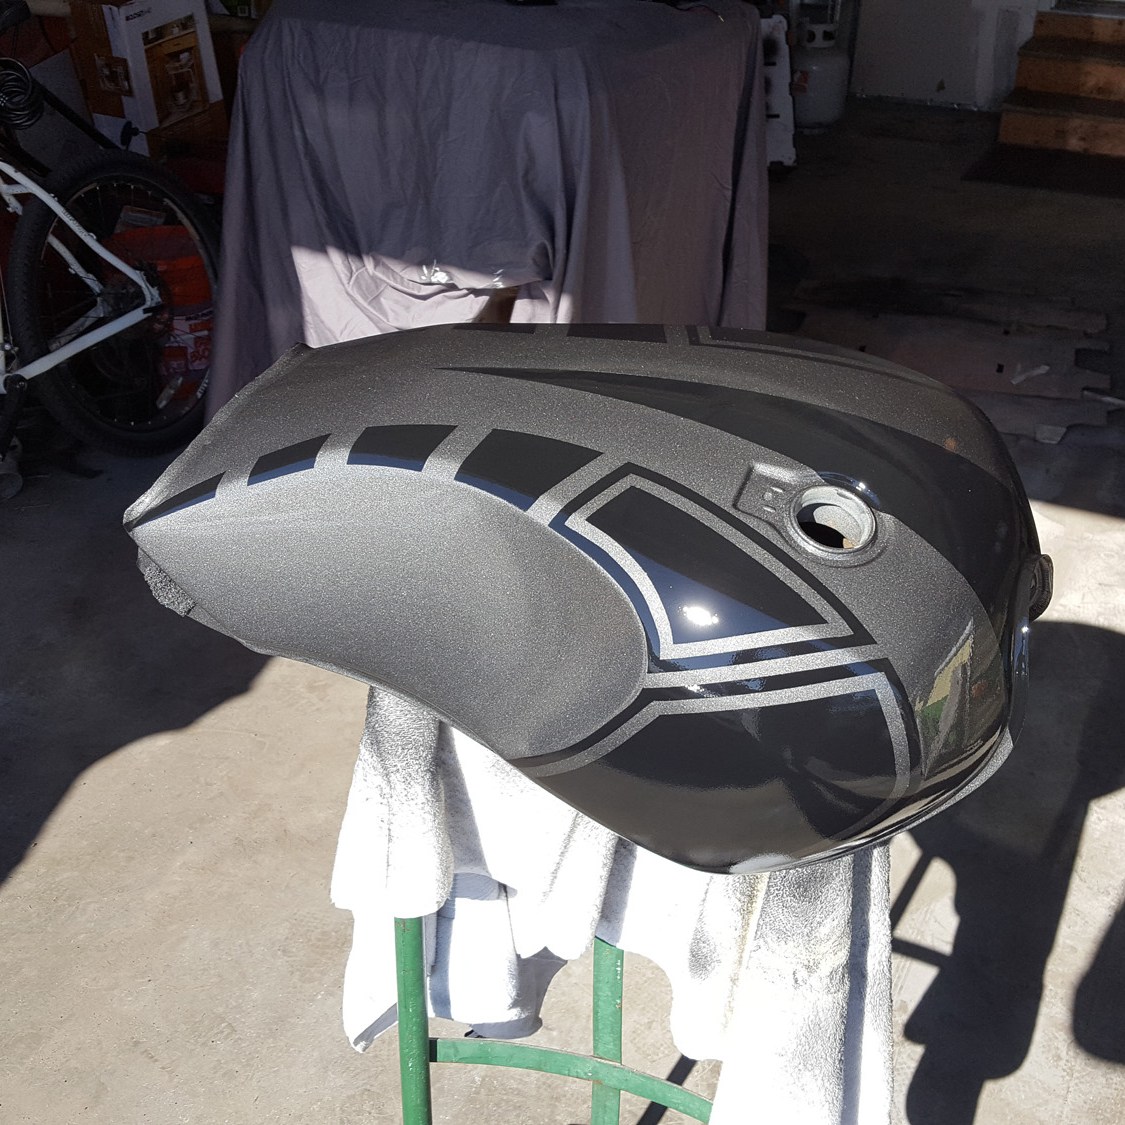
Now that the wiring and mods were taken care of, it was time to tackle the part of the project that always gets me most excited…PAINT! I really hated the original paint of the bike. It looked tacky and very much uncool. I love the look of old muscle cars from the 60s and 70s and decided to use a rally stripe theme inspired by those years. I don’t like over-the-top paint jobs, I just wanted something clean but unique.
To begin, I had to strip the old paint which proved much more of a pain-in-the-ass than anticipated due to the cold. Paint stripper requires temps of over 65 degrees to work correctly and the outside temp at the time was about negative 10 degrees…I did my best to heat the garage and see what I could get off, but it ended up being better to just get a razor blade and start peeling away the layers. Once the bulk of the paint was off, I could then use an orbital sander to get the rest down to clean bare metal. And then, trouble…

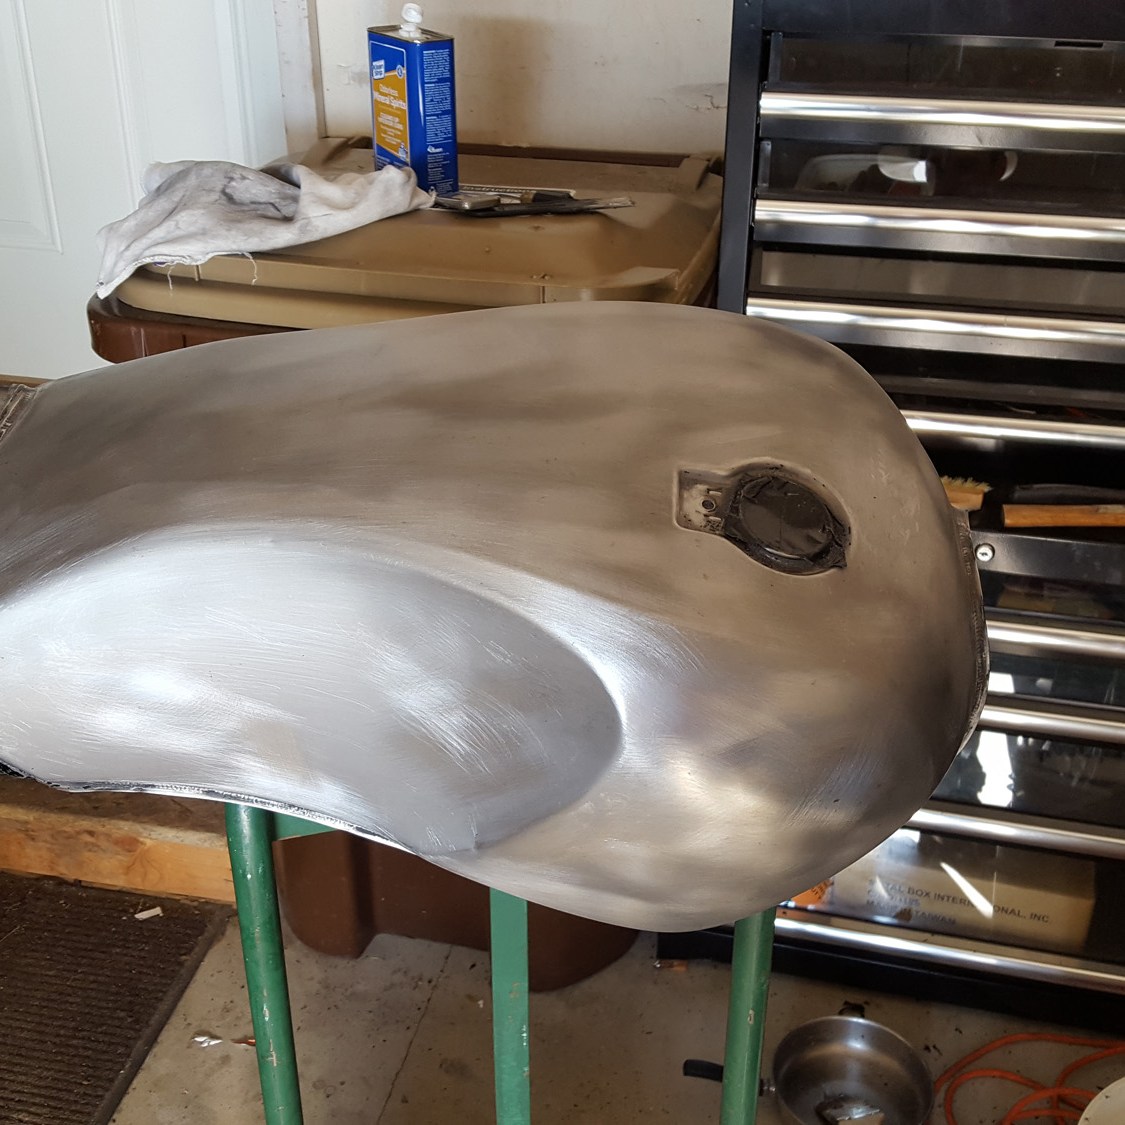
While working on the tank, it fell off of its stand and dented the top. I had never had to do any kind of metal work in the past so this part made me a bit nervous. I tried many different techniques such as epoxying a nail to the dent and trying to pull it out, using heat to pop it out, and eventually I was able to work most of it out using a J-hook tool and pushing out the dent from the inside. This didn’t get it all, but at least close enough to where I could even it out with body filler.


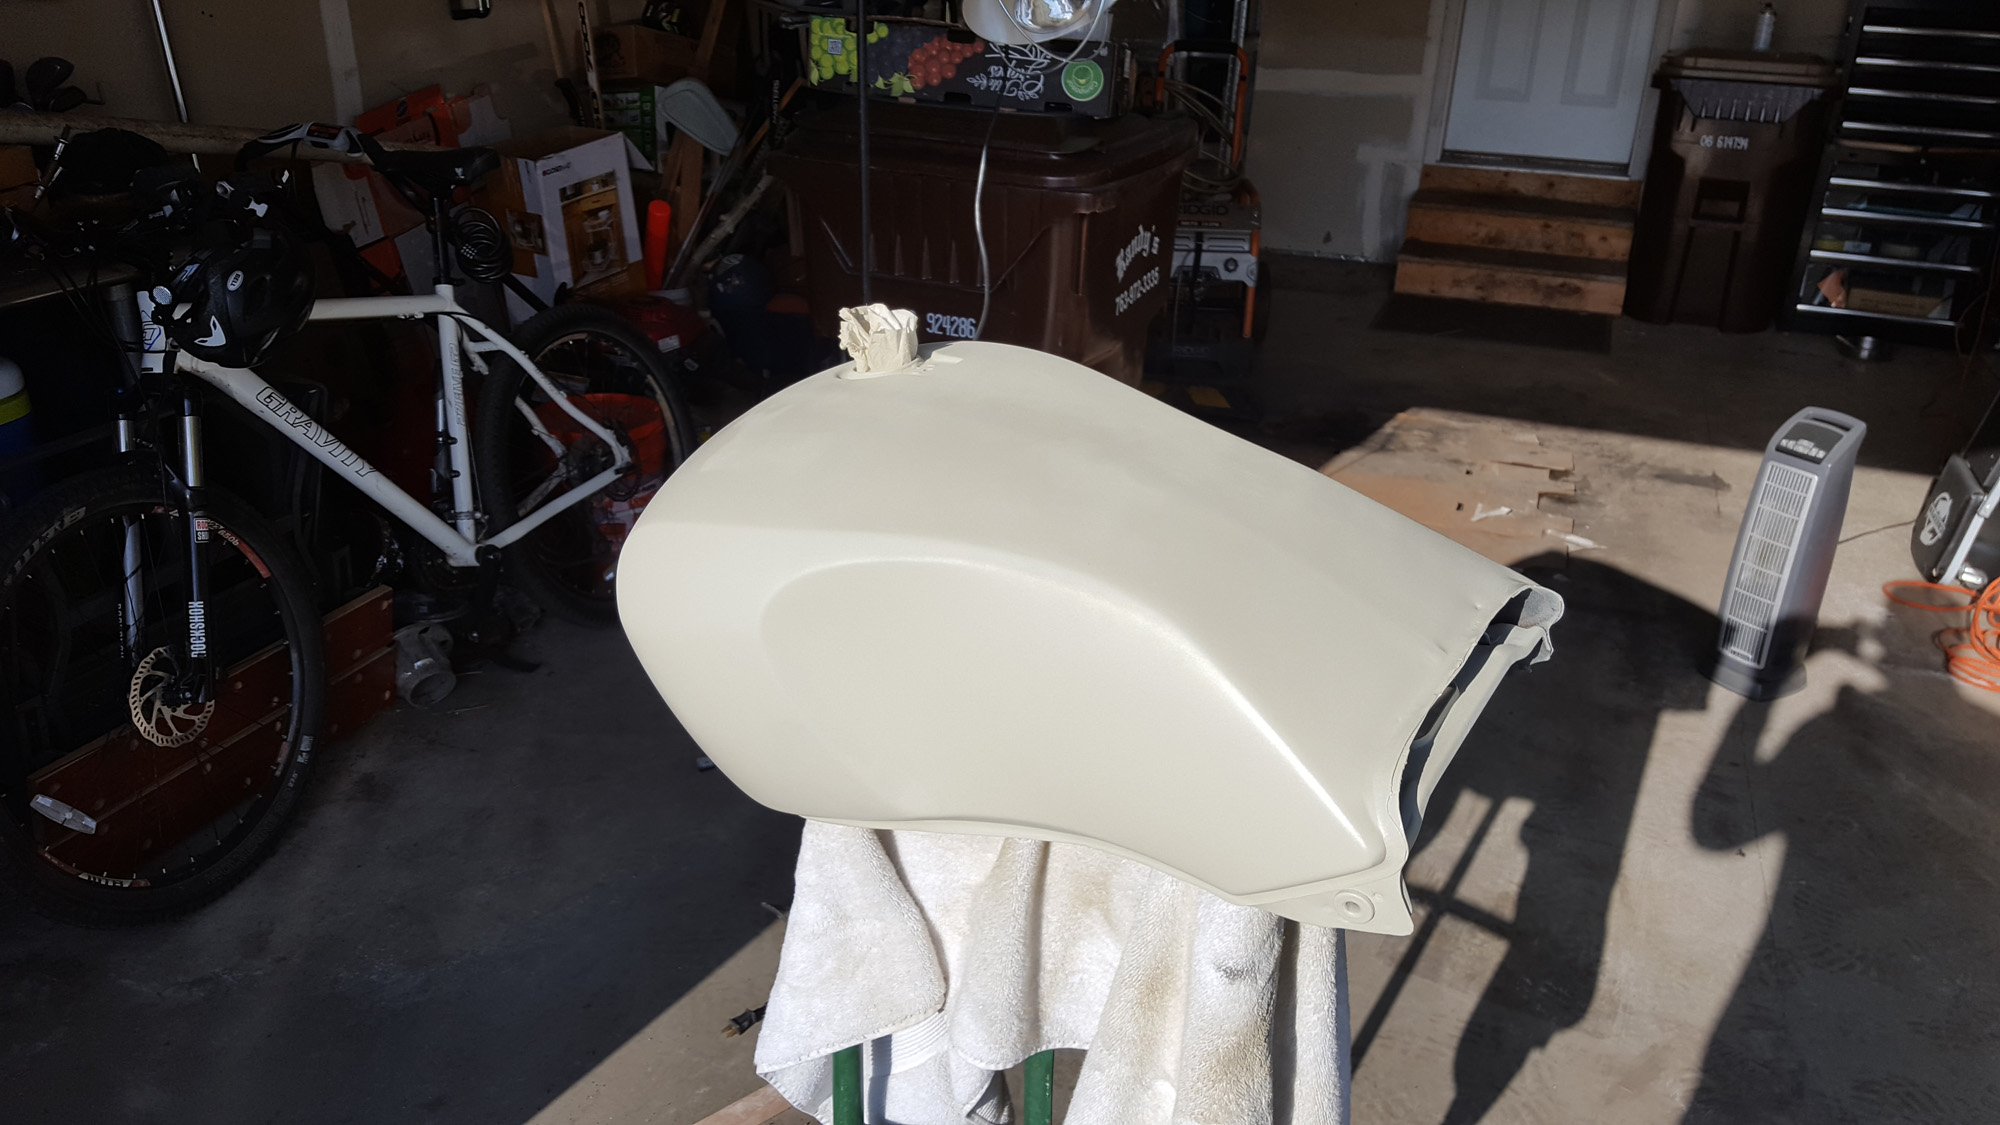
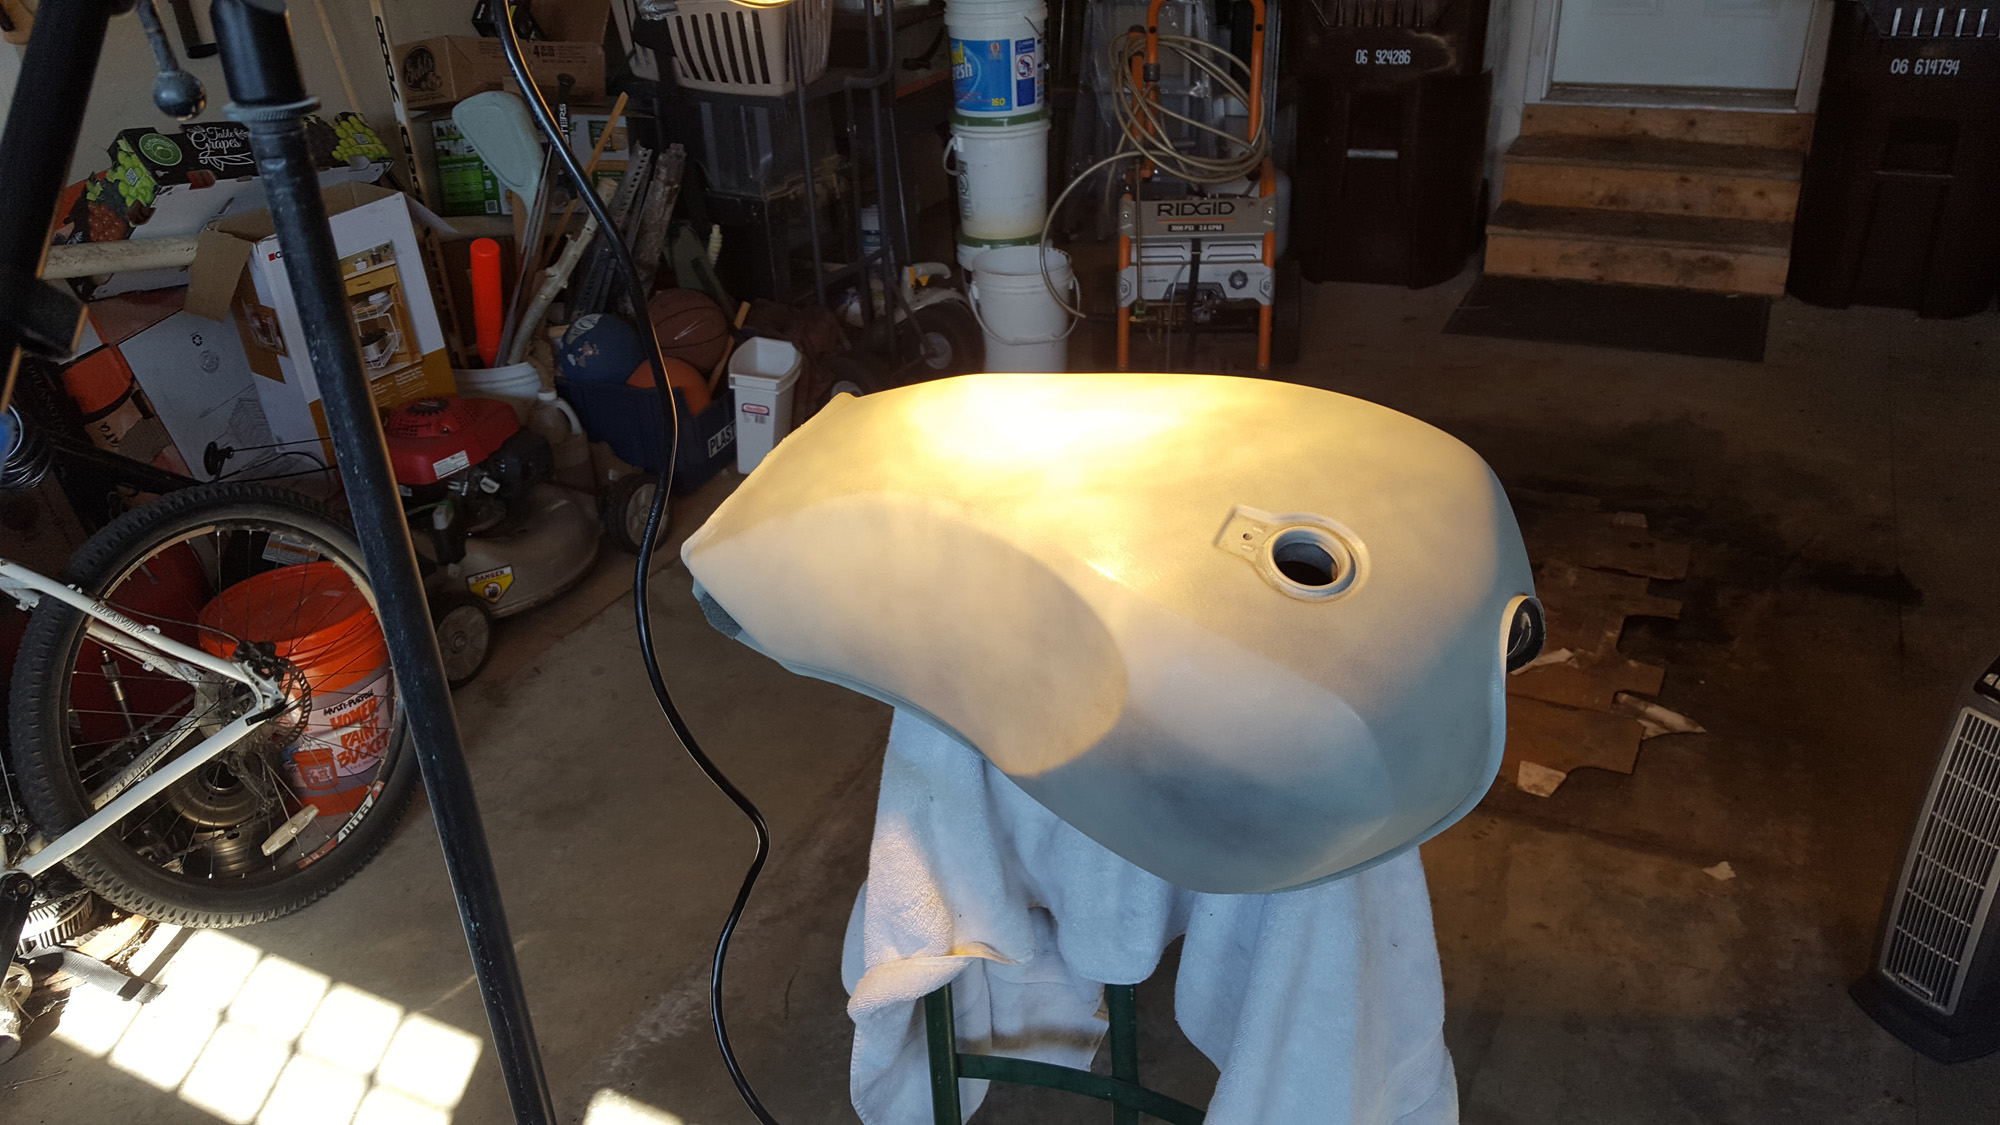

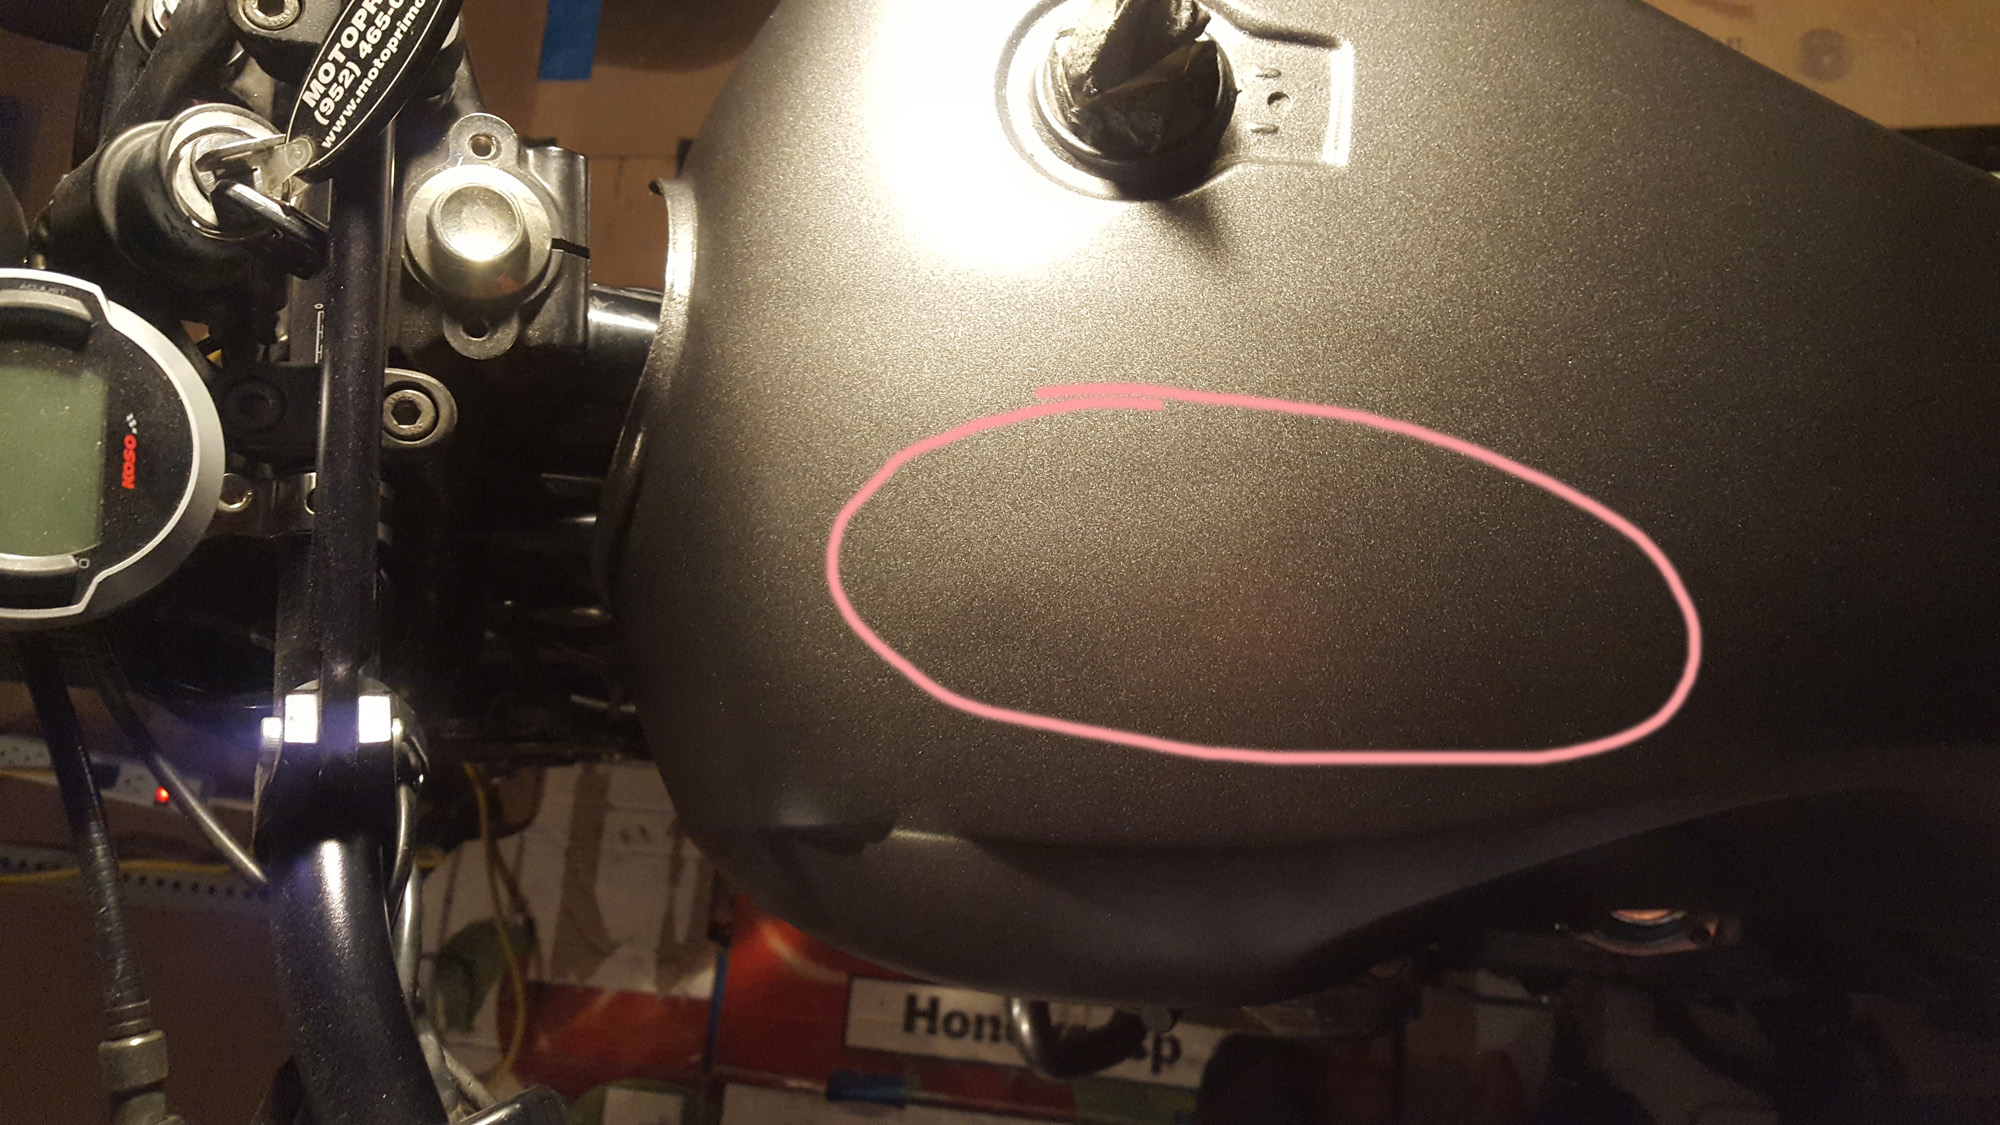
Once the body filler had been sanded to a smooth finish (or so I thought) I went ahead and sprayed 2K Primer from SprayMax. Once that was dry and sanded, I then sprayed my base of Rustolium Metallic Paint + Primer (I can’t recall the exact color as I just grabbed it off the shelf at a hardware store). This is when I noticed that where I had added the body filler there was a noticeable mound. I couldn’t have that, so I sanded it back, and then re-coated the whole tank.

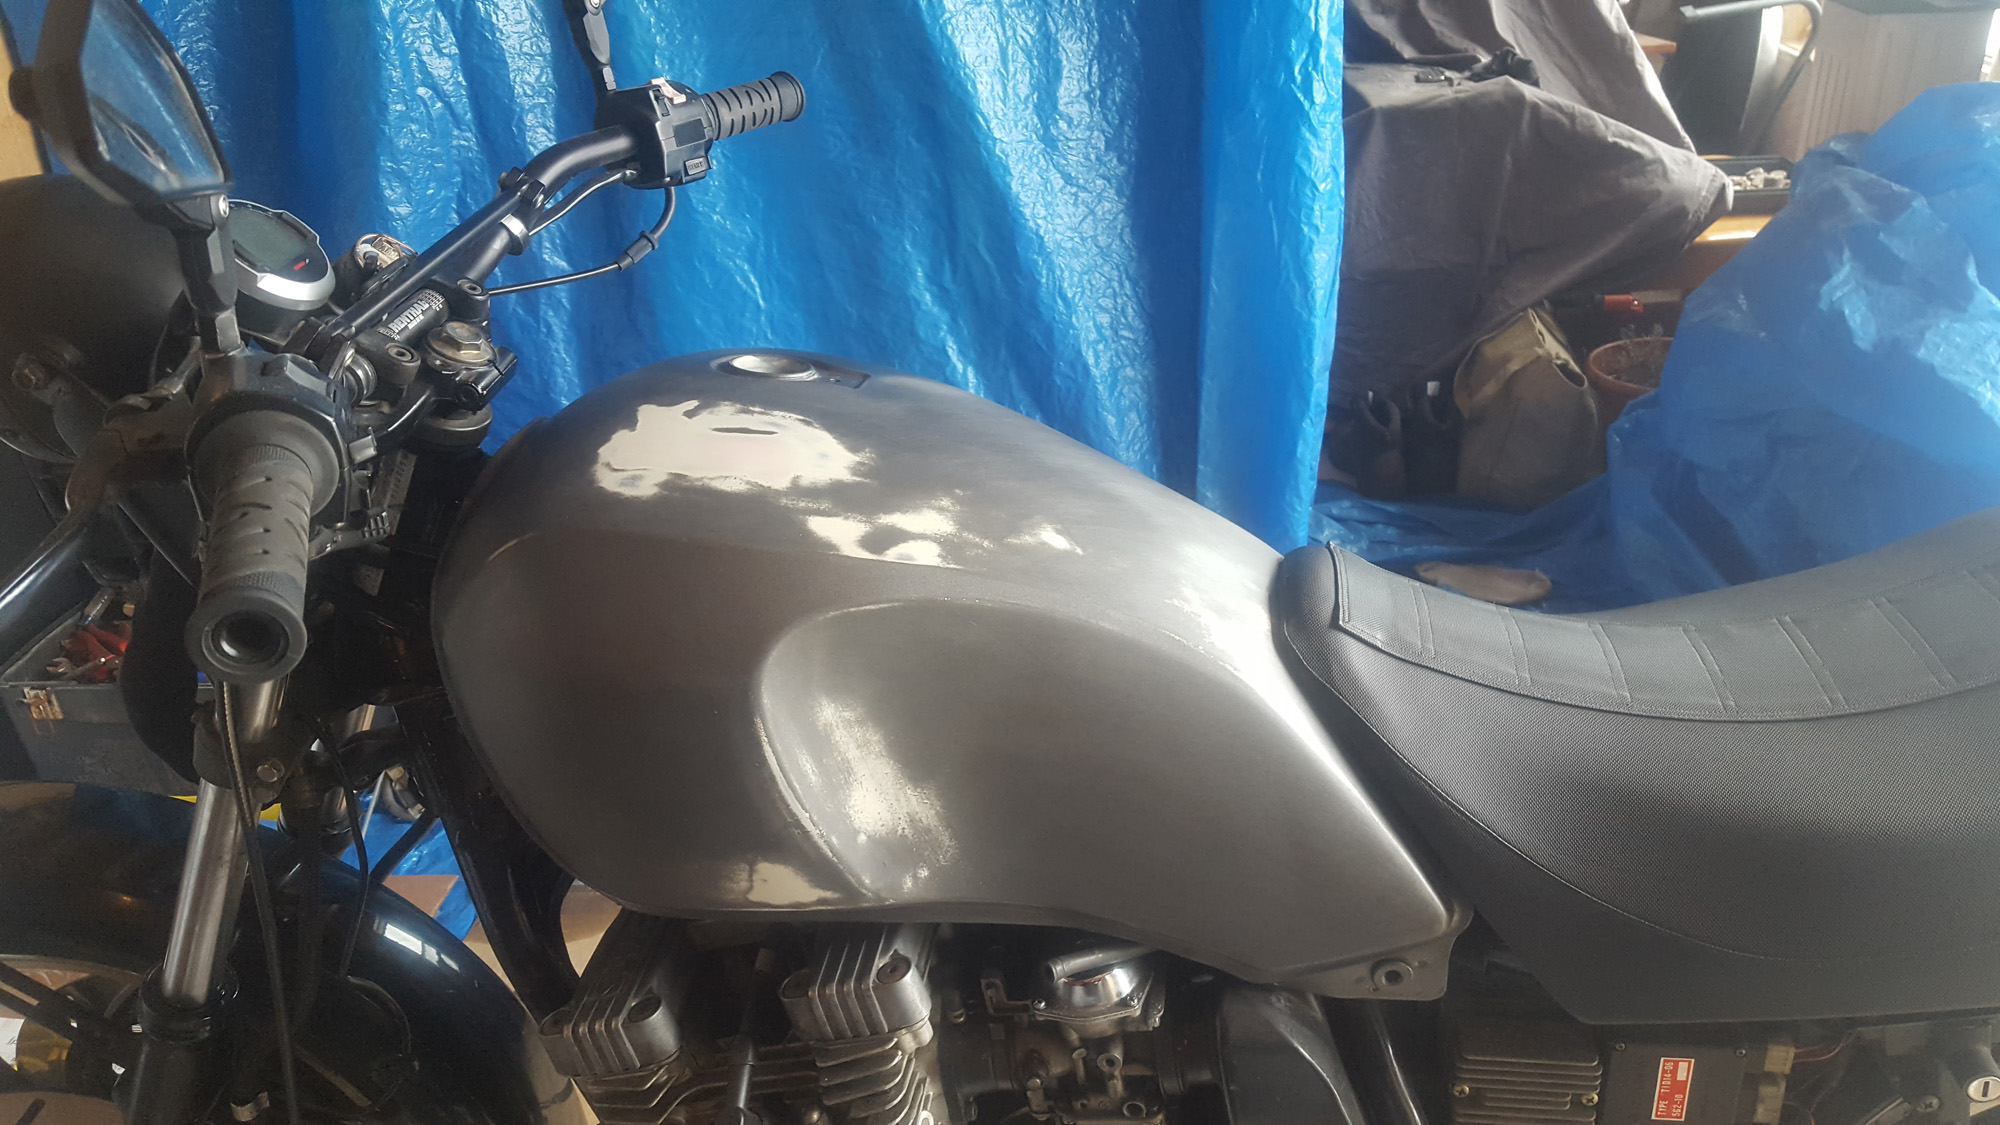
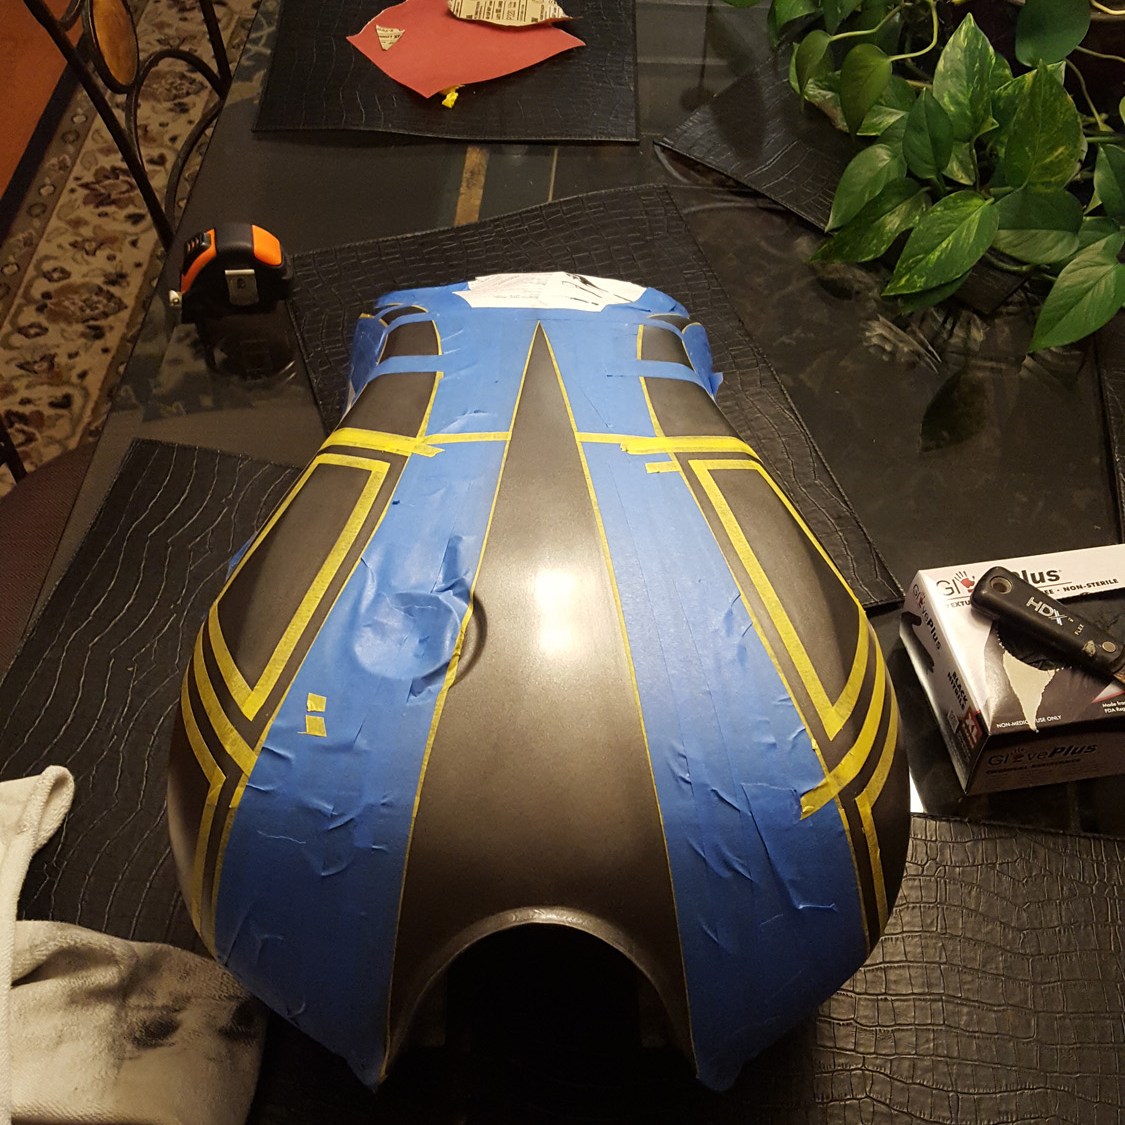
Once the base way sprayed on both the tank and the side panels, I started to lay out the black graphics. The Seca tank has pretty clear lines which made it a bit easier to transfer the design to the other side without needing too much measuring. I started by using ¼ masking tape and then filling in the other areas after I was satisfied with the design. The black spray followed that. Once the black was finished drying, I peeled the tape and sealed it all using SprayMax 2K Glamour Clear Gloss. This is essential as 2K paints have a catalyst that hardens the coat and protects it from corrosive agents such as gas.


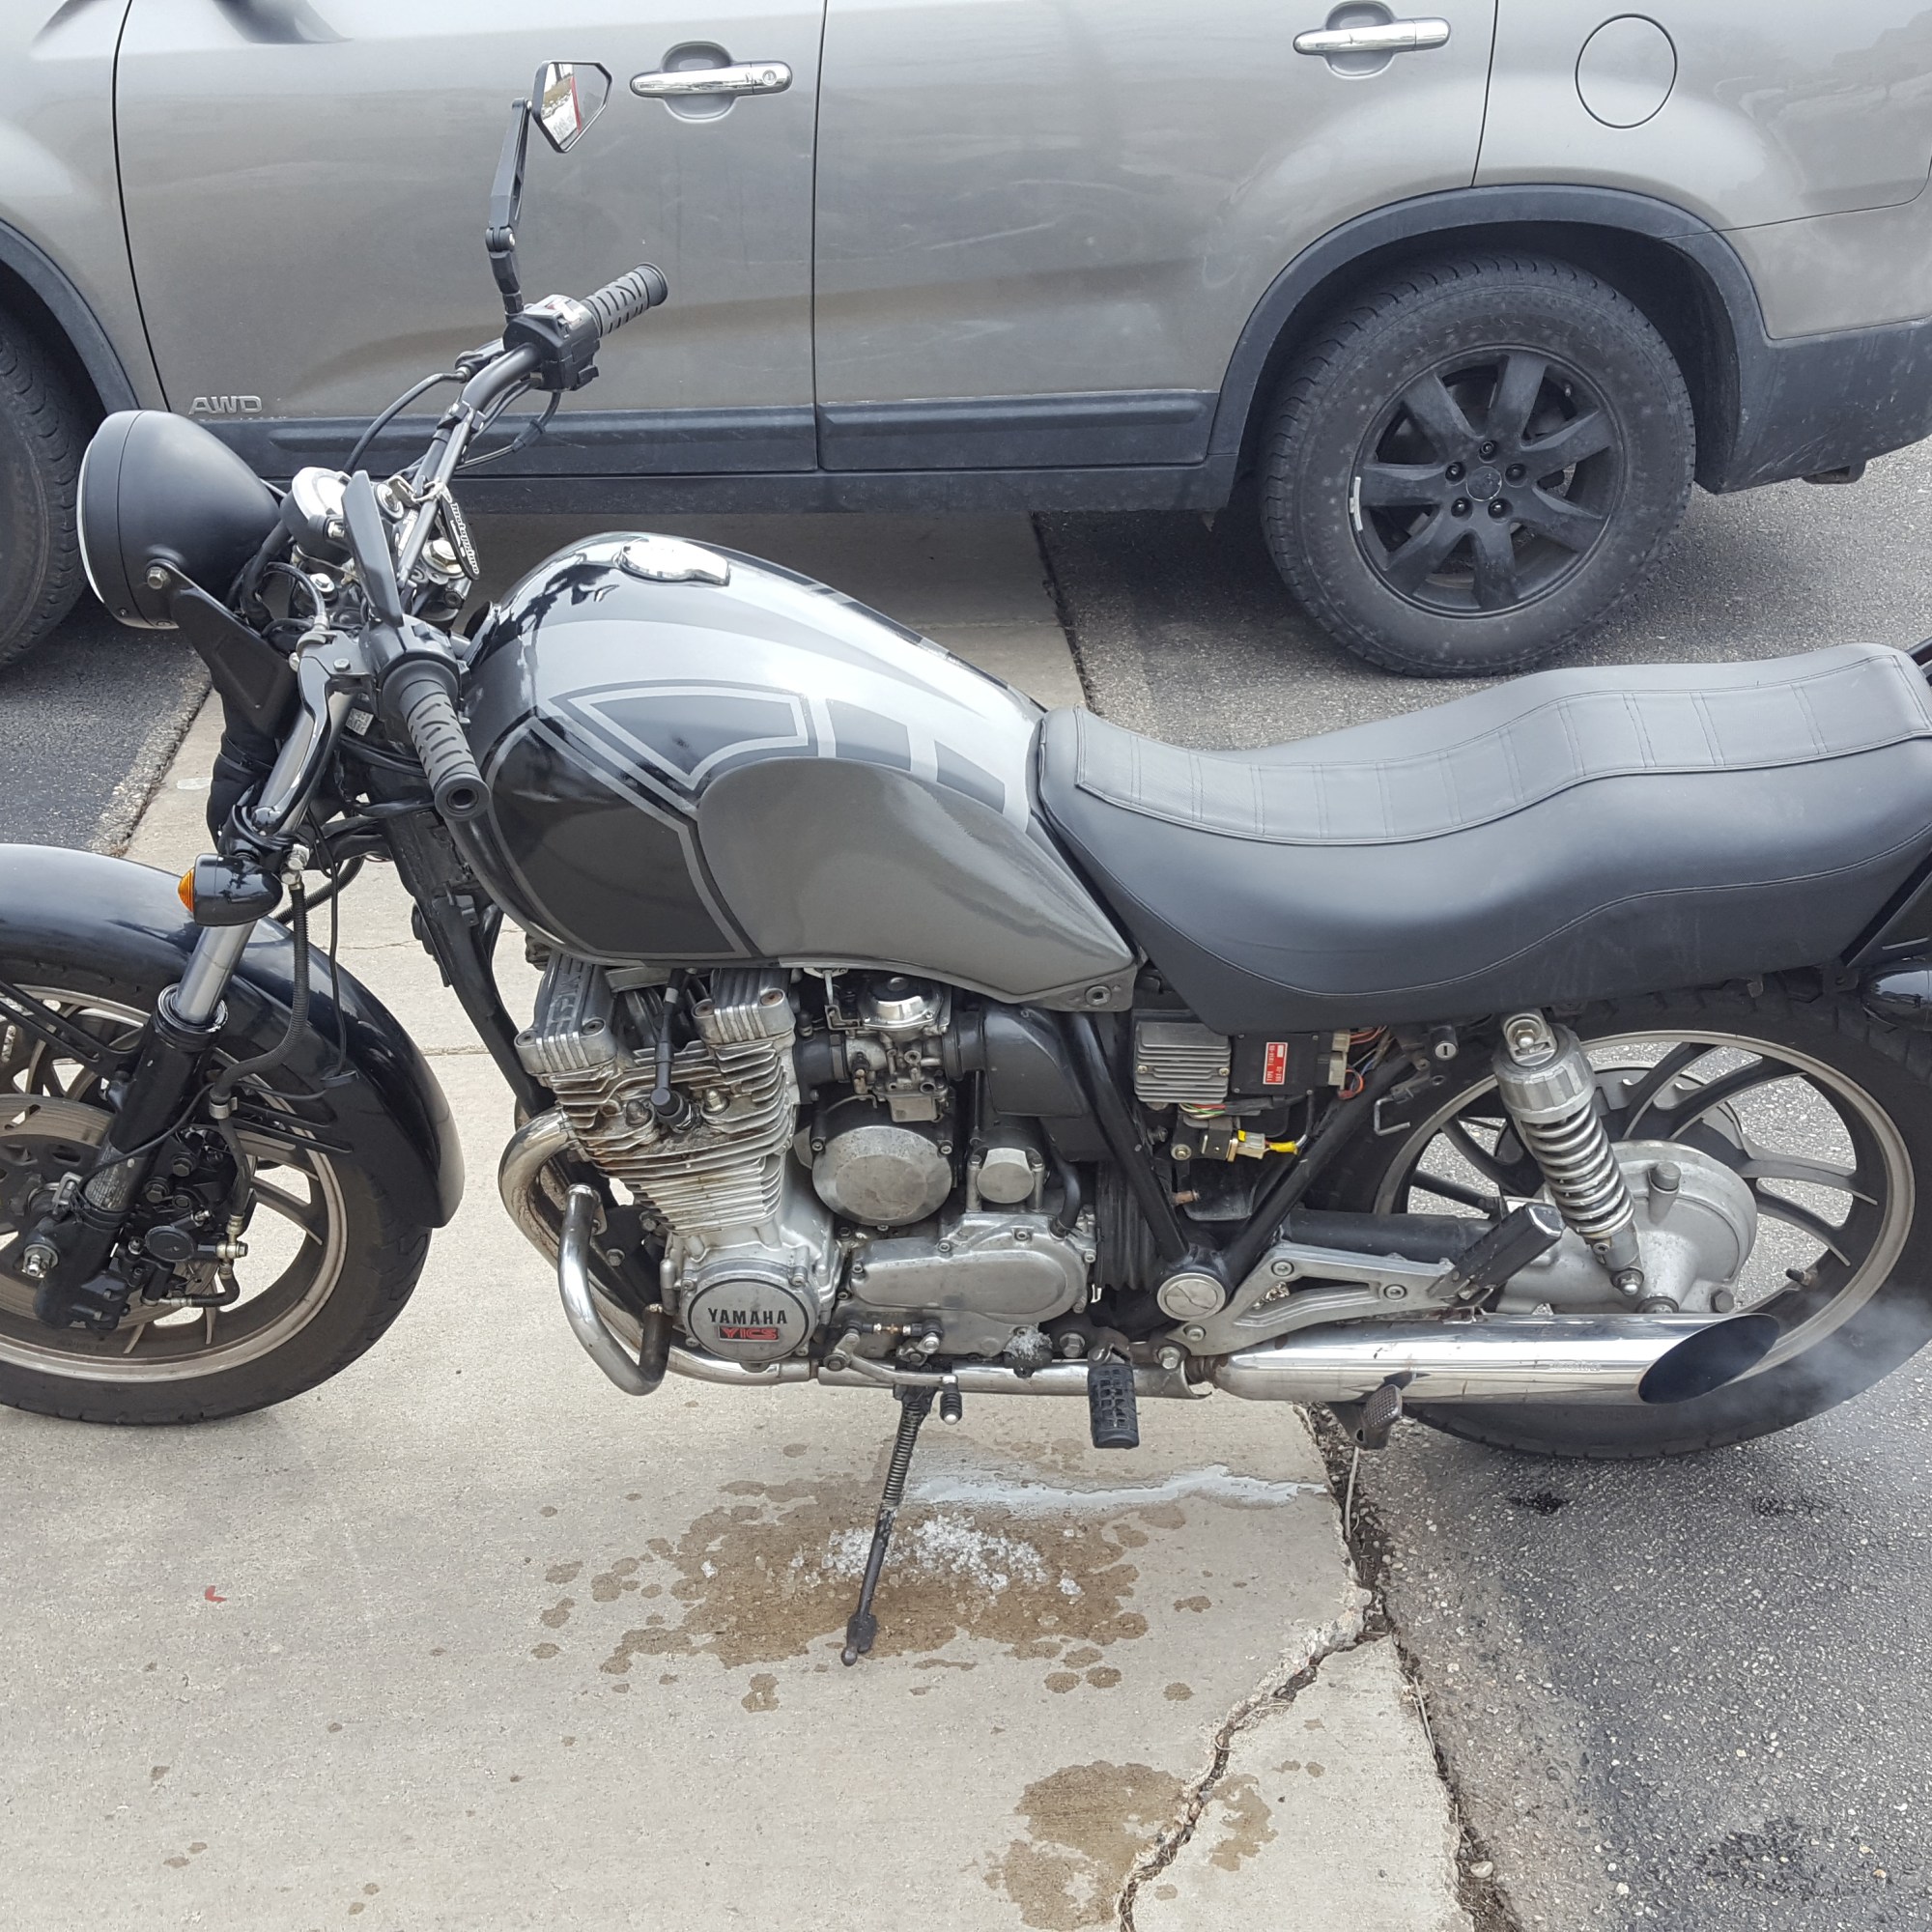
All in all, I was pretty happy with the way the project turned out. With a minimal investment of around $1500 total for bike and parts / paint, I had a decent looking bike that was unique to me. It also gave me confidence to start doing more difficult projects down the road.


Thanks for reading! If you have any projects of your own that you are working on or have complete, please let us know in the comments! Also, don’t forget to sign-up for my blog to be notified when new material drops!

The SECA is still on the road. It now lives in Grand Rapids and makes a great pair with my 83 Maxim 750. My wife loves it!
LikeLike
That’s awesome to hear! It was a fun bike. I always think about doing another one. It was the bike that started me down my bike customizing journey. Made my day hearing it’s still on the road being enjoyed! We actually head up that way in July, hopefully, for an annual bike trip we do.
LikeLiked by 1 person