If you read my first article, Old Man Winter Strat, then you know my first jump into guitar customization was a bit on a whim. It was both a journey of creation and discovery. I learned what worked and what didn’t, things I would do differently if I decided to do another one, and how much effort it actually took to complete one. For this round, I decided to give a DIY kit a try and find out the differences between a pre-made guitar and one of just parts.
A lot of the design was going to depend on what shape of guitar kit I chose so I spent a fair amount of time deciding between a ton of guitar kits. There are quite a few body and headstock shapes. Since I had done a stratocaster last time, and a Les Paul after that (not sure if there will be a build for that one), I decided to go with a telecaster this time around. This iconic body style has come to represent “country” and it seemed liked the perfect fit for the west.

To begin, this project was built for my dad who is a fan of the outdoors and whose heart has always been in Colorado, regardless of his current location. If there is one thing that has come to represent the Rockies and what it means to live out “west”, the beauty of the state is it. Snow capped mountains, wildlife, and the wildflower capital of the world made my creative decision fairly easy. But which items to choose when there are so many? The shape of the guitar would end up making some of those choices for me.
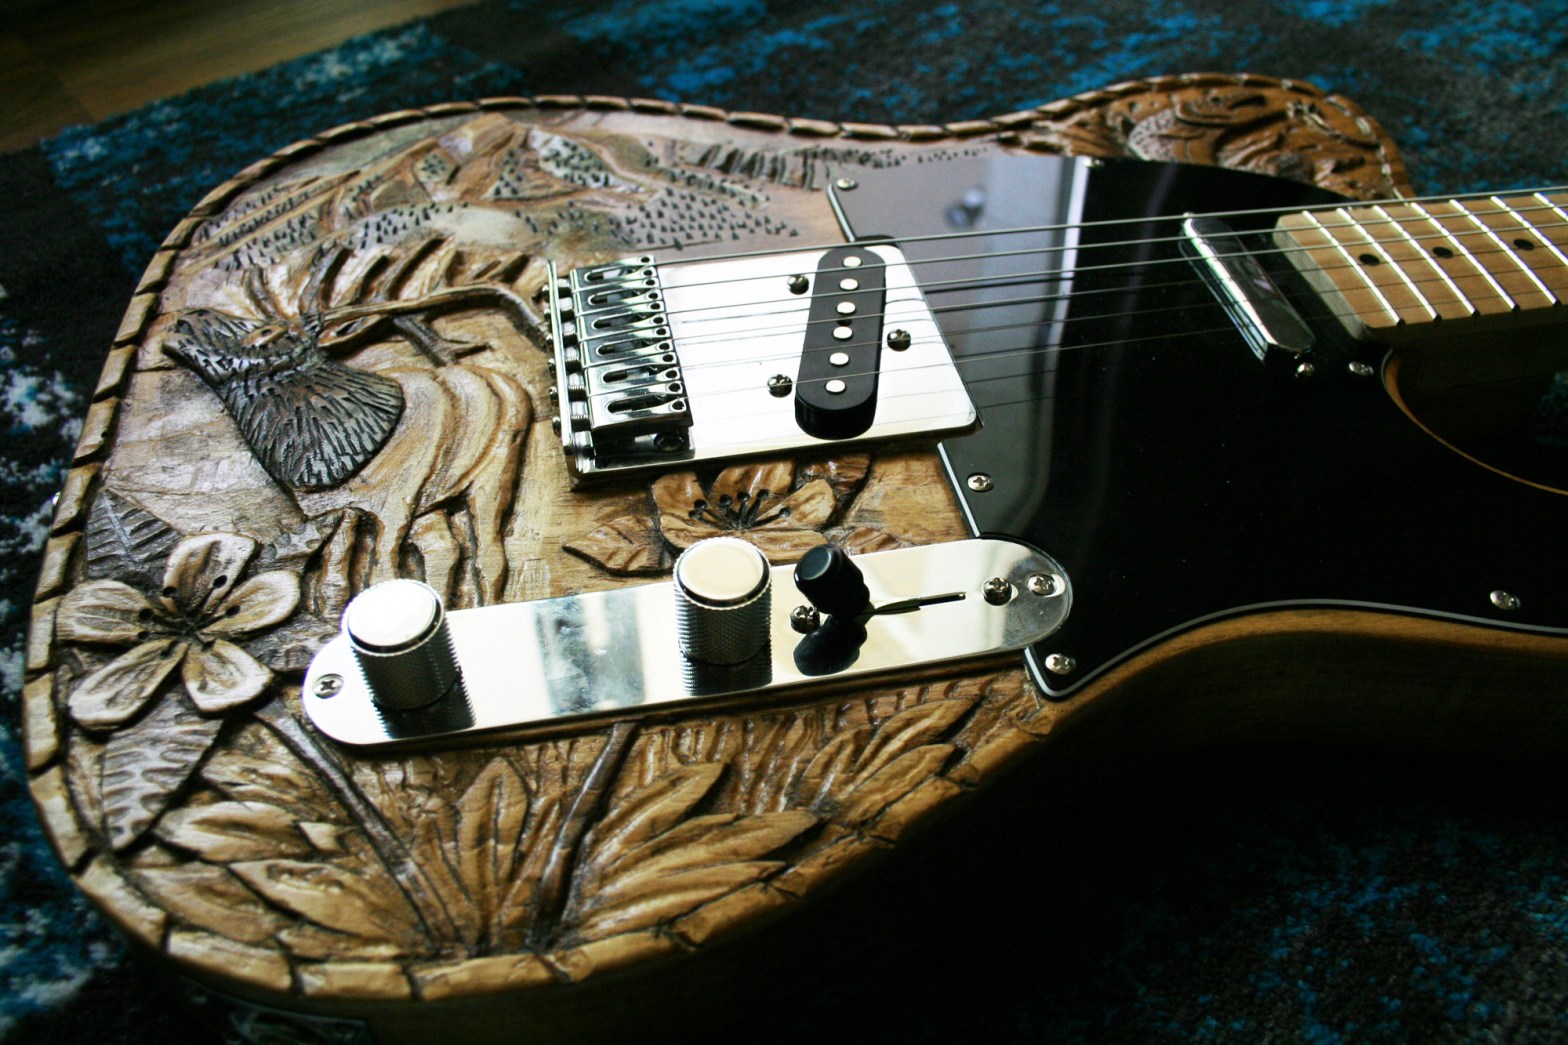
Since the pickguard takes up a fair amount of space, but does leave the bottom area more exposed than a stratocaster, I wanted the arrangement to flow together. The top is where I began by choosing Mt. Crested Butte as one of the focal points. It’s where I grew up and the area is still the most beautiful place I have ever been. It’s literally like jumping into a Hallmark card. My only concern was with creating depth and detail for such a large object while still capturing its essence. I tried to pick out some of the major features that I thought would distinguish it from other mountains in the area. It has a very unique front cliff section and defined funnels which seemed like a good place to start.

Once I had that piece of the puzzle laid out, it was time to figure out what kind of space I had left and what might work to fill those areas. An elk was chosen because of its dynamic outline. The body and head positioning combined with the antlers made for a great fill between the bridge and the edge of the body of the guitar. To make sure it didn’t seem randomly placed in there, it was posed in a way to make it look like the mountain was deep in the background with flowing hills in between. I decided at this point to also carve the headstock to appear as part of an elk antler as well to tie the whole thing together.
The bottom section is where I probably struggled the most to come up with something that was going to complement the rest of the guitar while also flowing with the bottom body line, control panel, and pickguard. I tried different flourishes and other wildlife, but in the end, a columbine flower ended up being the perfect choice. Being the official flower of Colorado as well as one of the most beautiful wildflowers you will find really captured what this piece was all about. It ended up being one of my favorite parts about the project.
The last section that needed filling out was the upper right above the pickguard and it was decided to use a jumping brown trout with a fly in its mouth. Fly fishing has always been something every trip out west must include. Captured so poetically in “A River Runs Through It”, it also happened to be a pastime that my father enjoyed. There is nothing quite like wandering the bends in the river seeking out those little honey holes and hooking into one of these beautiful fish.
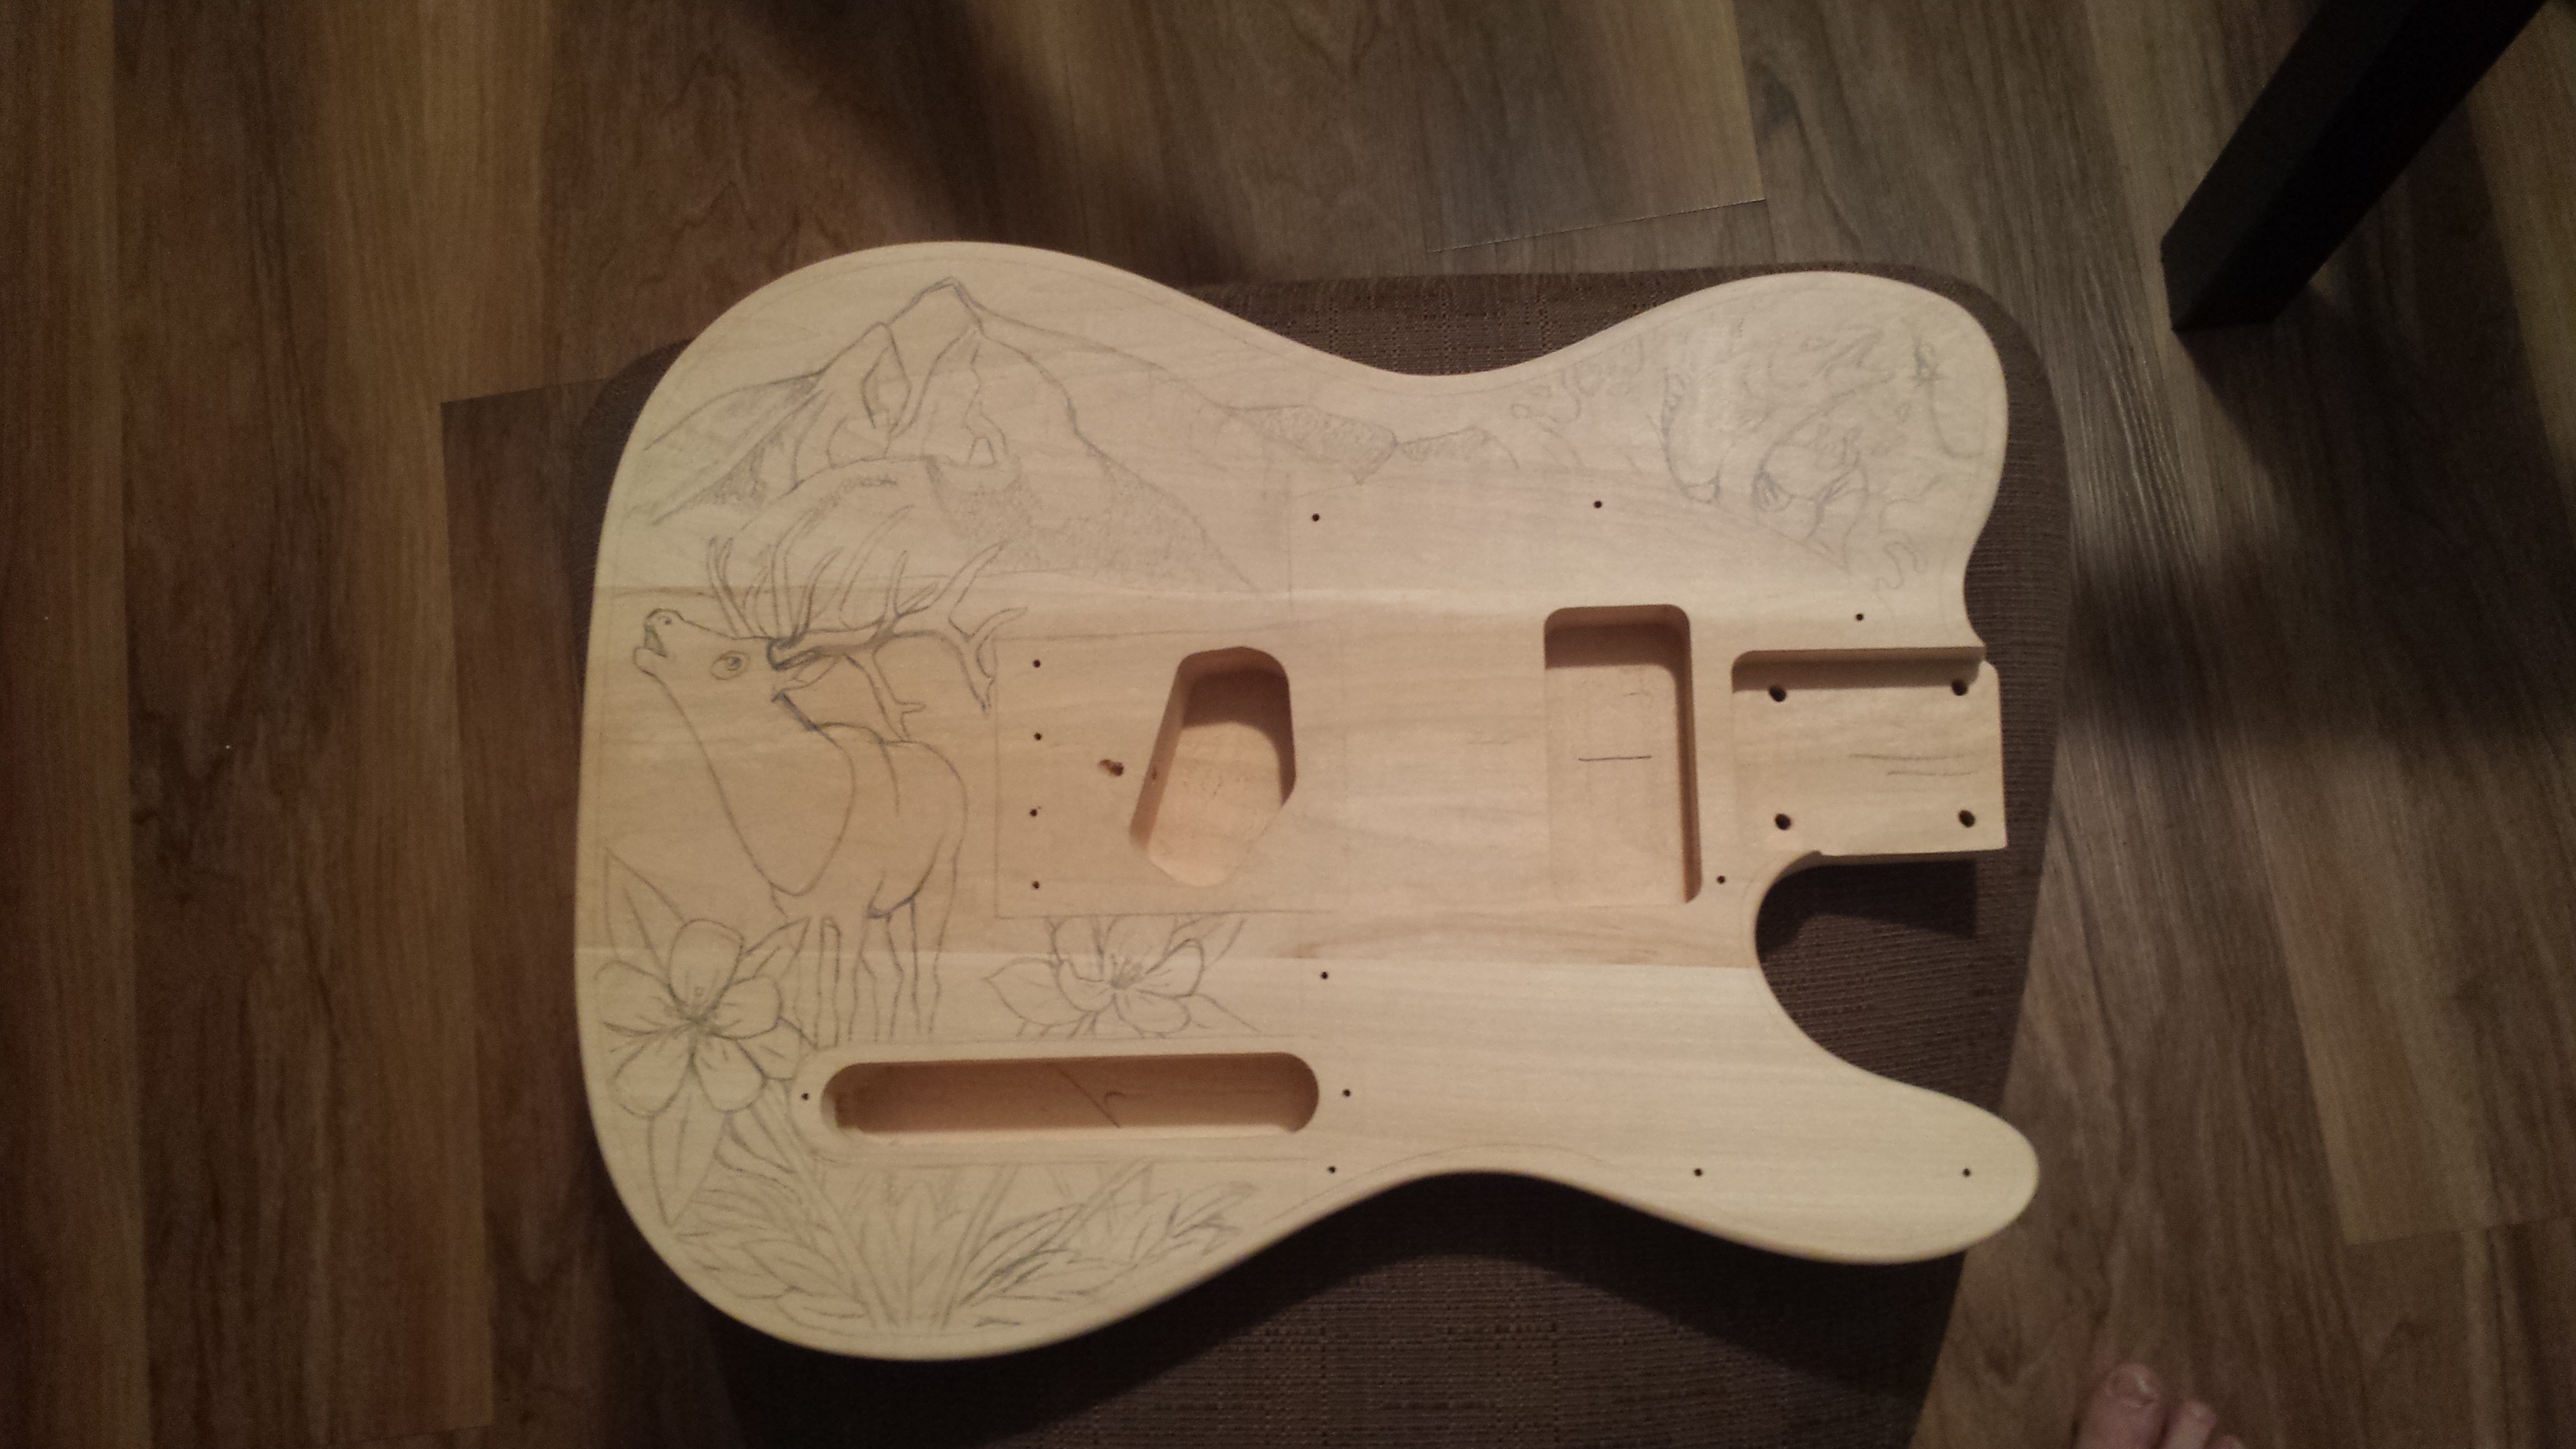
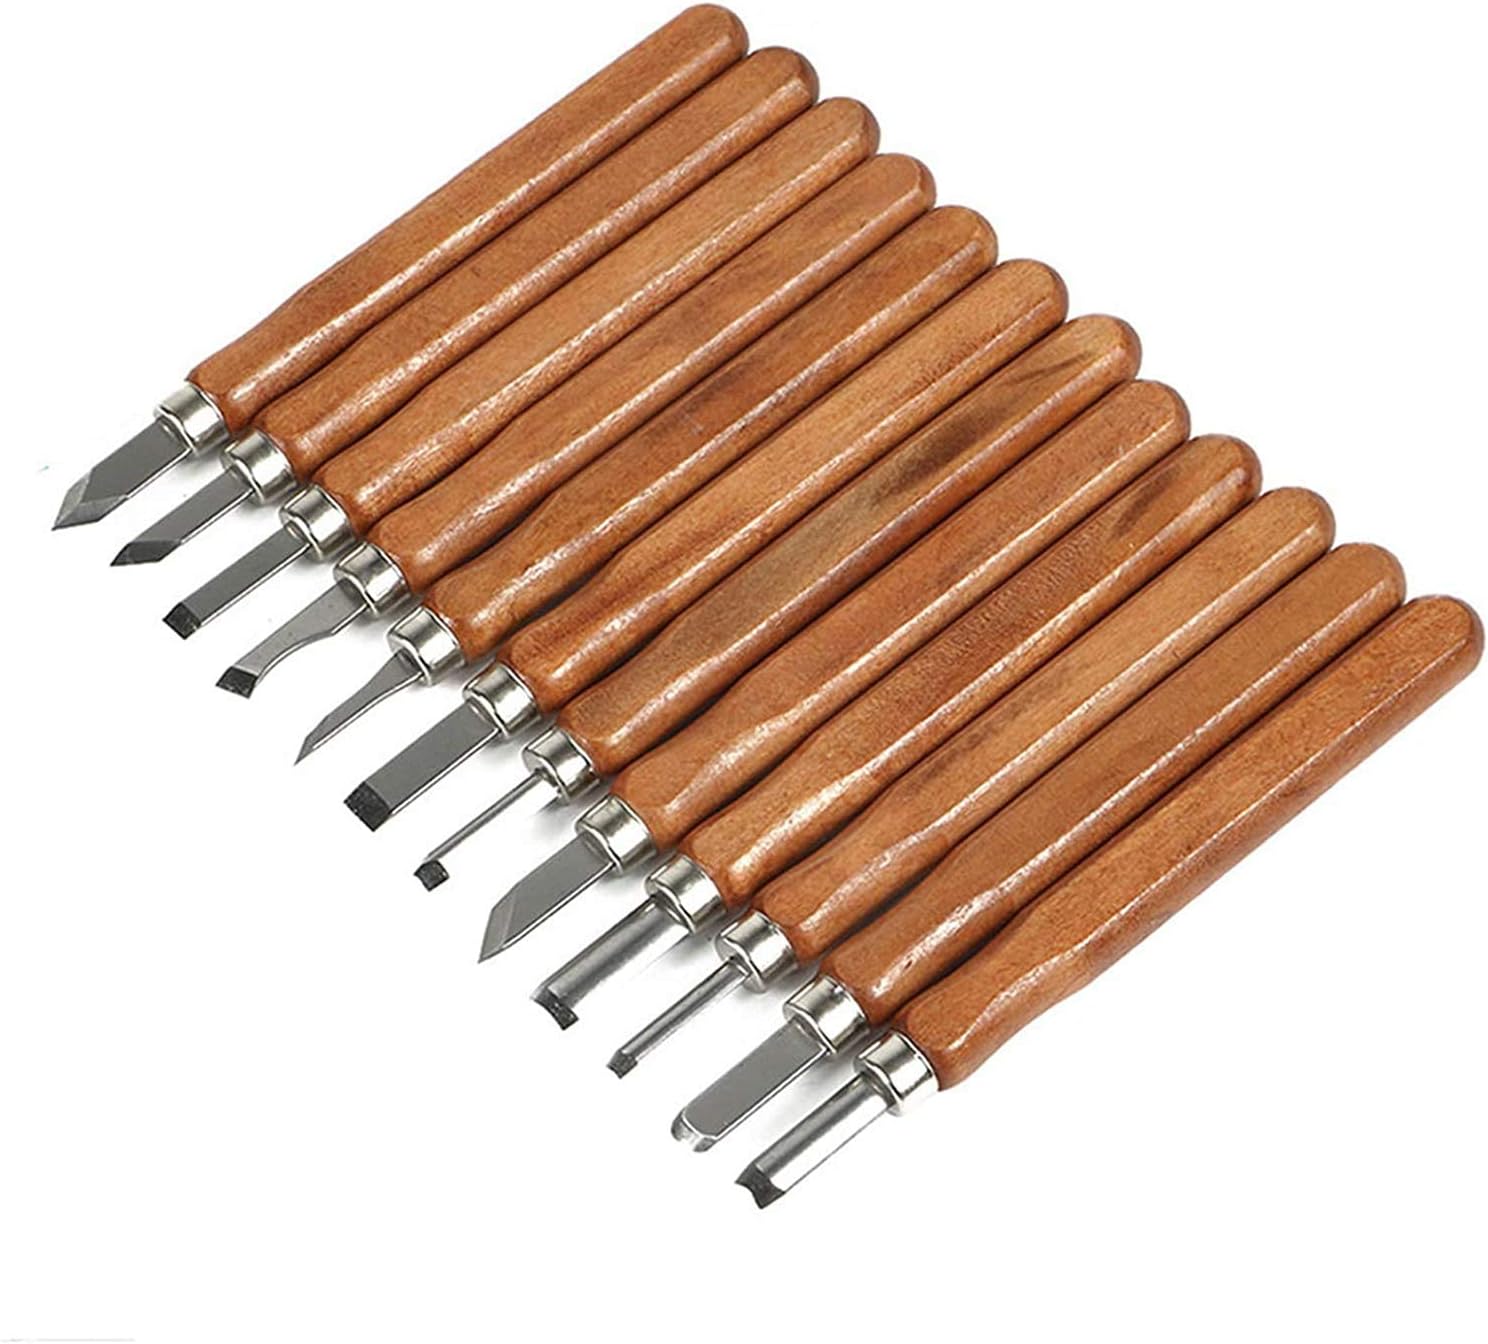
Now that the design was all laid out, it was time to start carving! I like to block out my areas first before going into the final details. I was still using my cheap chisel and gouge set that I had purchased off Amazon, but I also had some larger wood chisels from random projects before. Since some of the areas needed more material removed than others, I started with the largest chisel and worked my way down in size. I found that a sharp flat 1/2” chisel worked the best for setting depth while tapping one of my smaller chisel straight down along edges helped define borders and prevent unwanted chipping later on.

Blocking started.
1/2″ flat wood chisel and smaller angled wood knife.
Most of the work was done with flat edged chisels because I found they were the easiest to move material while also not causing collateral damage. But when it came to working into the mountains and flowers, a v-shaped chisel worked wonders. I didn’t really use some of the more common rounded gouges that you will see in a lot of these sets. While they are great for certain things, I found that the shallow depths I was dealing with to create the relief cuts did not lend itself well to such a tool. They didn’t glide through the material like I had hoped. I used mostly a cheap wood carving kit I got off Amazon HERE.
As the detail started to become more defined, I had to be really careful not to break off thinner pieces of wood, especially in the antlers. One slip of the hand could cause an entire tine to be removed and no one wants an elk with only a few points! I also decided to do some of the stems and filaments of the flowers as relief cuts rather than trying to leave a thin line of material. The same went for the trees on the mountain and dots on the trout. This guitar was meant to be played, so it had to be able to stand up to some abuse.
Once the carve was complete, I sanded the areas down I wanted smooth but I left many tool marks in so that you could tell it was hand-made and not some CNC knockoff. Since this guitar was meant to look rustic and worn, no body filler was used this time around. I used a combination of dark walnut and natural stains to give depth and detail to the design. Elk have a very prominent mane that is quite dark compared to the rest of their body. It created great contrast. The stain was painted on as if painting a watercolor and then rubbed deeply into other areas. I also let some of the dark stain pool in the deeper detail and sit for a little bit so that it really soaked into the grain.
Highlights were created by going back in and sanding some of the higher ridges to make them pop. Once I was satisfied with the dark areas, the natural stain was applied over the rest of the guitar. A lacquer coat was added to protect the finish and give it its final warn look.


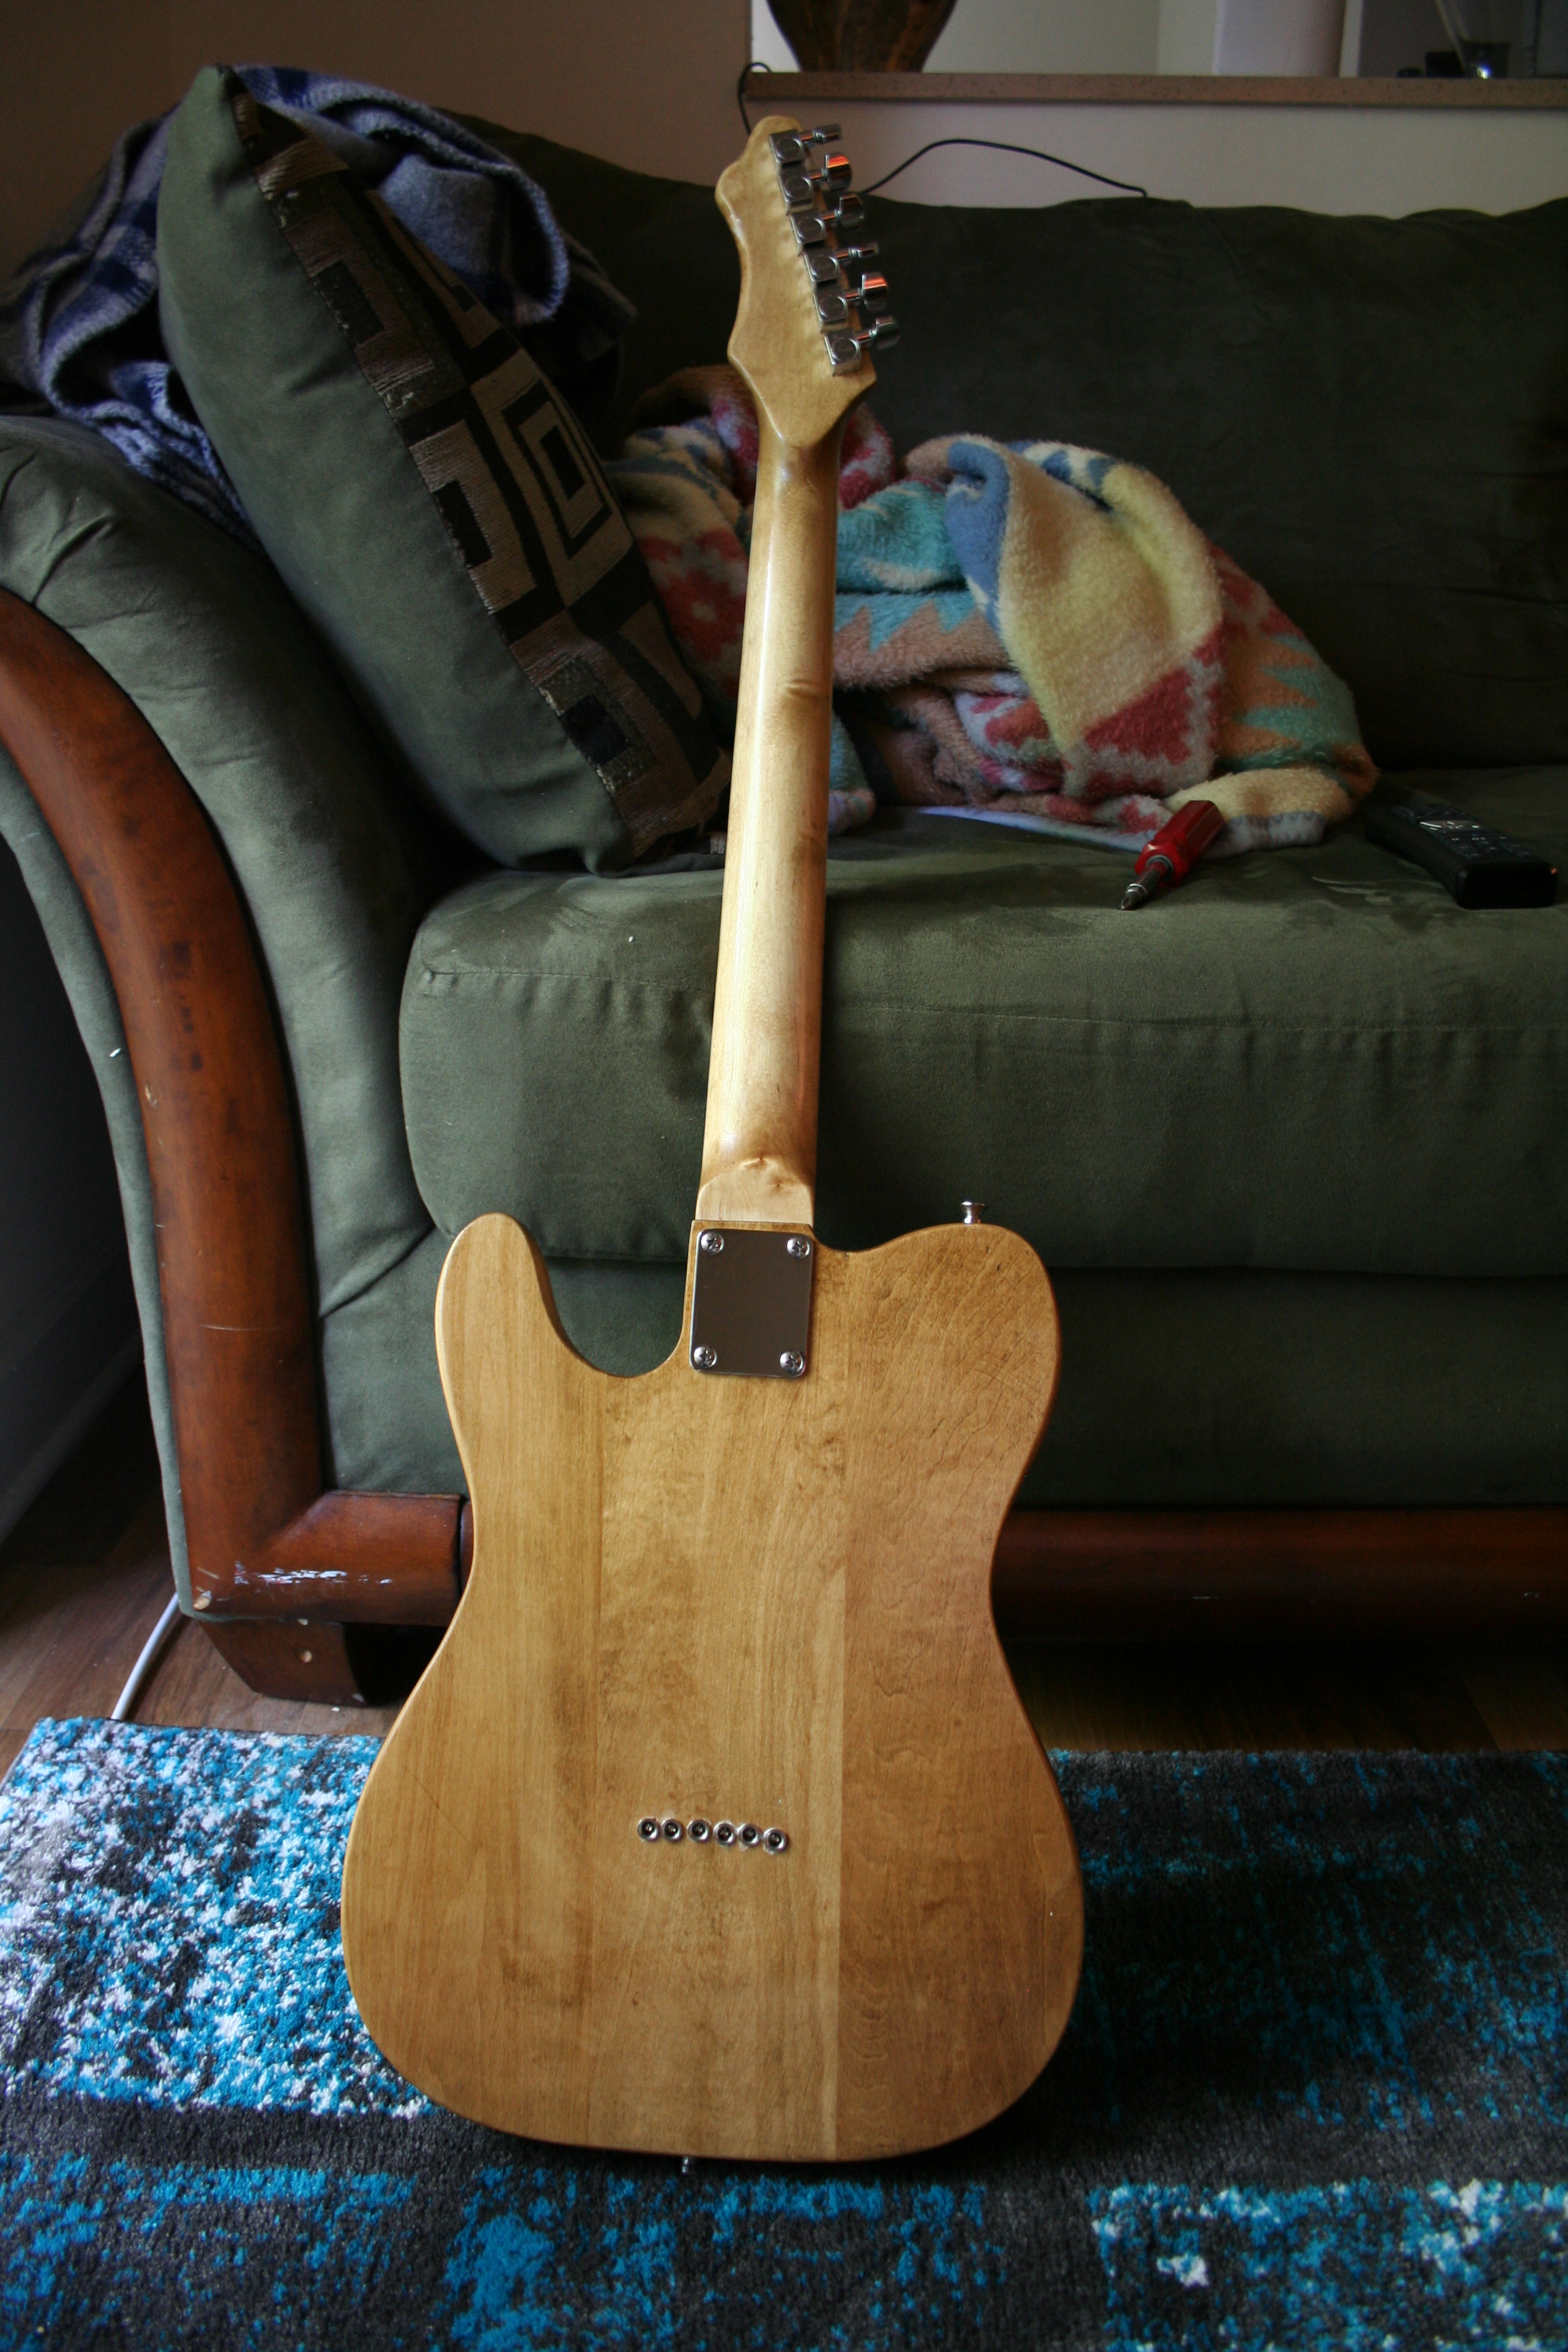
Now that the creative parts were finished, it was time to dive into the mechanical pieces of the guitar. The electronics that come with these kits are easily to worst part. They sound like crap and are overall junk. I decided to go with a loaded pickguard (just like on the Old Man Winter Strat) but with a more classic telecaster sound. Unfortunately it doesn’t look like they make this particular loaded pickguard anymore. The setup I had purchased also came with a new bridge which was a plus. I prefer the individual saddles over the old school 3 saddle setup of some telecasters. Mounting the through-body bridge was the most difficult part of this install since I didn’t have a drill press. Getting the holes perfectly straight didn’t quite work out, but it looked alright none-the-less.

Fender Ping Standard Electric Guitar Tuning Pegs were added for better quality.
The neck on this guitar is where the most post-carve time was spent. While it didn’t buzz bad, the action had to be quite high in order to play cleanly. I ended up spending a fair amount of time leveling and polishing the frets as well as some truss rod adjustments to get it to where I felt like it was a decent setup. I did this by buying a piece of aluminum L-bar and taping 1000 grit sand paper to it. Since this was a maple fretboard, using a sharpie to find low spots was out of the question as it would stain the surface. It ended up being a bunch of trial and error. I then rounded off the edges of the frets so the neck was as smooth as butter.


So there you have it! Another guitar build in the books. Would I choose to use a kit again? I am still undecided. It seems easier to just buy a used brand name guitar that might have some cosmetic damaged decreasing it’s value but still making it a great base. On the flip side, there are many sites out there that let you pick out your individual pieces that are of a higher quality, but I still think you would end up paying more in the long run.
Have experience with your own guitar build? Want to share your progress or have questions? Please drop me a comment below and subscribe if you liked the content! Thanks!

Looks awesome bro! Been wanting to mod a cheap strat one day!
LikeLiked by 1 person
They are fun! Just gotta take the leap.
LikeLike