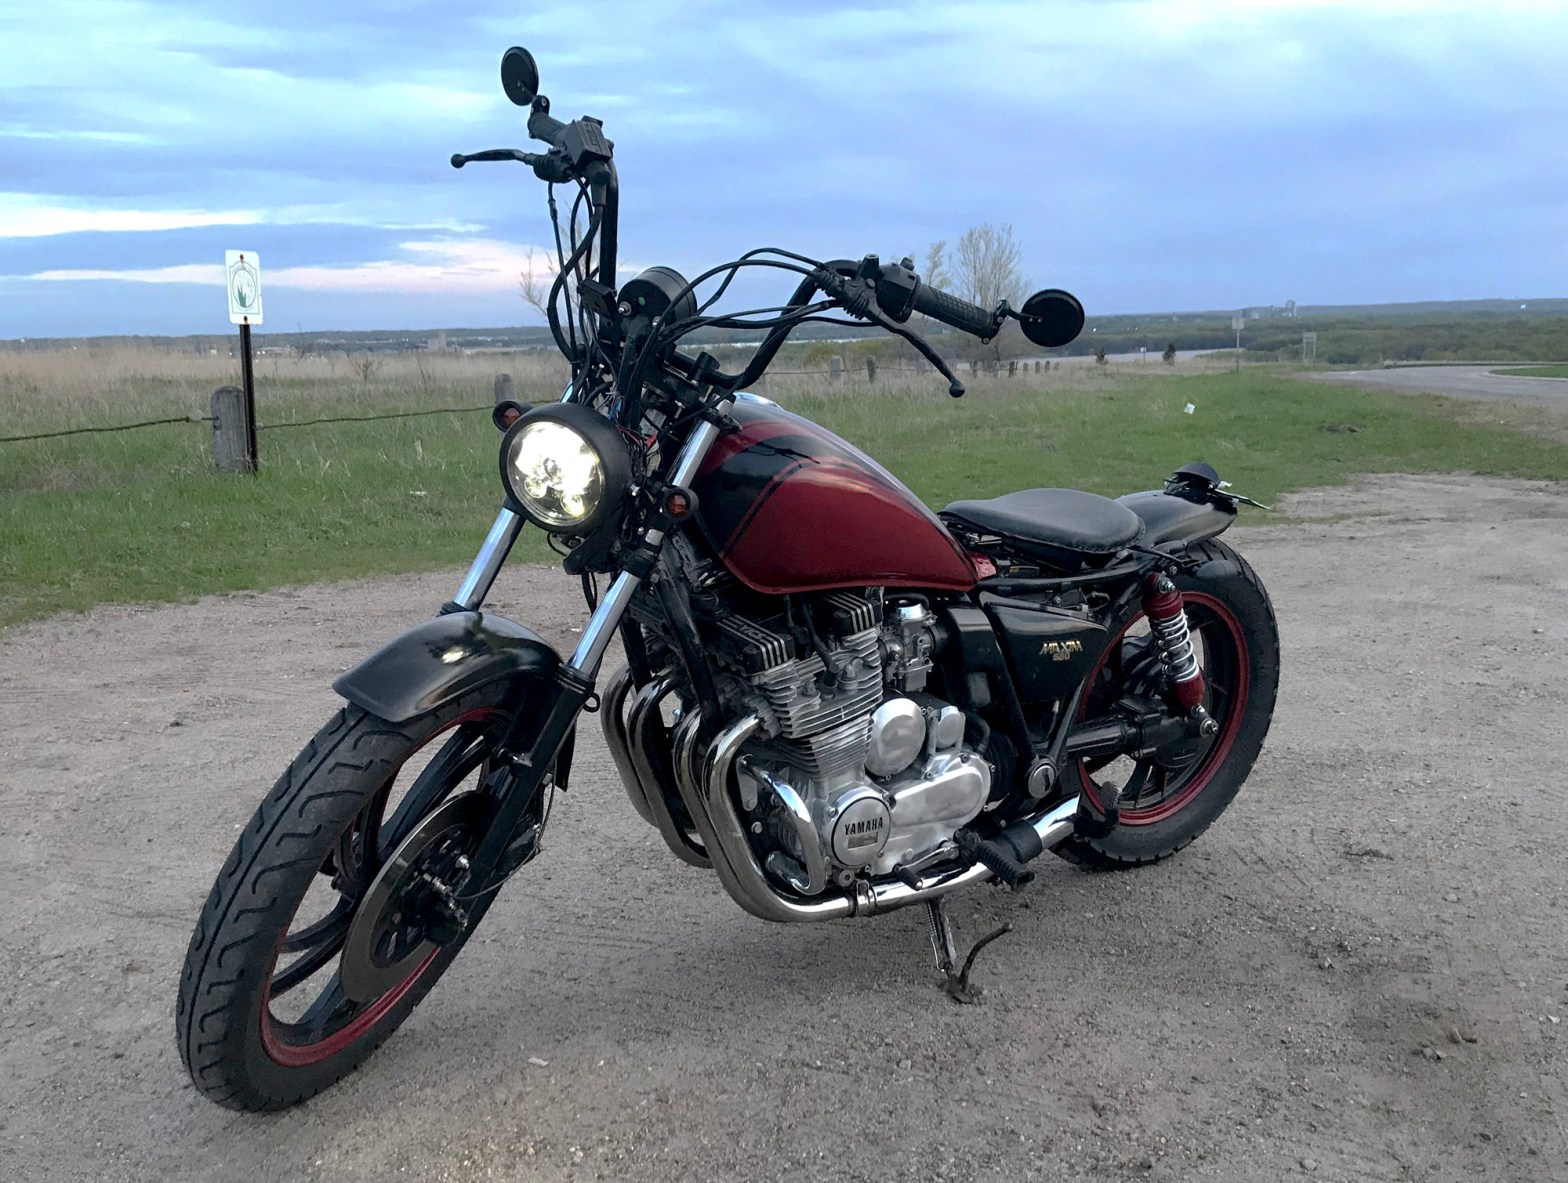
Can you really create a cool looking bike with just some rattle-can spray paint and some elbow grease? After getting most of the electronics installed in the last blog, I could finally focus on the part of bike building I enjoy the most, the graphics! The choice of lights is certainly a nice cosmetic accent, but paint is where most eyes land first.
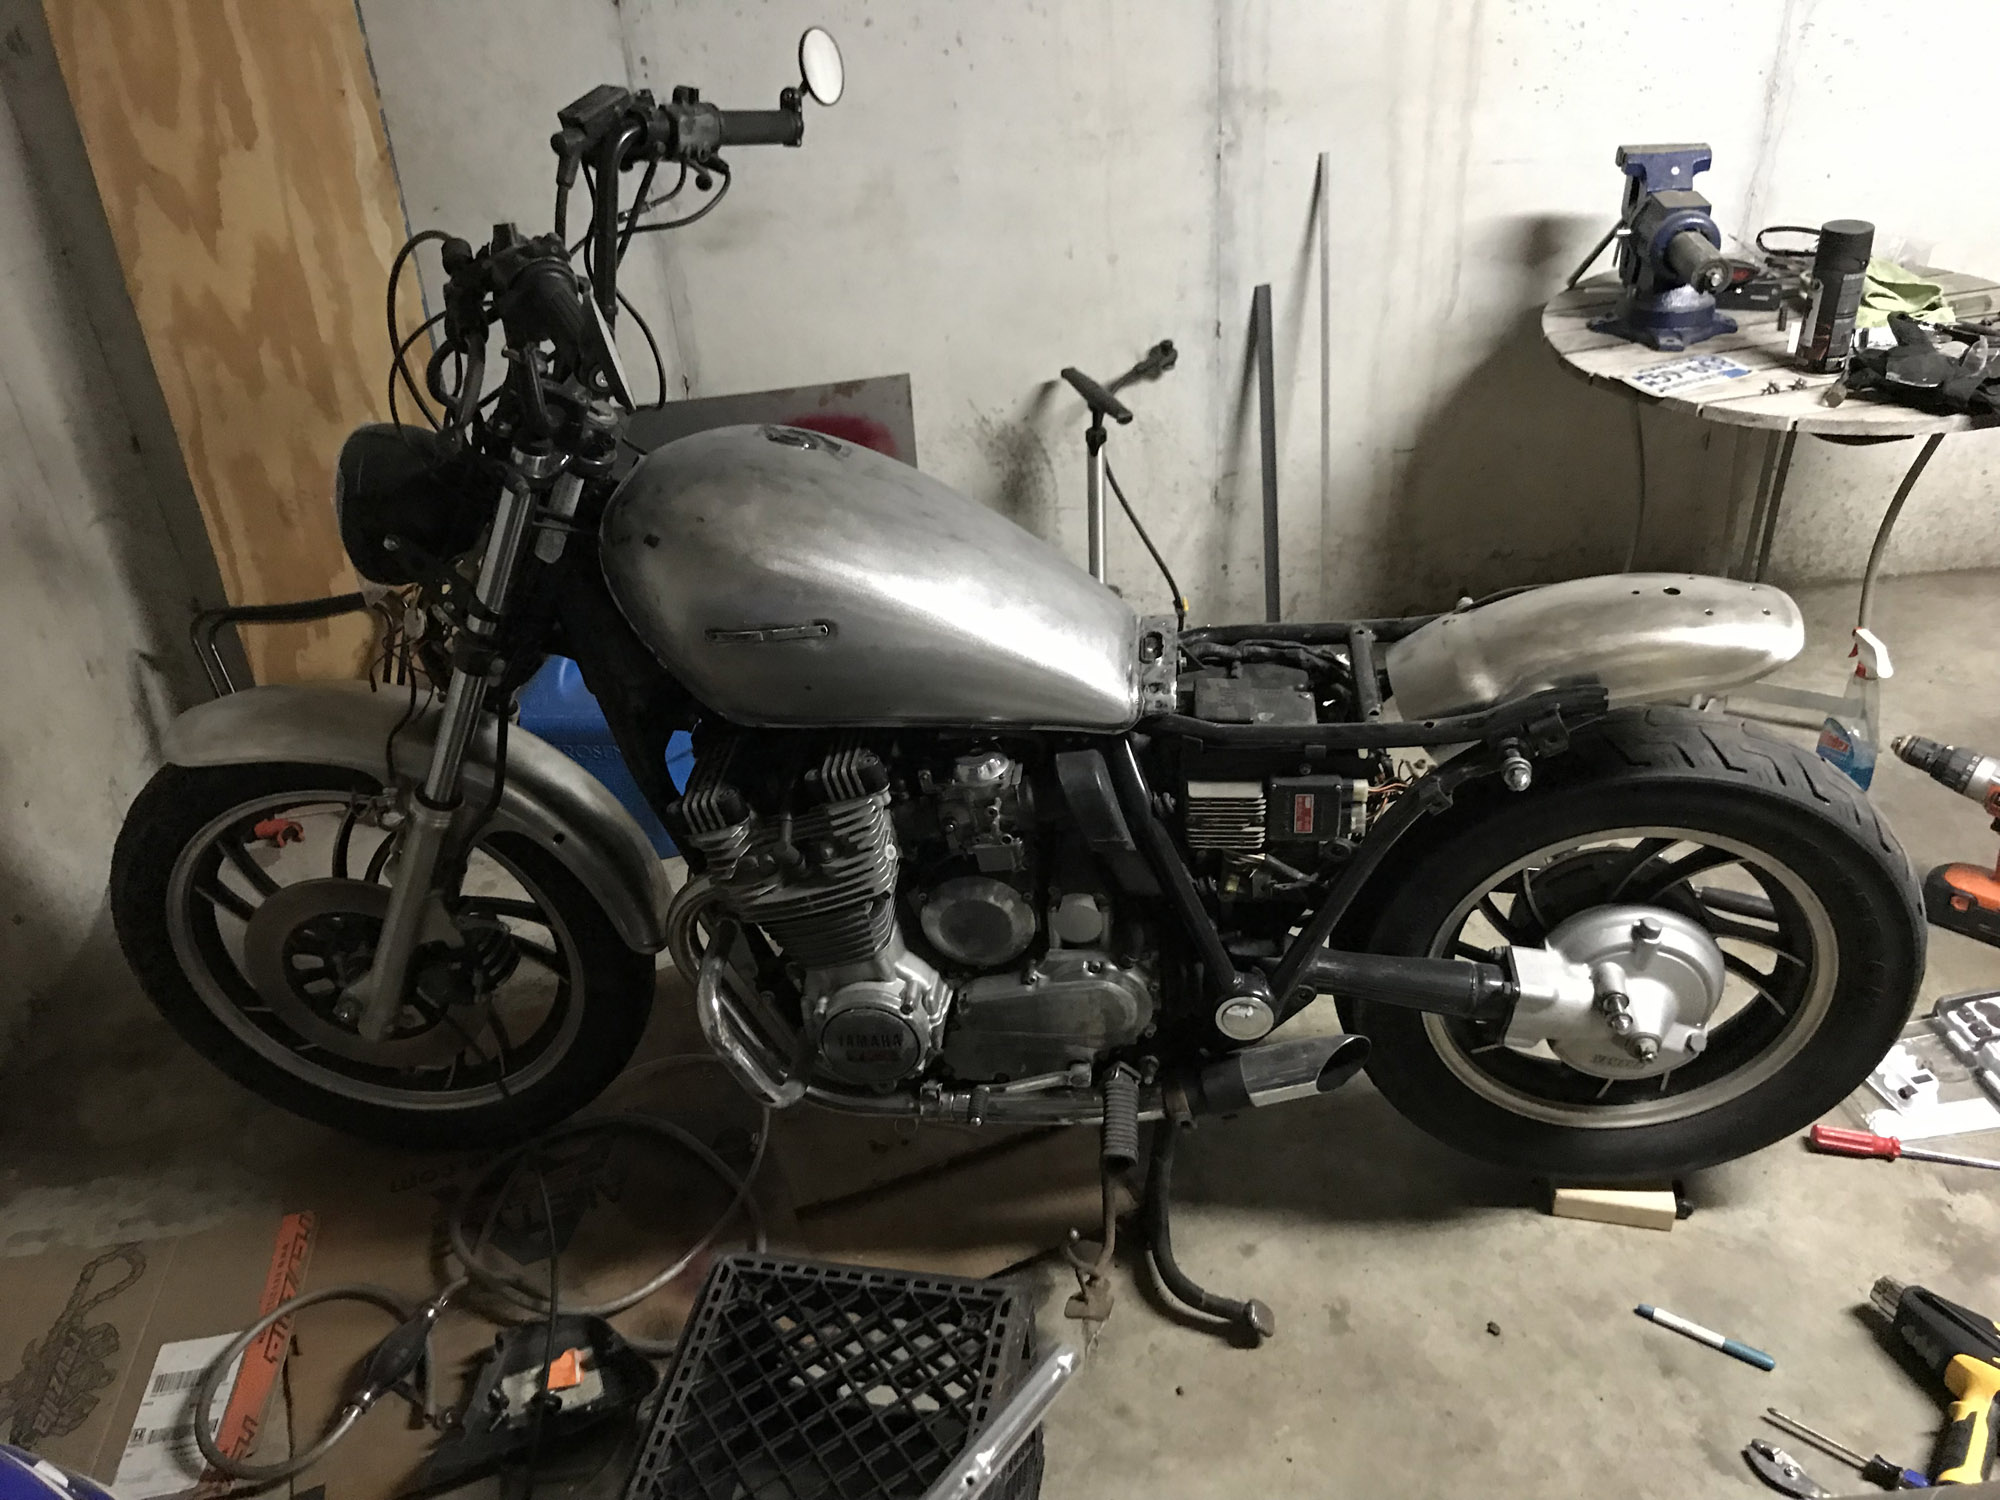
In order to have the best base to start from, I had to strip the tank and the fenders down to bare metal. Due to the tank having brackets welded into it to mount the Yamaha decals, it meant I couldn’t just scuff and paint over the existing paint because I was going to need to Bondo. There was also some surface rust that needed to be removed. This was my second time stripping a tank. The last time I had tried some paint remover I bought from a store that did NOT work at all in cold weather. Seeing that this bike was being worked on in Minnesota during the winter, warm weather was not an option. That meant I spent a ton of time with a orbital palm sander with 60 grit sand paper and a lot of shoulder stress. Eventually I got the surface to where I needed it.
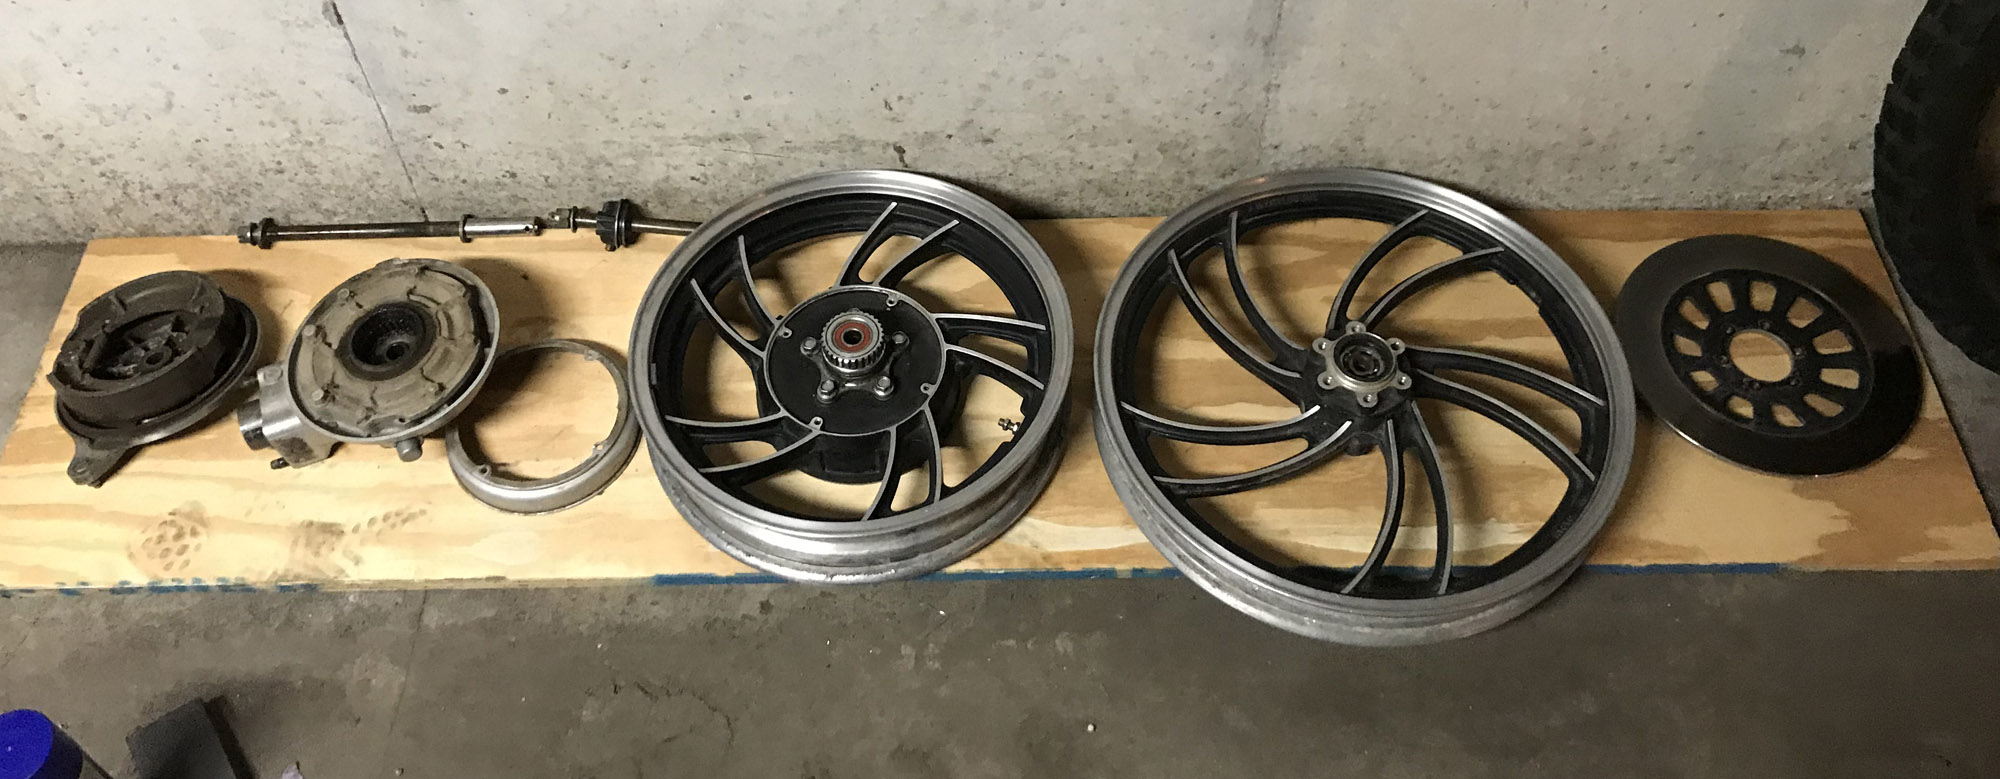

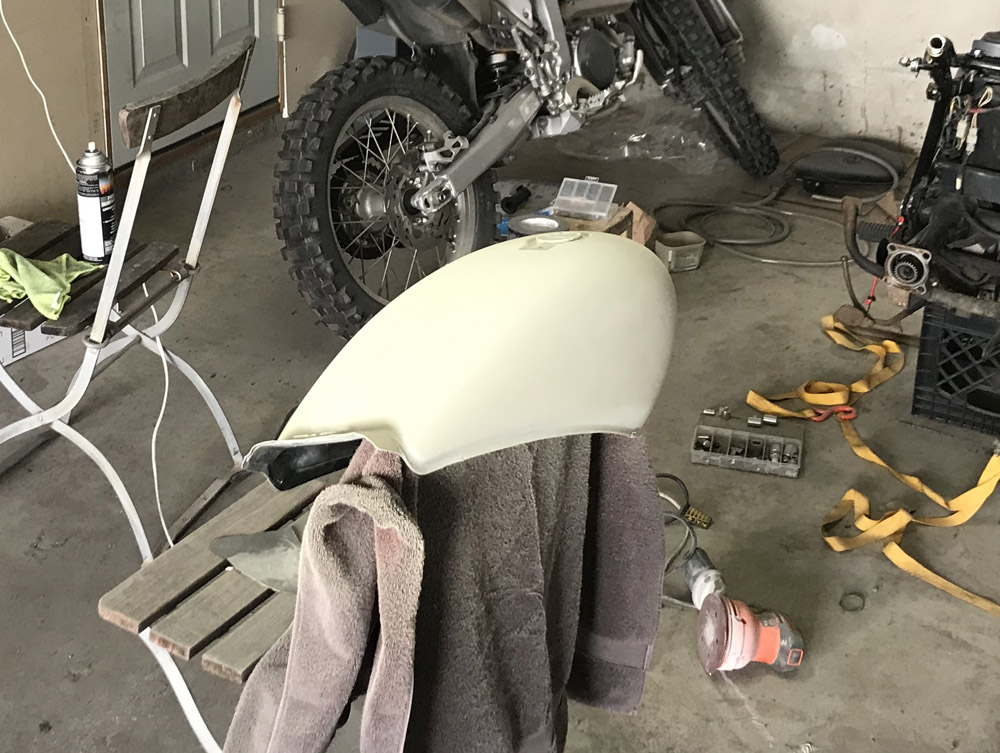
I also wanted to make sure the other accent parts matched. I had to take off the wheels, brakes, and rear differential (or whatever it’s called). Once all the parts were removed, it was time to start on getting the surfaces ready for paint. The first step was to fill in those ugly brackets with body filler so that I could lay down primer over the top. It took a couple of layers since the indents were fairly deep. There were also a couple of low spots on the tank that I needed to fix as well.
Once the body filler was dried and sanded, I could start laying down primer. One of the biggest issues I see when people try and do their own spray paint job is that they don’t use a good primer. If the primer sucks, the rest of your paint is going to suck. Because of that, I used USC 2K Spray Max Epoxy Primer. A 2K epoxy primer gives the best adhesion while also sealing the tank. Self-etch primers do not seal the tank and I have also found them to not give nearly as good of a surface for top layers. Once the primer was down, I sanded all the surfaces smooth.


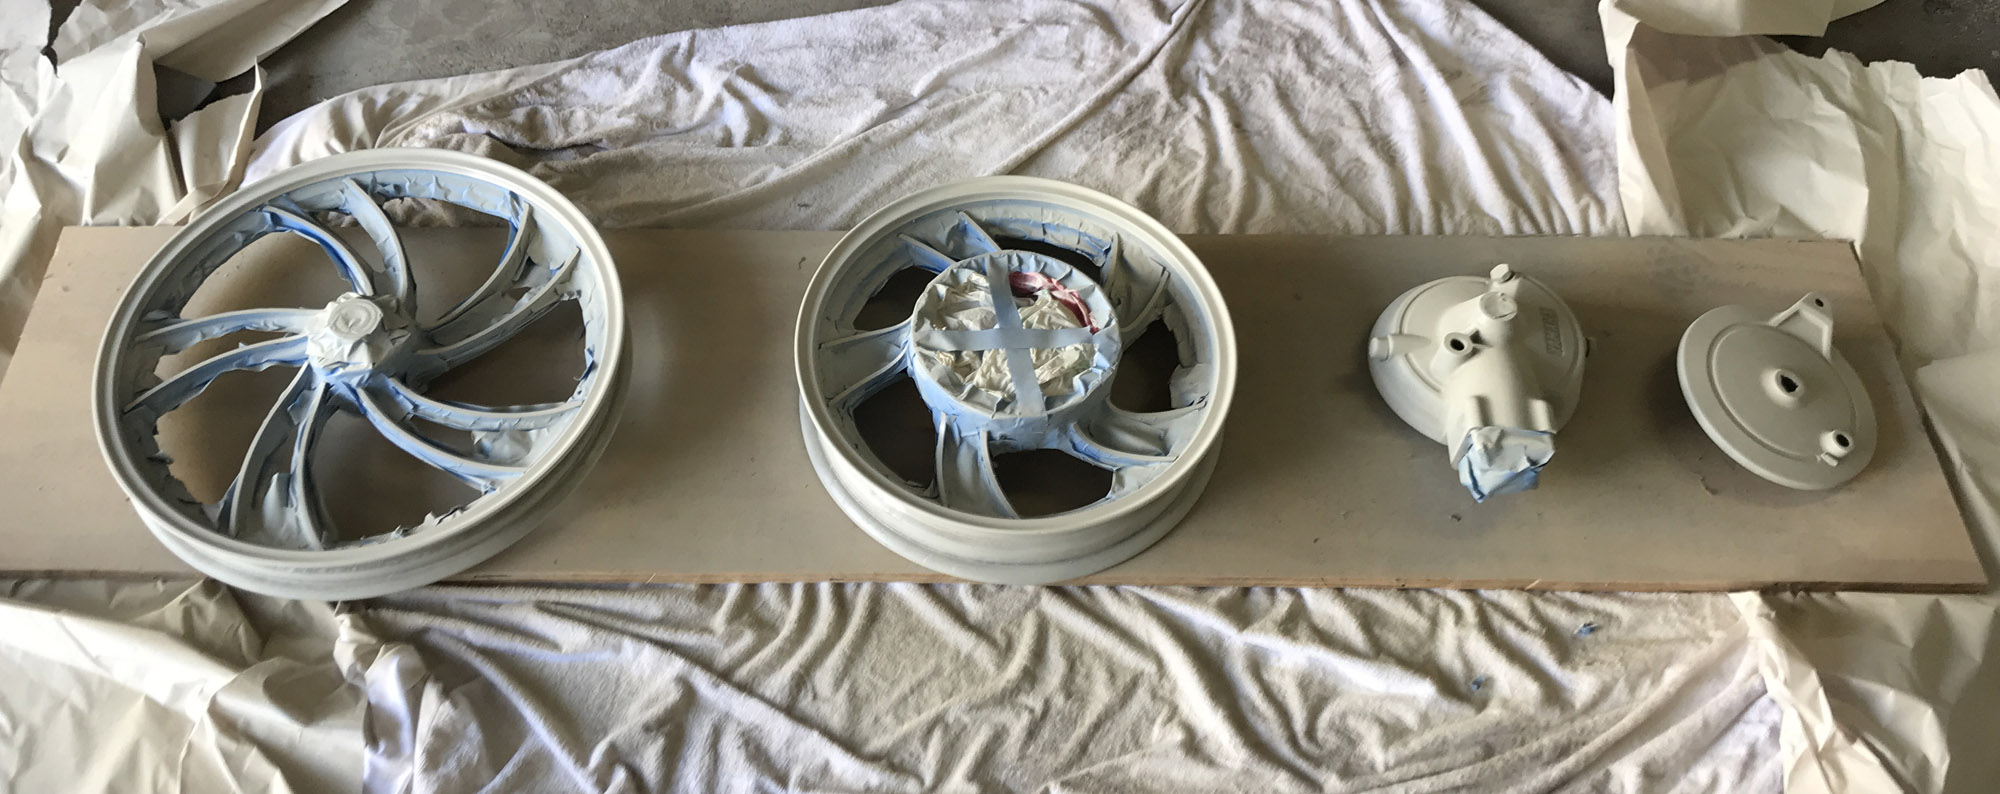
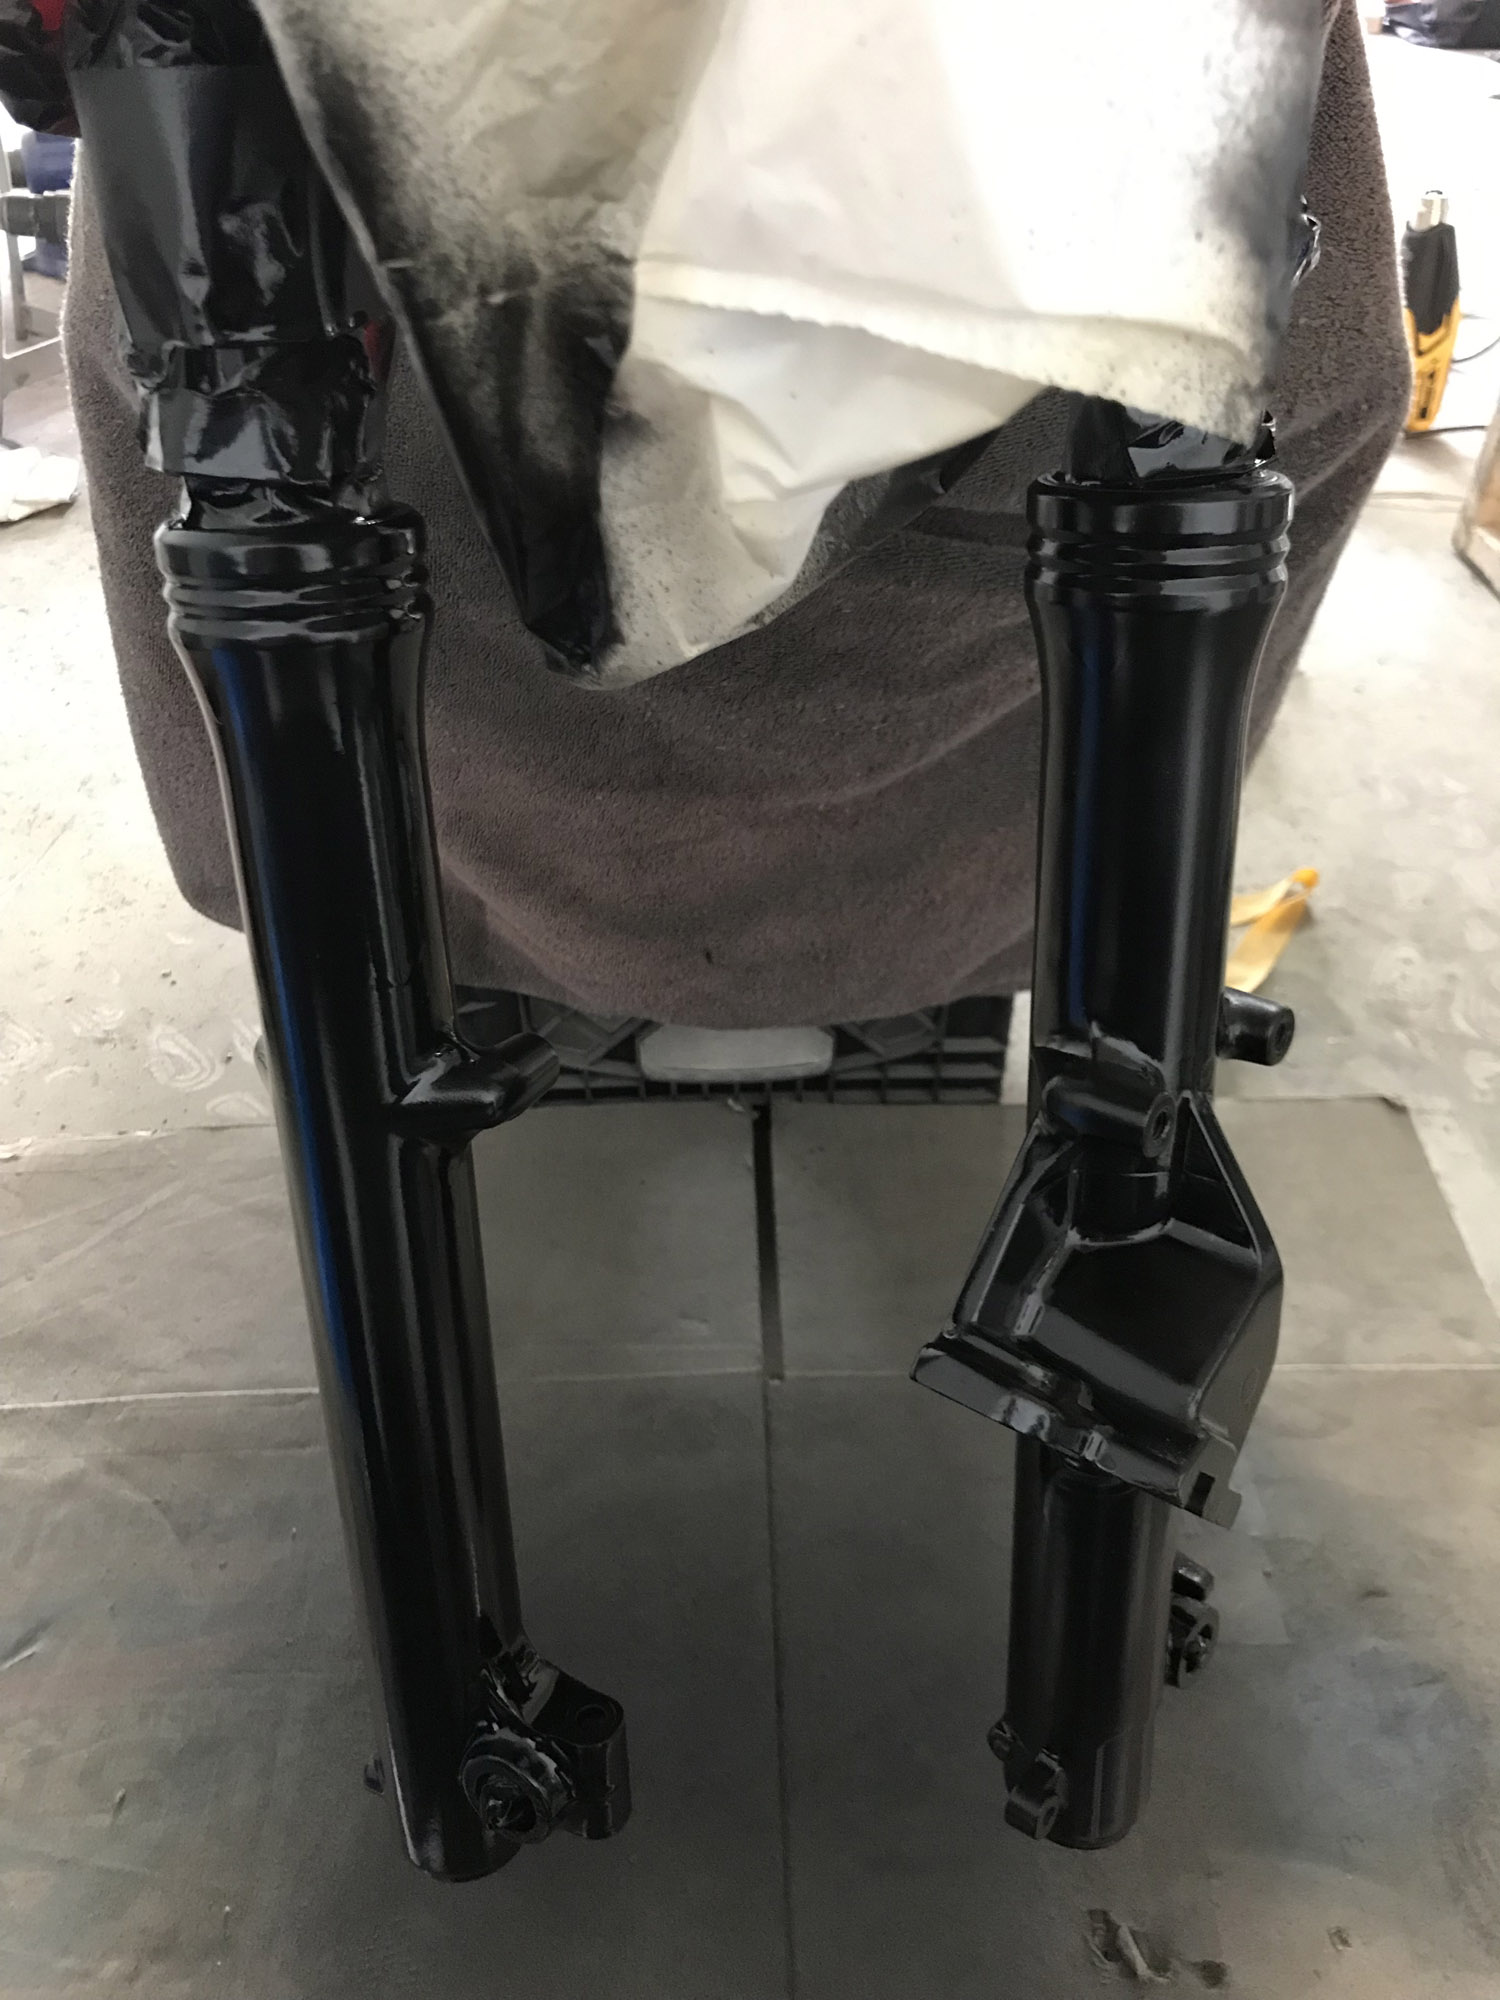
Now that the primer was sanded and ready for paint, I started with the easy parts first. The brake drums, differential, front fork lowers, and fenders got painted using Rust-Oleum Painter’s Touch 2X Gloss Black. The wheels, tank, and rear shocks required taping. Taping the wheels turned out to be the biggest waste of time on this project as I thought I could keep the stock painted black areas. That turned out to be incorrect once I peeled the tape and the old black came up with it. OOF! That then meant I had to go back, re-tape, and repaint the black areas. I would have done it totally different had I known that was going to happen.


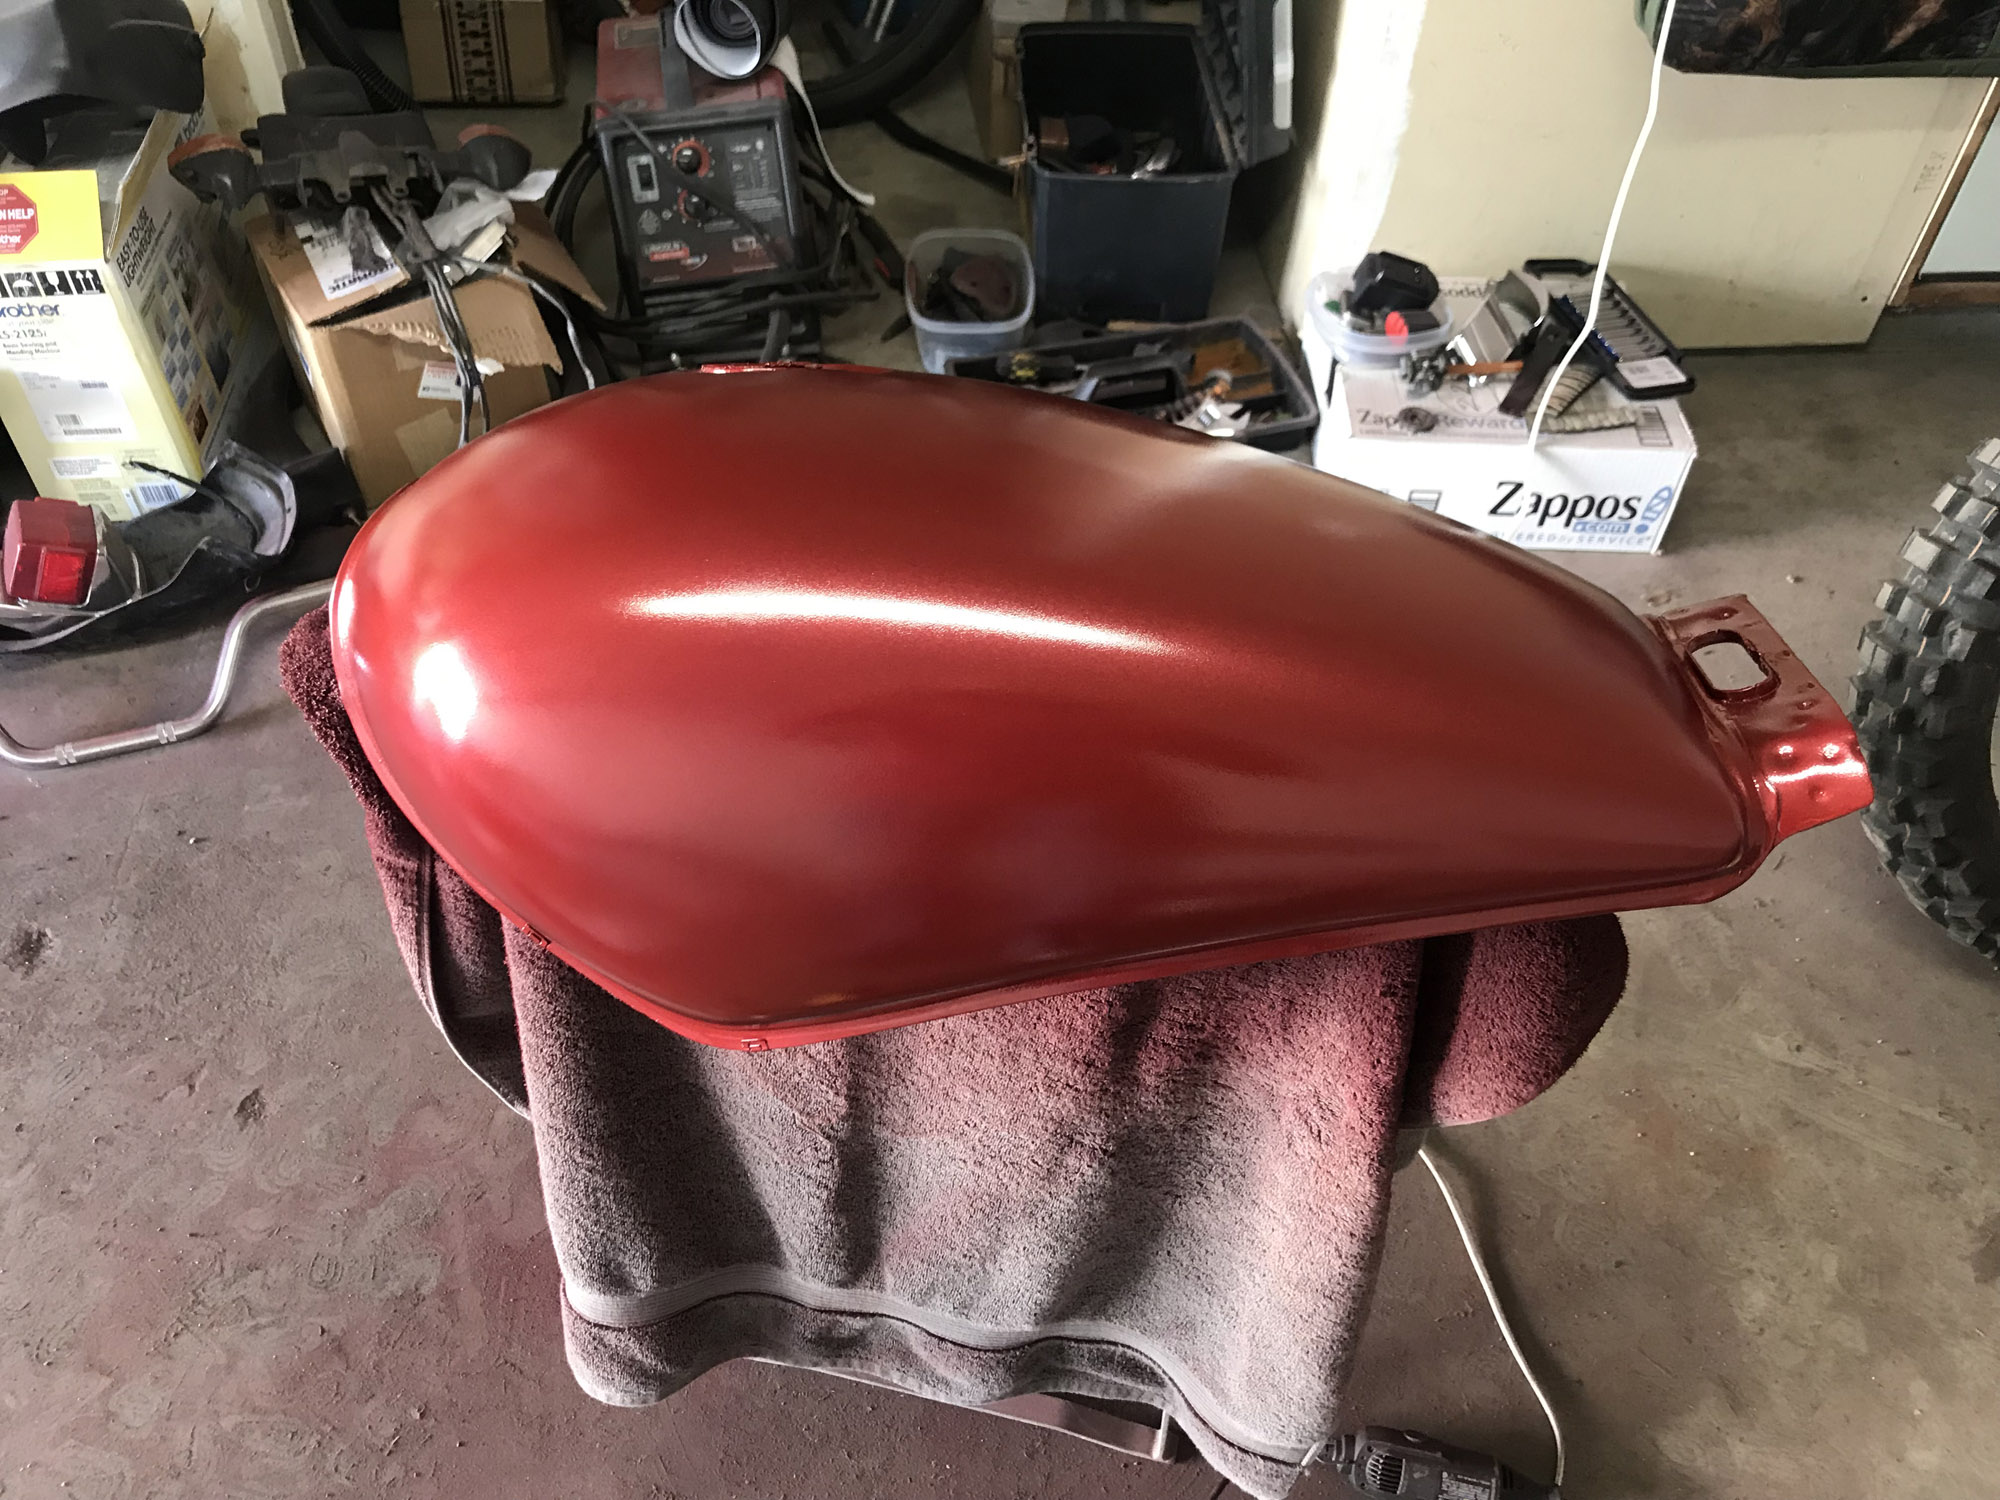
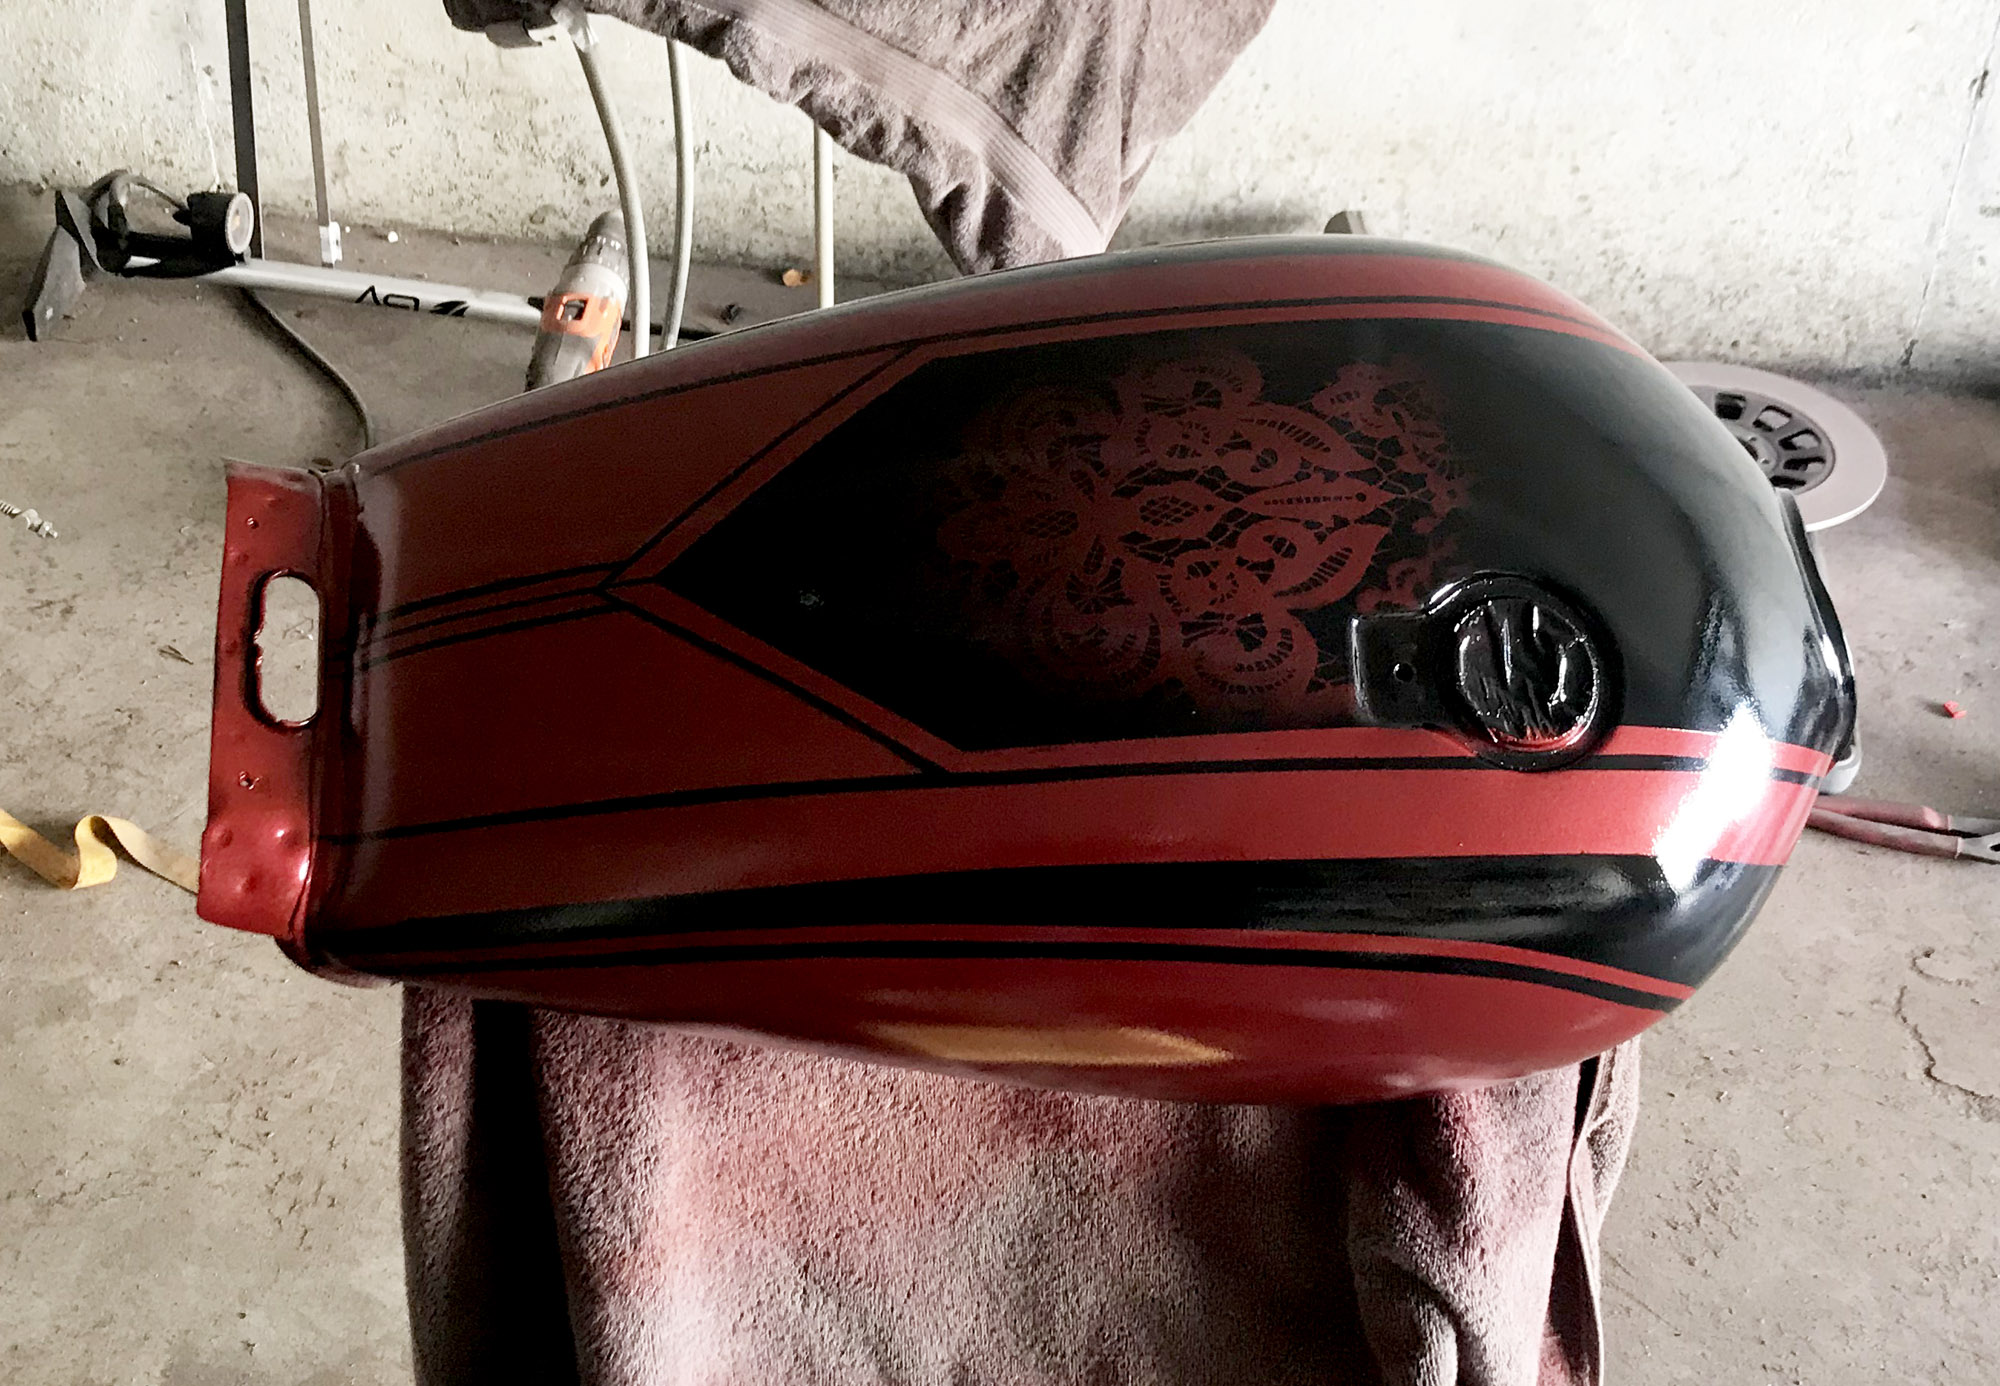
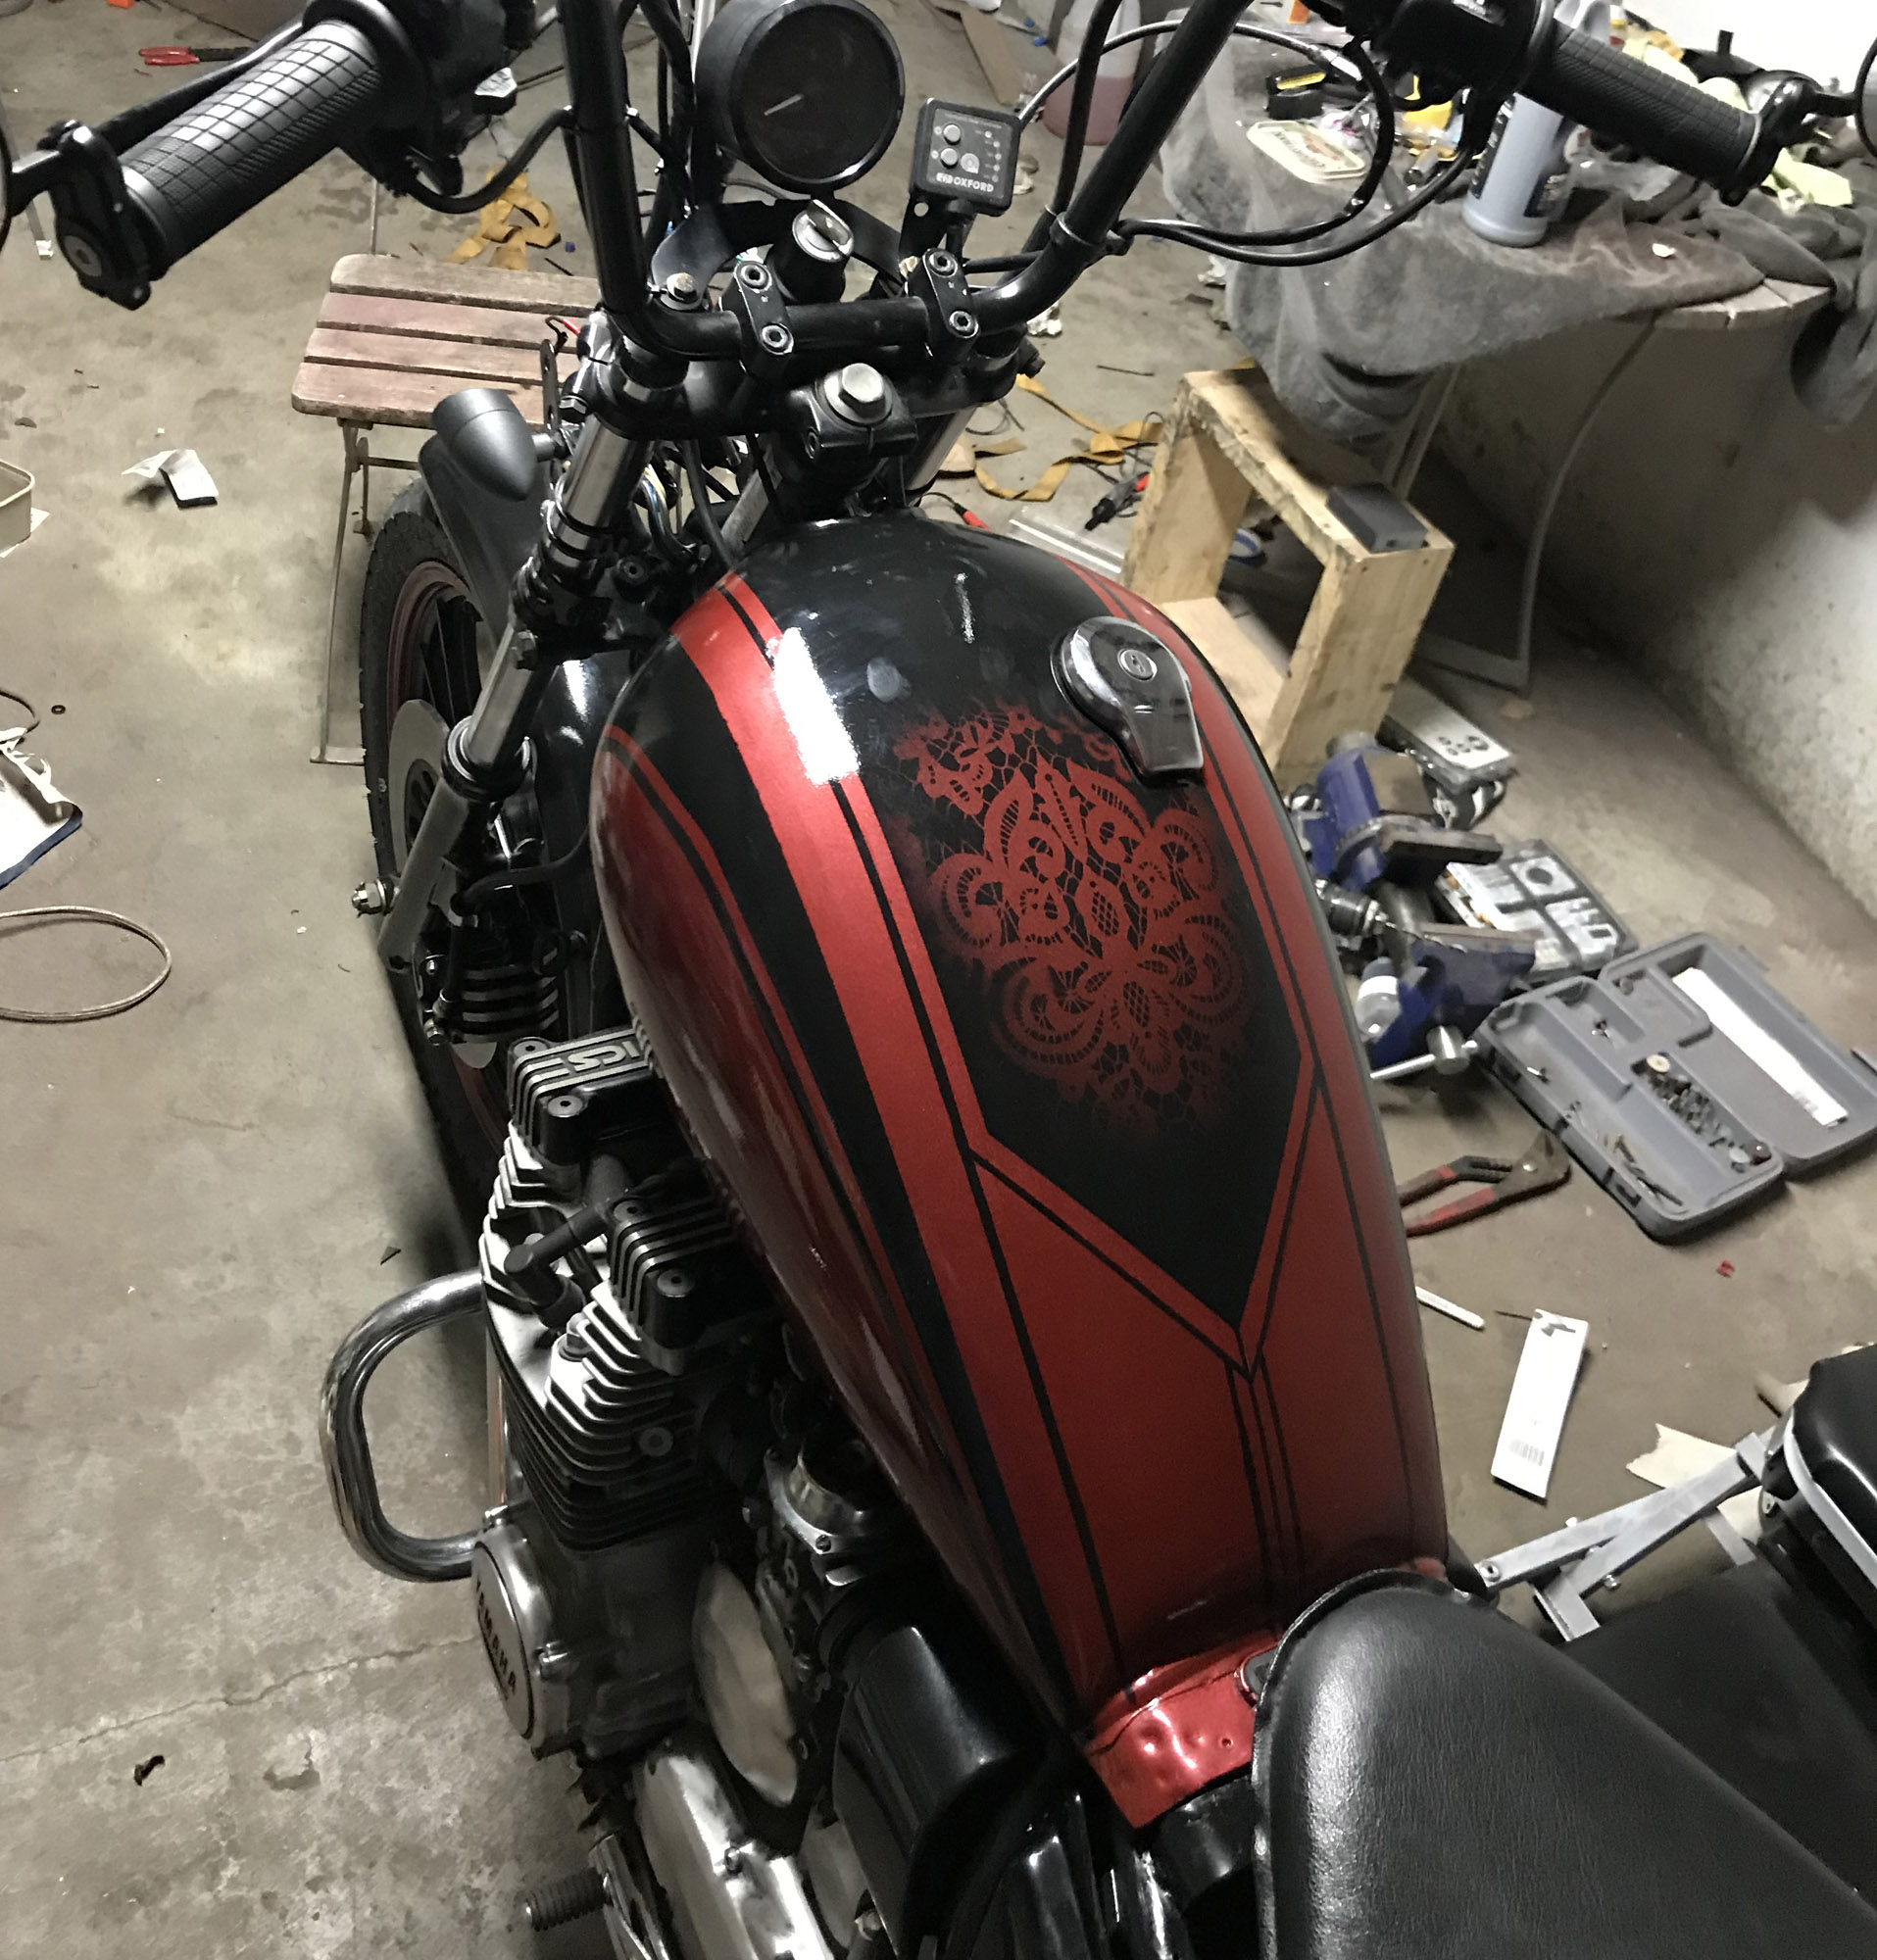
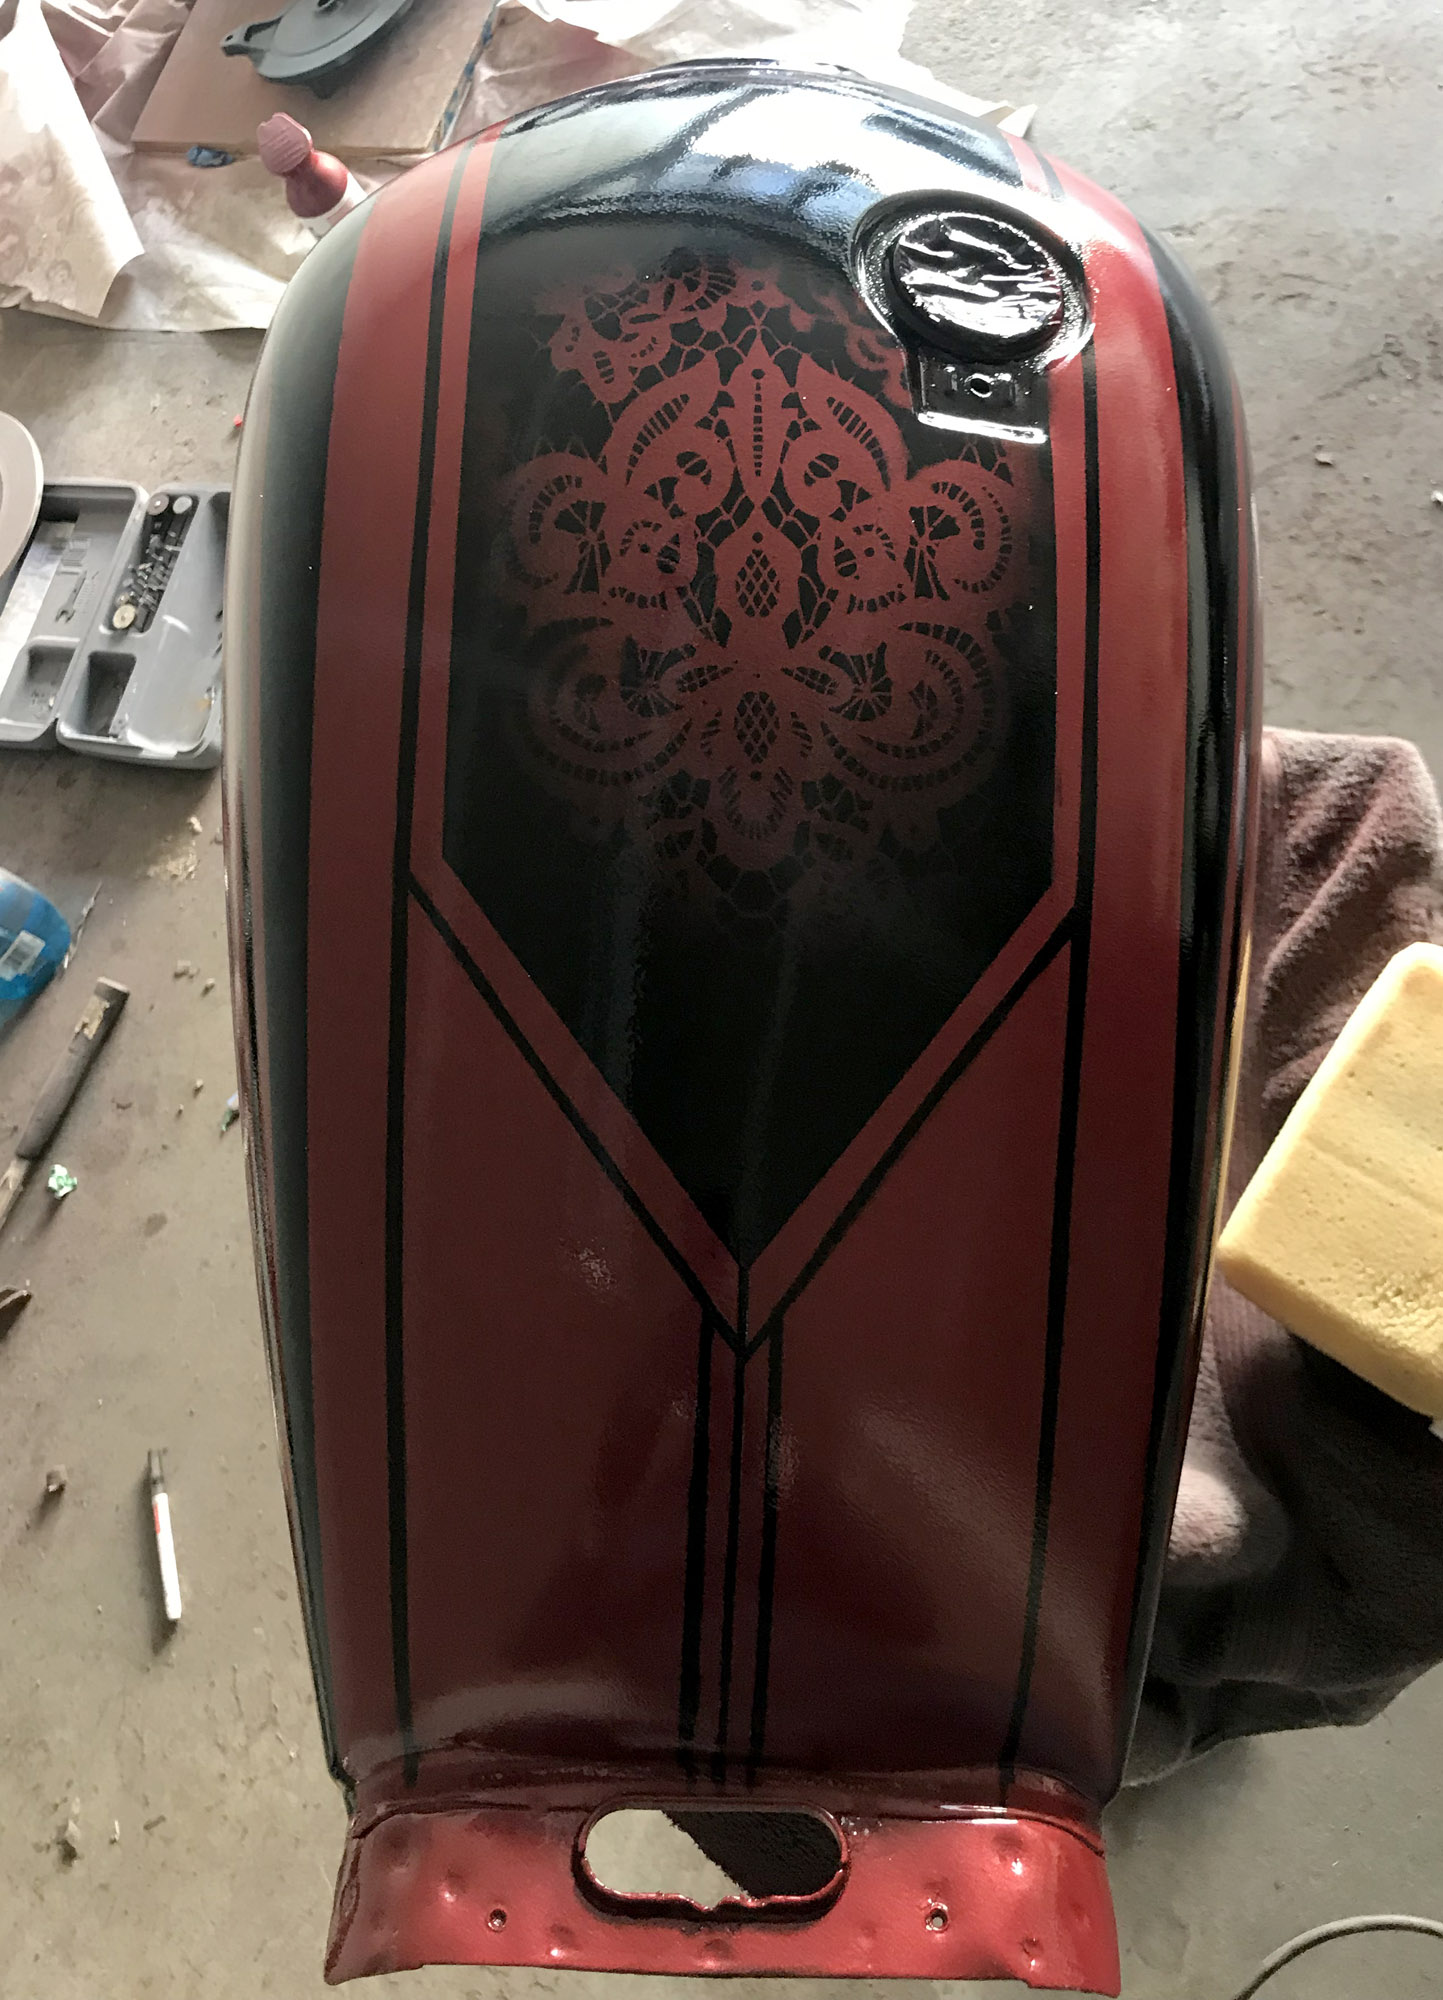
I started on the tank by laying down Rust-Oleum Dark Cherry Metallic. This paint actually lays down surprisingly well and had a great color for the price. Once I had laid down the initial base coat I noticed that the body filler had not been sanded quite as flush as I initially thought. That meant I had to once again do some finish sanding and then repaint more base coat. Once that issue was taken car of, I used a lace stencil I found at Michael’s for the main part of the tank graphic. I also taped off some striping to accent it. Continuing to use the same blacks spray paint as on the other parts, I added a bit of shadowing and fade into the stencil. This was a little bit tricky due to the poor quality of spray heads that Rust-Oleum uses. That said, it came out better than I thought it would!


Once all the paint dried, the final step was to use a good clear to finish it. This is the final step where I see a lot of home projects fall short. Using a junk clear means you will have horrible orange peel as well as a finish that is not resistant to chemicals. Gas will eat right through regular paint as well as most clears that you can find on a store shelf. I used USC Spray Max 2k High Gloss Clearcoat to make sure I had a great finish that wouldn’t melt if gas hit it.
The last part of finishing this bike was to change how the seat and the tank mounted to the bike. I ended up welding some the brackets for the front and rear area where the seat would connect and also make for easier connection of the tank. Originally I had also planned on making a different fiberglass seat that I later abandoned after not liking the way it came out. While I had the seat and tank off, I also took that time to replace the old glass fuse box with a modern blade fuse kit. This made finding and changing fuses a hell of a lot easier.


The bike was then put back together and ready for the road! Since I had never ridden the bike further than a couple hundred yards to make sure it ran and shifted, I never realized just how loud the straight pipes were. This monster really breathed fire and made for a bit of a light show at night if you were following it. Probably one of my favorite sounding bikes, but also one that definitely required ear-plugs if riding.
Hope you enjoyed the build and don’t forget to hit that subscribe if you want to see more customized content!

Where did you get the handle bars
LikeLike
They are TC Bros Mini Apes: https://amzn.to/3I26smy
Full parts list can be found at the bottom of the bike page.
LikeLike
What type of shocks did you use
LikeLike
They are just the stock shocks, but painted black.
LikeLike
How would I go about the seat and rear mudgaurd? Im just getting into customizing my bike and Im using the way you made yours as my inspiration for something I could build
LikeLike