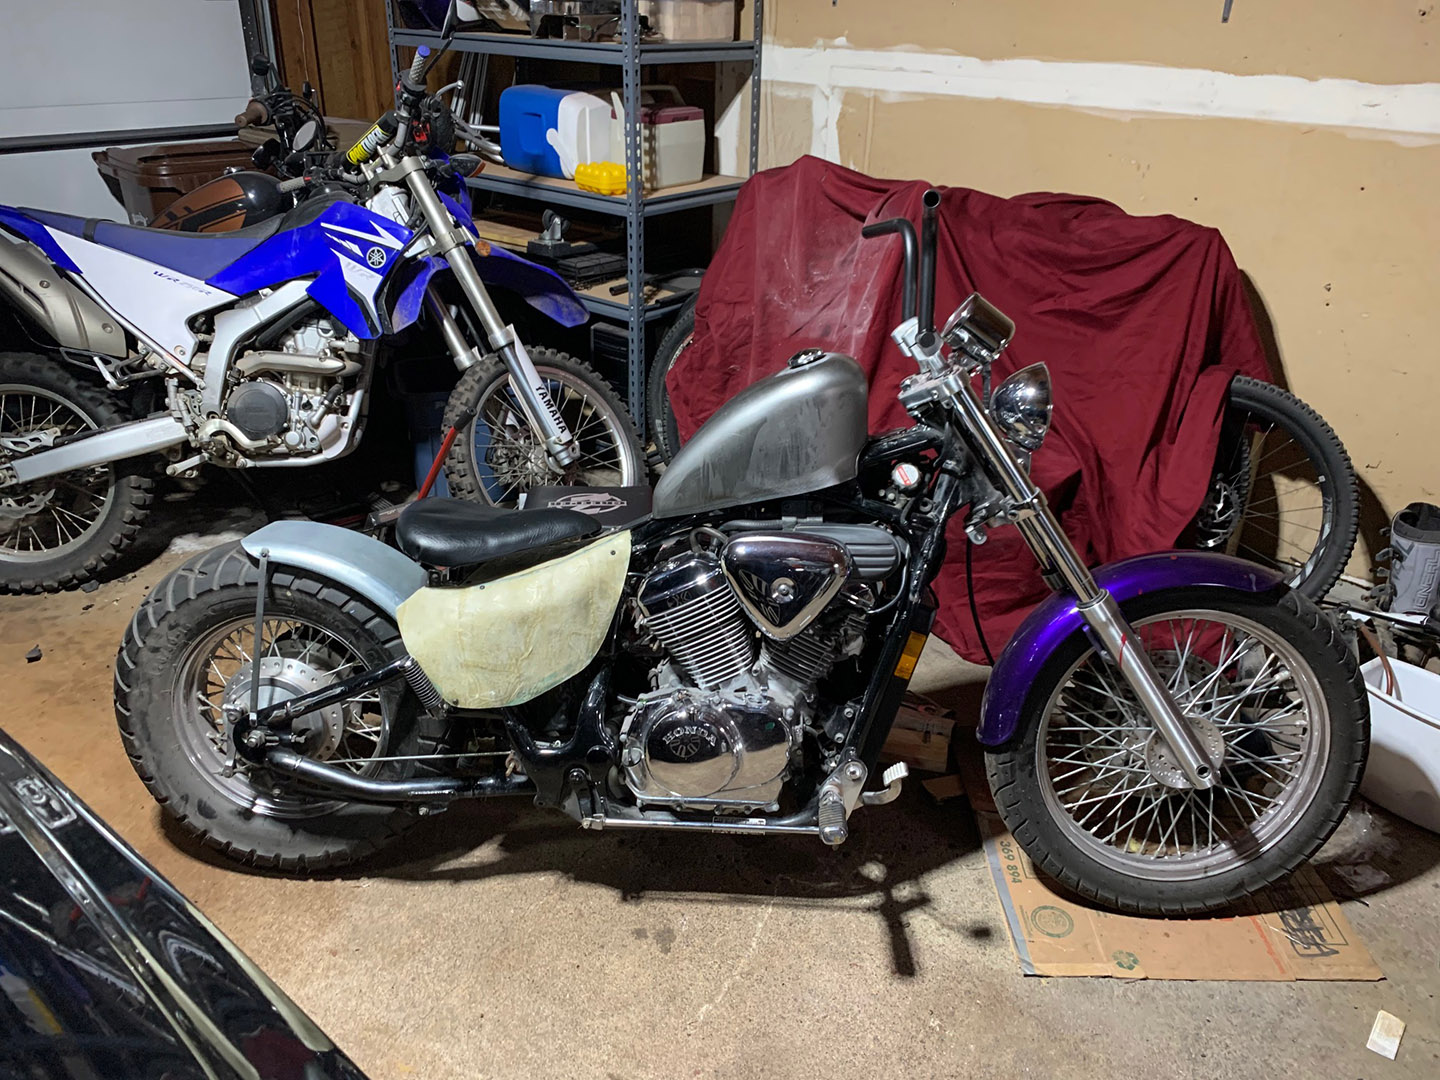
The last time we checked in, I had just got done covering the seat and was looking ahead to some more cosmetic work. A lot has happened since then, so let’s start at the back and move forward. There are many different ways you can do the back end of a bobber. Some people go without a fender, some with the full round fender, shorties, boat trailer fenders, you name it. It took me some time to decide which of those routes I wanted to go. I knew the shorter look was more my style, but did I want a domed fender or flat? So many of the bikes that catch my attention have had the domed short fender. After looking around, however, the price and frequent use on other bikes lead me to give the boat trailer fender idea a try.

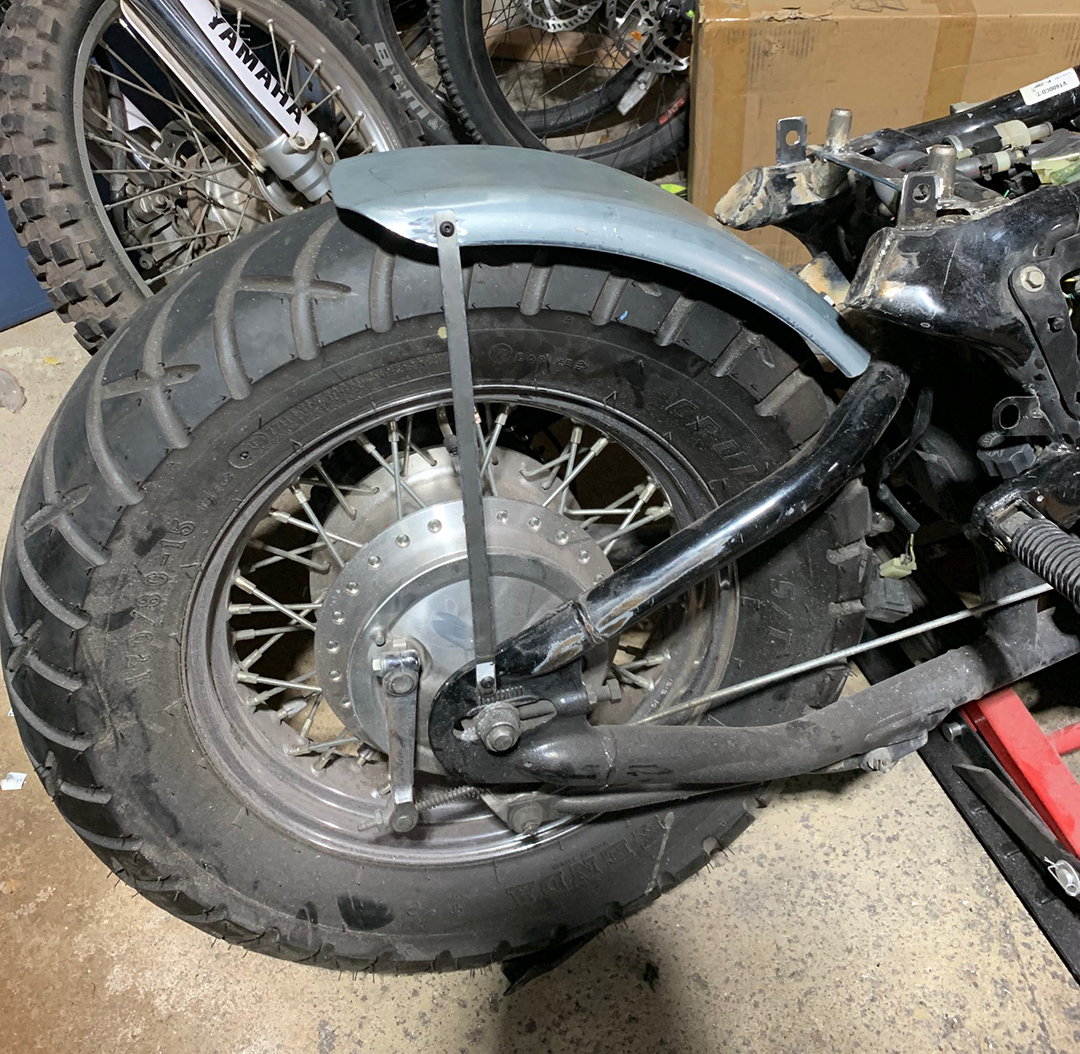
The first trick was to find one in the width I thought would work best that also had the correct radius. This steel fender I found on Amazon for less than $30 seemed like the perfect choice. It had decent thickness, had the right curve, and it just needed to be cut down. Thin masking tape was used to map out where the cut needed to be and it was just a matter of taking an angle grinder and chopping it up. The ends were then rounded a bit for a cleaner look. A piece of old chain was then laid down on the tire to set the correct gap for the fender once mounted.


With these short fenders and a soft tail, a bit of modding needed to be done in order to have it attach to the bike. I have seen some people use u-bolts while others buy mounting brackets. I decided to just make my own out of some raw steel you can pick up at any local hardware store. 1” flat plain steel was used for the connecting bracket along with 1/2” flat plain steel for the brace. Once the bracket was drilled out and welded together, it was then welded to the swing arm of the bike. Struts also needed to be created to keep the fender in place. This posed a little bit of a challenge because I didn’t really want to weld more tabs onto the frame if I didn’t need to. Since I still had a bunch of 1/2” steel laying around, I cut to length and then bent the ends to match the angle of the fender as well as the frame-end where it attached. Instead of welding tabs, I elected to drill and tap for 6mm bolts. It was a bit surprising to see just how easily the bit carved through the frame metal on these Hondas.

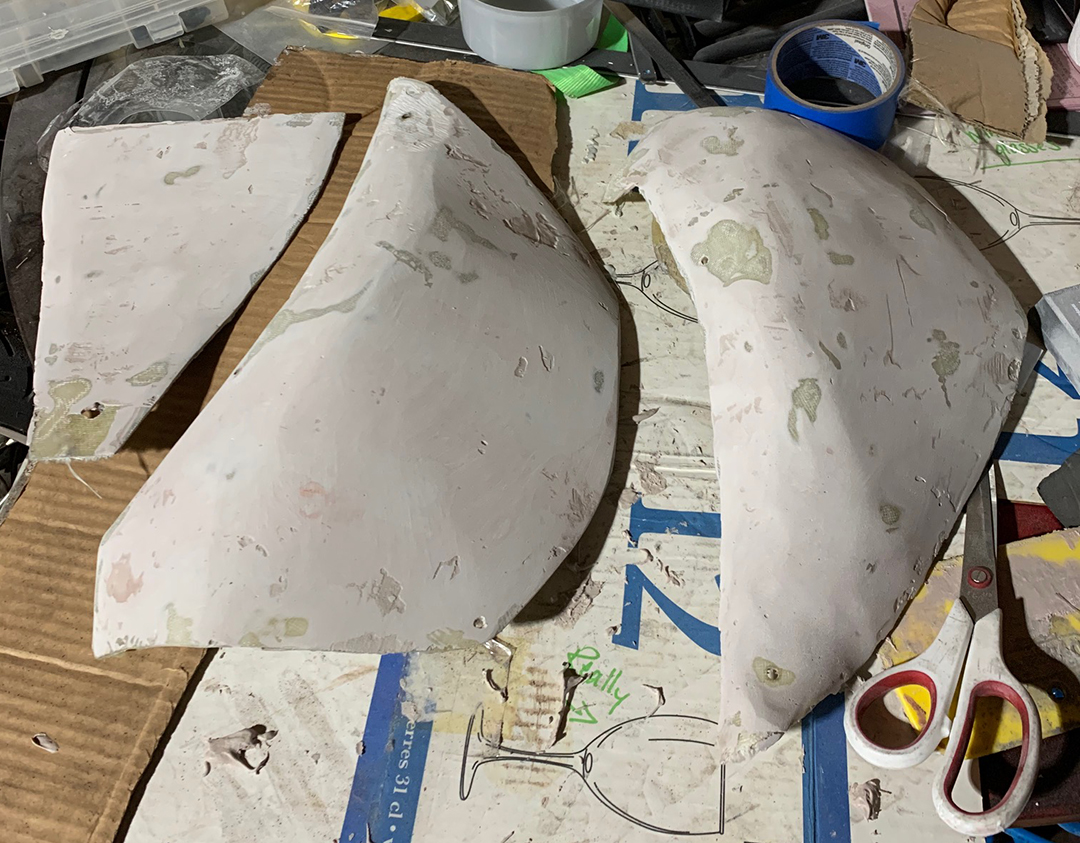
Moving forward from the rear, turn signal lights needed to be mounted somewhere. After testing out a couple of different locations, I decided to mount them directly under the seat. This would make them somewhat hidden cosmetically but still be visible from the rear. Brackets were made using more leftover 1” steel. Holes were drilled slightly larger than the turn signal bolts and then those tabs were welded to the frame near the seat bracket. Due to the mounting location and for ease of access in the future, I decided to cut the side covers (which was currently one piece) into a top, left, and right side. I also needed to trim the back to make room for the brackets as well as be able to remove them in the future without needing to take off the seat.

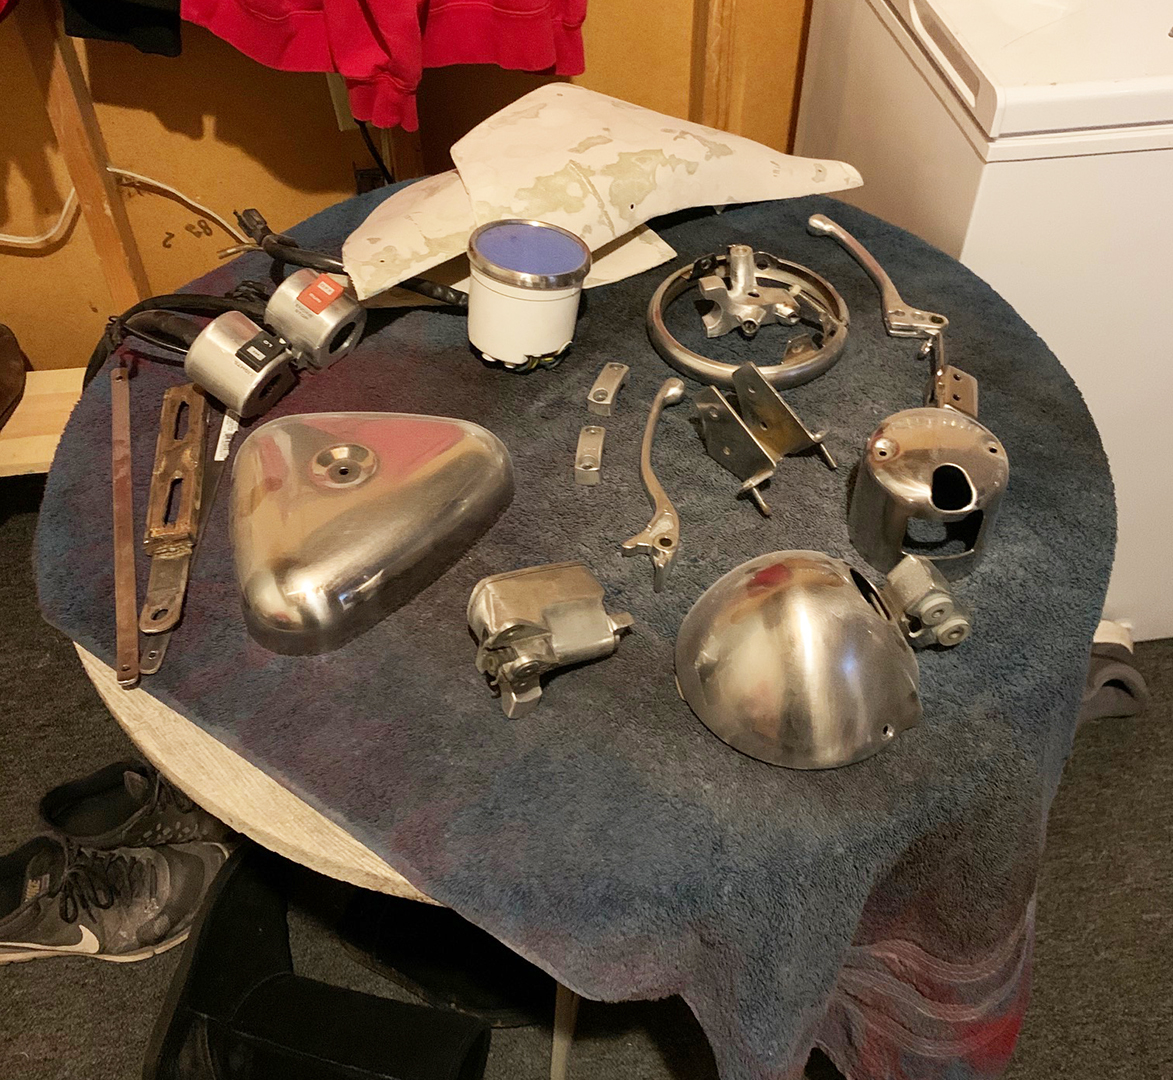
Now that most of the rear was taken care of, it was time to focus on the front of the bike. The biggest decision I had to make was whether or not I was going to keep the stock shadow tank. Before I even bought this bike, I was pretty set on getting a sportster tank for it because the body lines / angle appealed to me. It took a lot of searching to find exactly the right one for this bike. Right before I threw in the towel and was about to buy a cheap sportster peanut style tank, I ran across one that was made specifically for these Honda Shadows. Since the shadows have a double backbone, a stock Harley tank would have required a lot of modding to work, which would have meant welding on the tank. Seeing as I tend to burn through metal now and then when welding, I thought that sounded like a bad idea. This Sportster Steed Tank was the perfect solution.
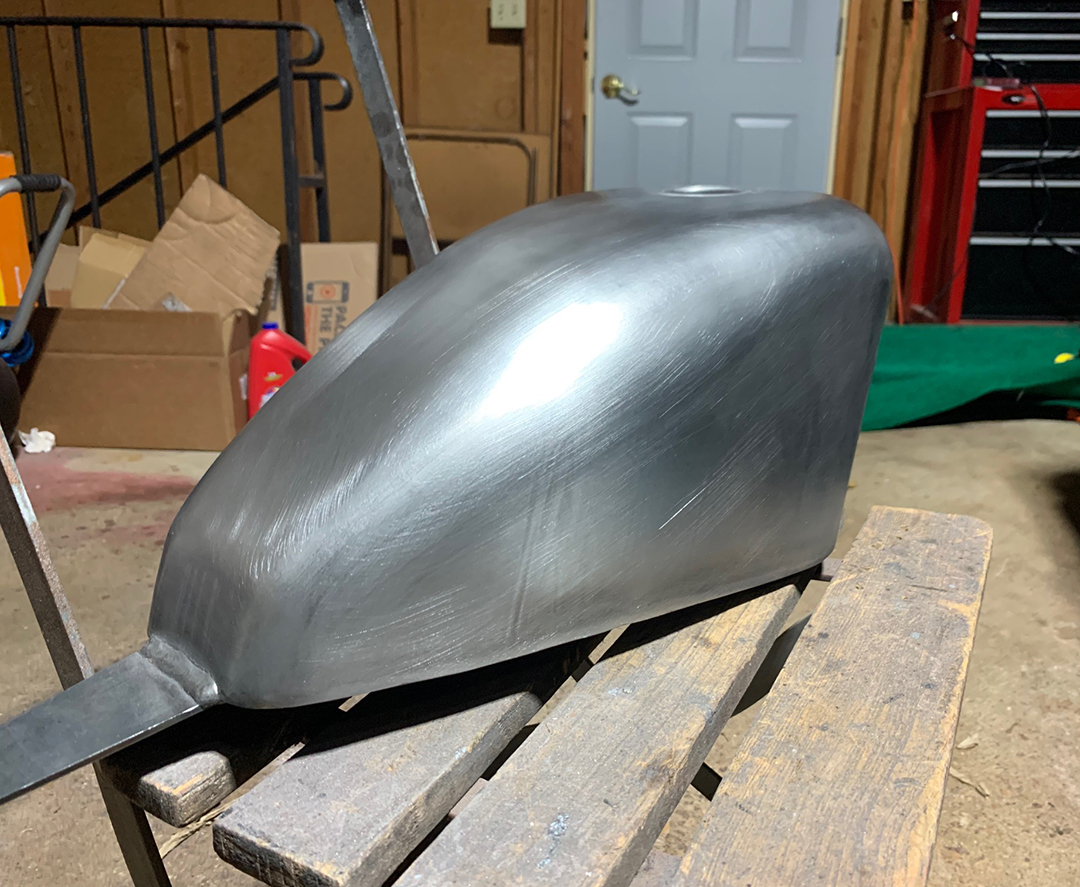
The only trouble I had with this tank came down to mounting. It had tabs that lined up fairly well with the stock hole on the bike, but the tank I received was off just a bit. Due to the cavity being such a tight fit, the front tab was angled just enough to where it wouldn’t align with the hole. This meant I needed to cut the front tab, grind it and re-weld it so that it aligned with the hole. I could have done this right at the base of the tank, but again, to avoid any burn through, I did it midway up the tab.


In order to mount it to the frame, the hole that was also already on the bike wasn’t really going to be user friendly in the future. Instead of taking everything out so that I could access the frame from below, I decided to drill out a hole just big enough for the nut size I wanted to use. I then welded the nut into the frame and used a grinder to smooth it out. It worked perfectly and made it so the tank could easily be removed in the future if needed. I also didn’t have to grind off the old mounting pegs so if I chose, I could still run a stock shadow tank in the future.
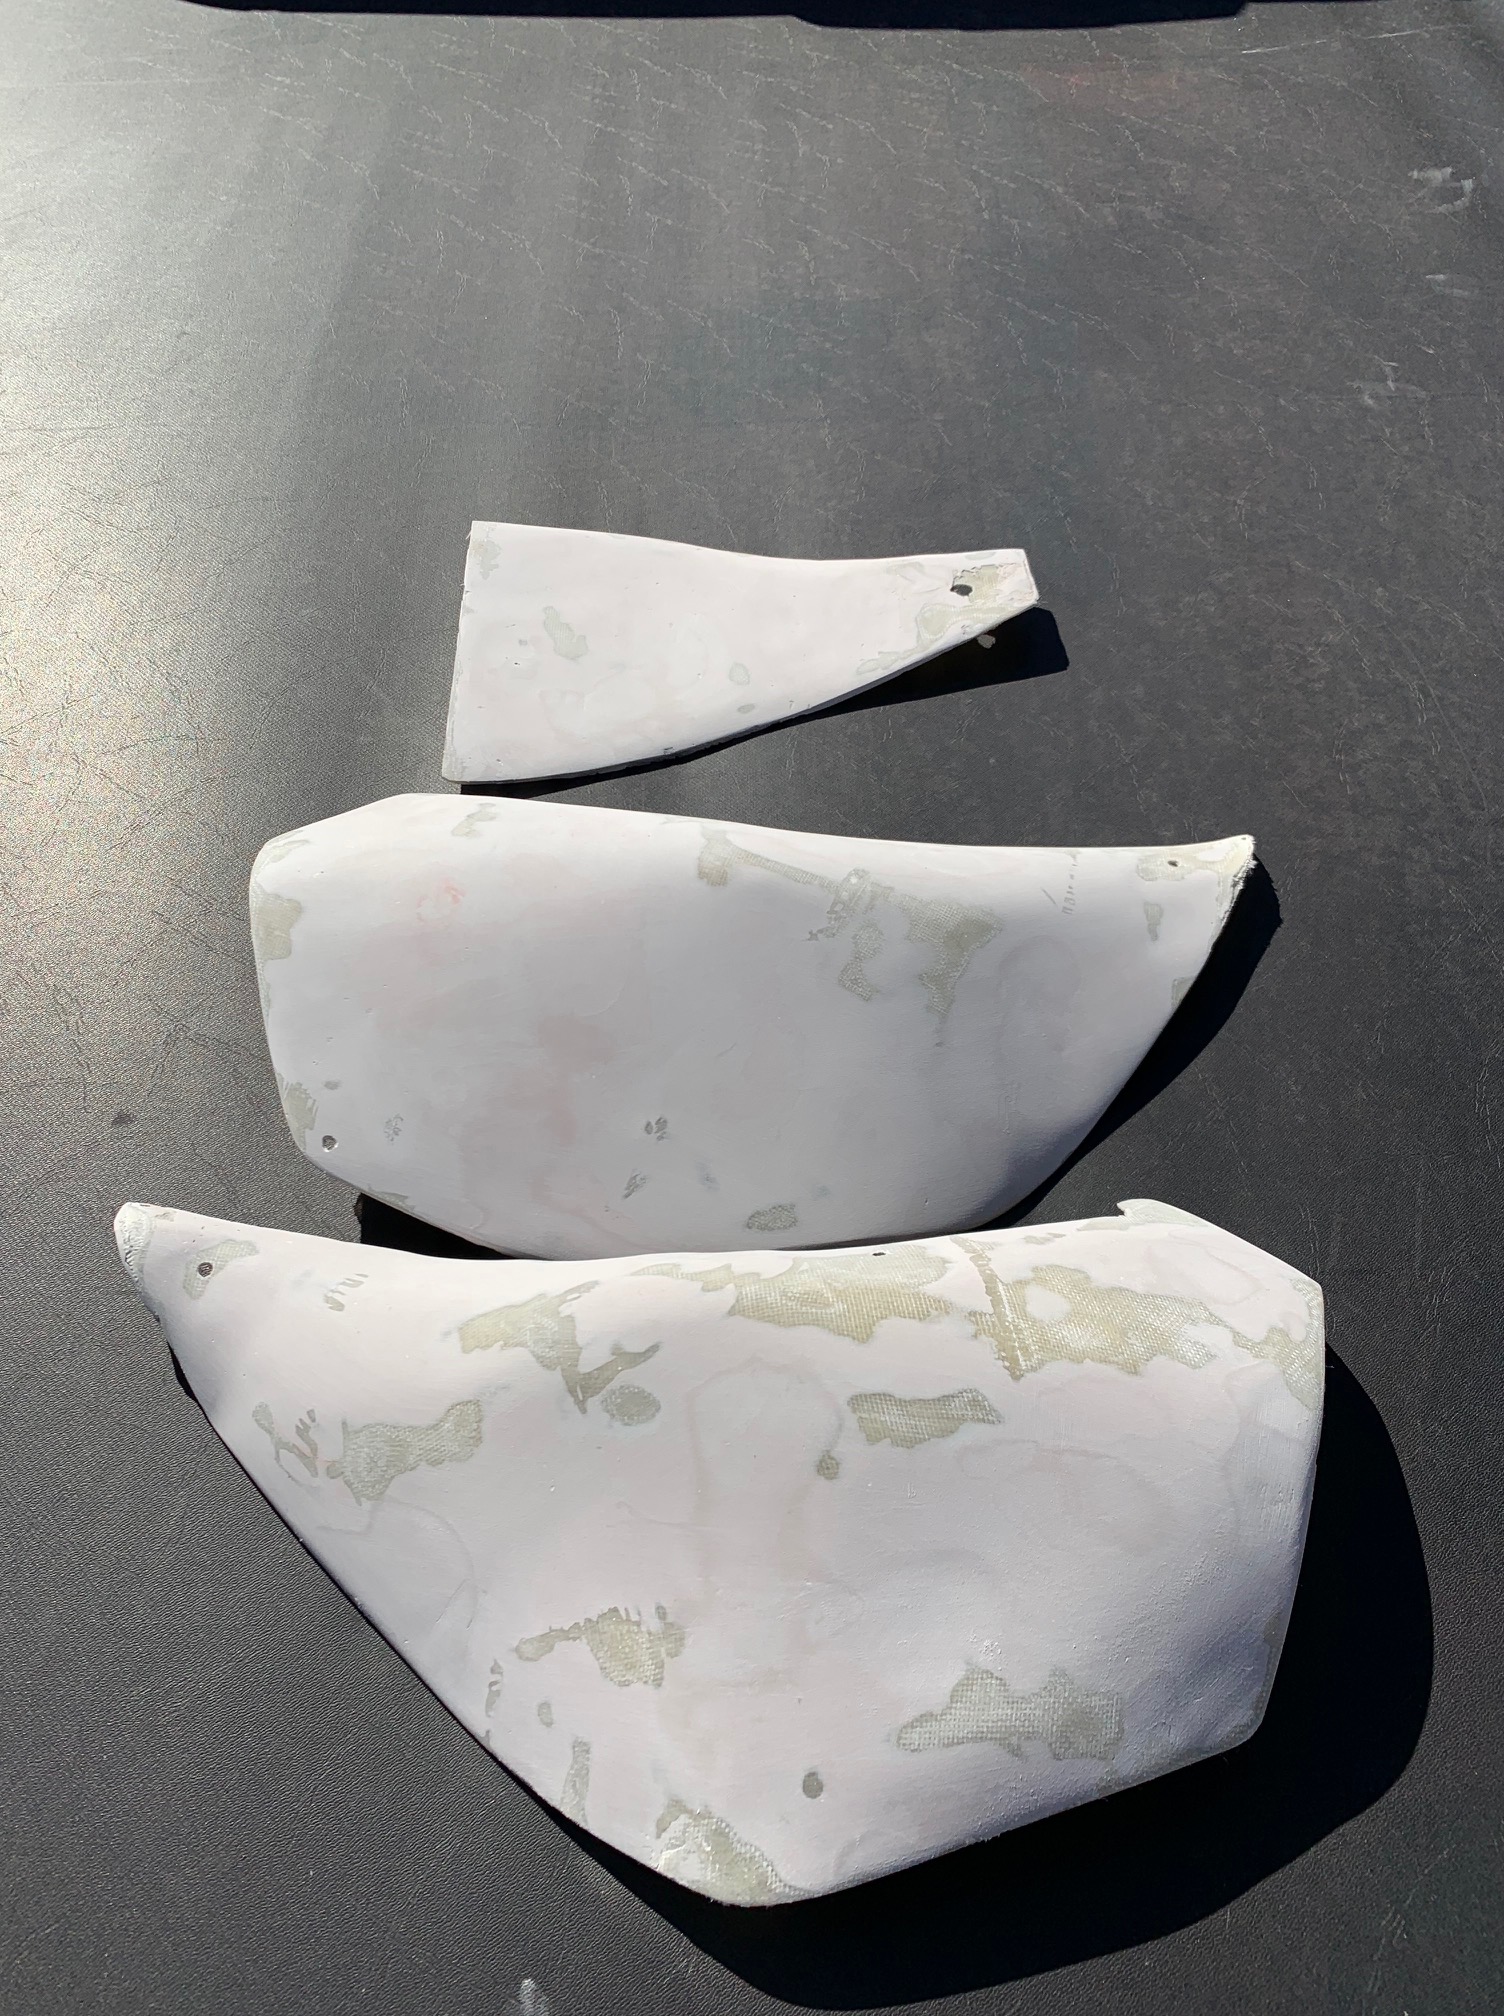
That pretty much wrapped up the fabrication portion of this build. It was now time to move onto dismantling and prepping the parts for paint. The majority of this bike was just going to get black gloss, but that meant each piece still needed to be prepped and primed. The side panels required quite a bit of Bondo in order to get smooth. I HATE this step. Every time I have to do it, I rush it and make more headaches for myself. This time was no different. Instead of taking the time to lay down the Bondo smooth and sand it properly, I just tried to move through it fast. This lead to a bunch of mini air bubble pockets that had to be smoothed out and redone later. Even then, it still wasn’t great. But since I wasn’t completely sold on the panels I made, I just moved on without much worry.

Each part was sanded or scuffed, and in some cases, ground down to get ready for paint. The front brake lever had been damaged by the previous owner and some kind of JB weld had been used on it. I decided since I was going to use different mirrors that I would just grind it all the way down. If it looked like crap, new levers weren’t that expensive to just re-buy.

Once the parts were prepped, Speedokote Epoxy DTM Primer was sprayed over everything. I love this stuff. It goes on easy, is creates a super strong bong, and is fairly easy to sand. Once the primer was dry, each part was sanded smooth for the black to go on next. The black I used for these was left-over paint I had from a different project. Quite frankly, it’s not a great black, but it would work fine for these accent pieces. Again, is way sprayed over each part and left to dry for a couple of days. Due to the colder weather, I wanted to make sure it had time to set up a bit before messing with the parts again.
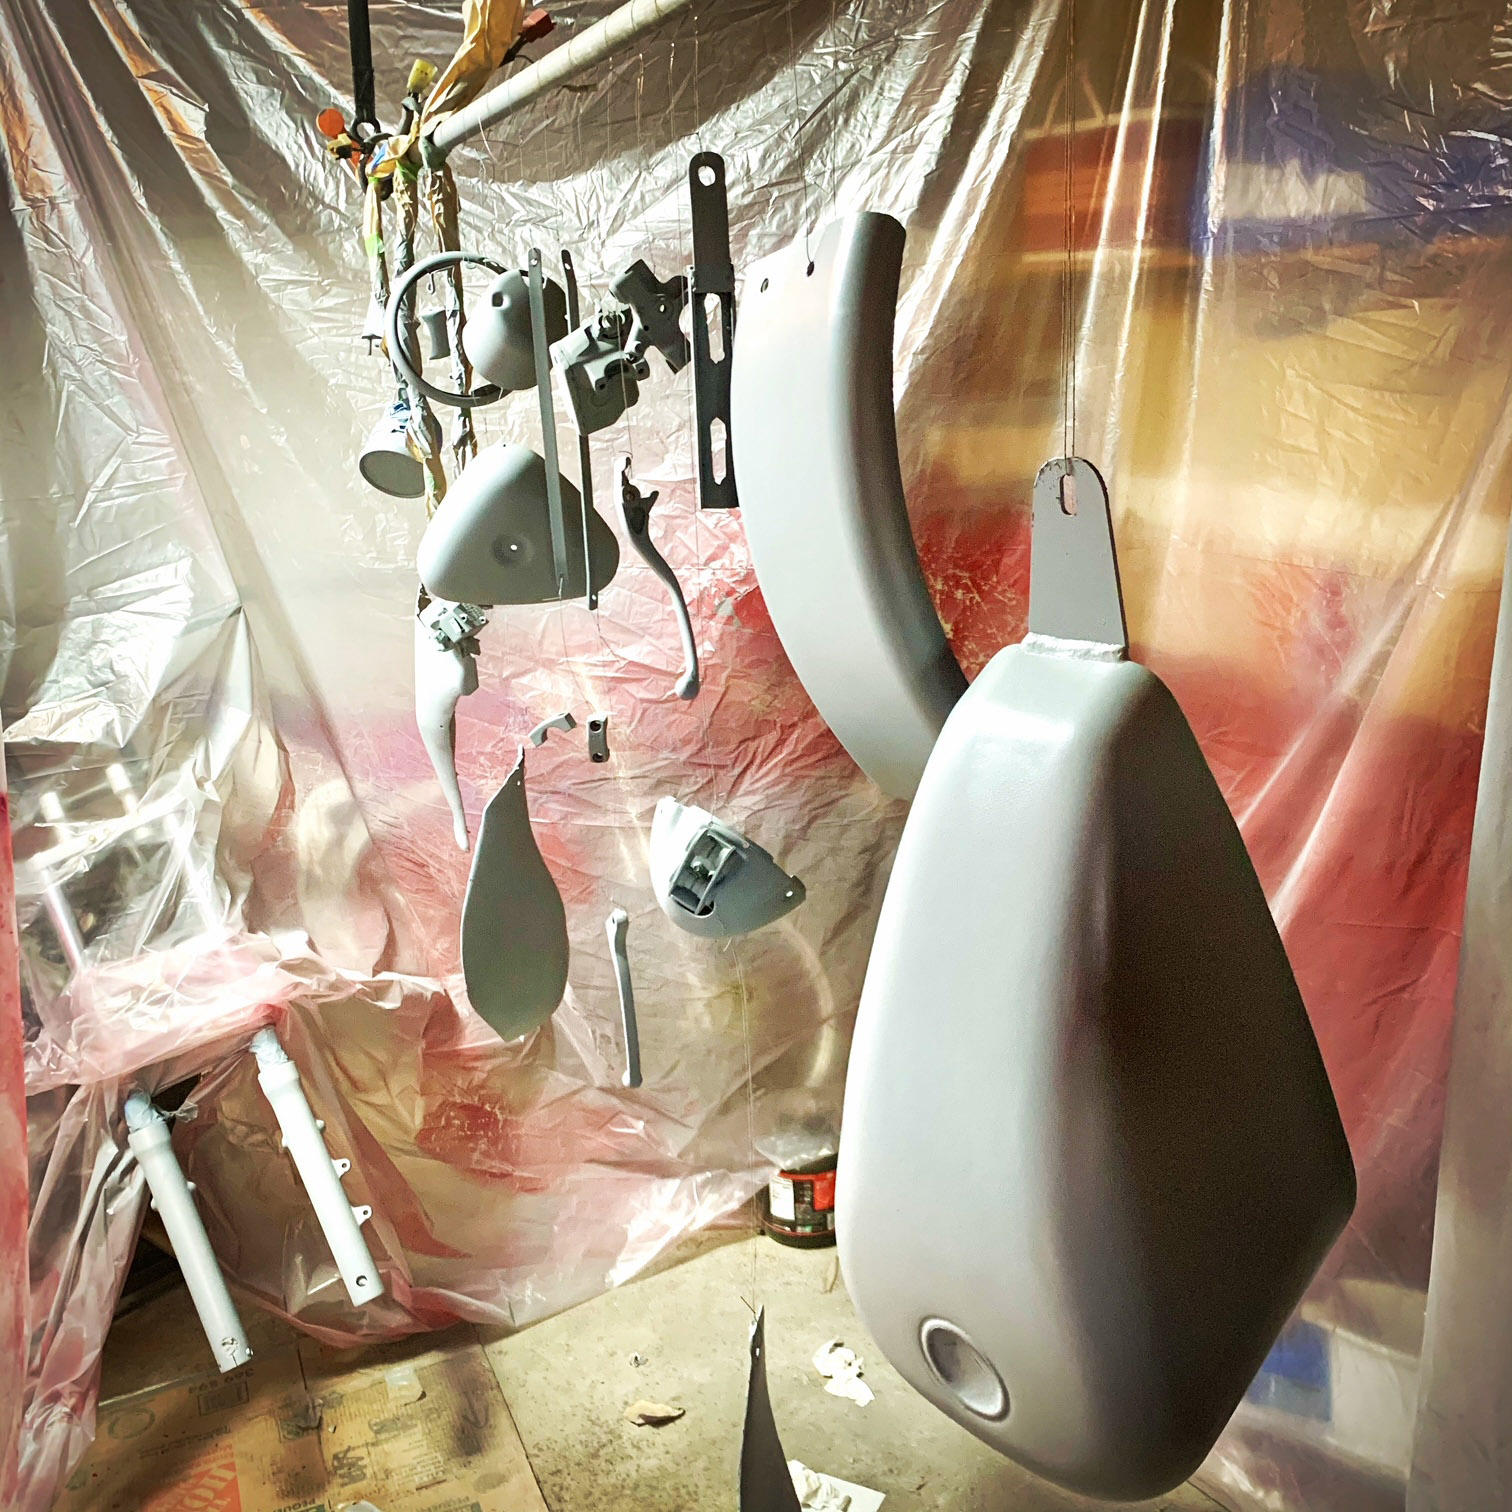

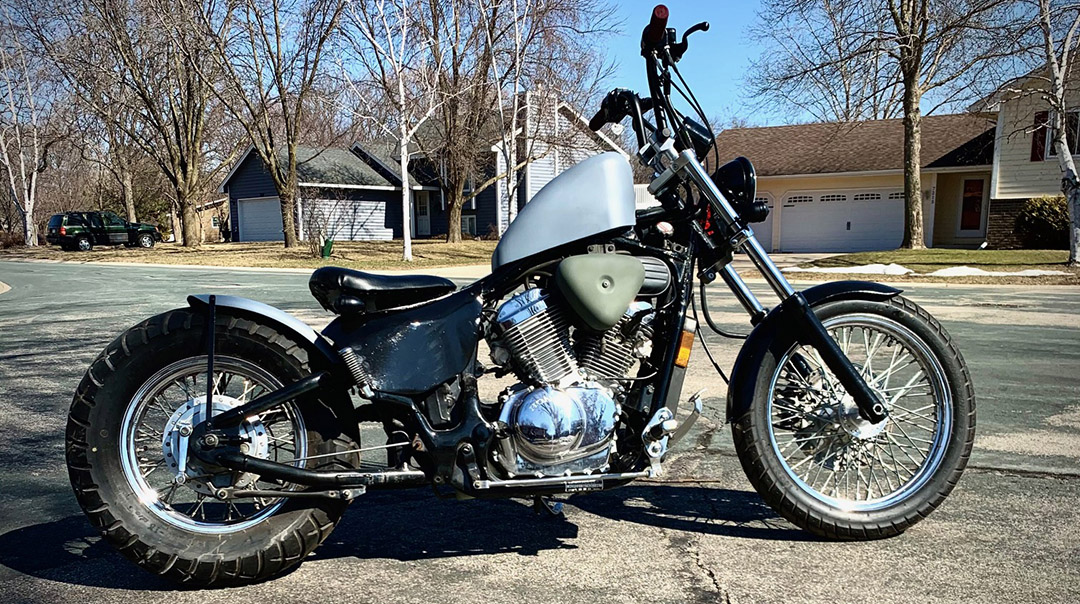
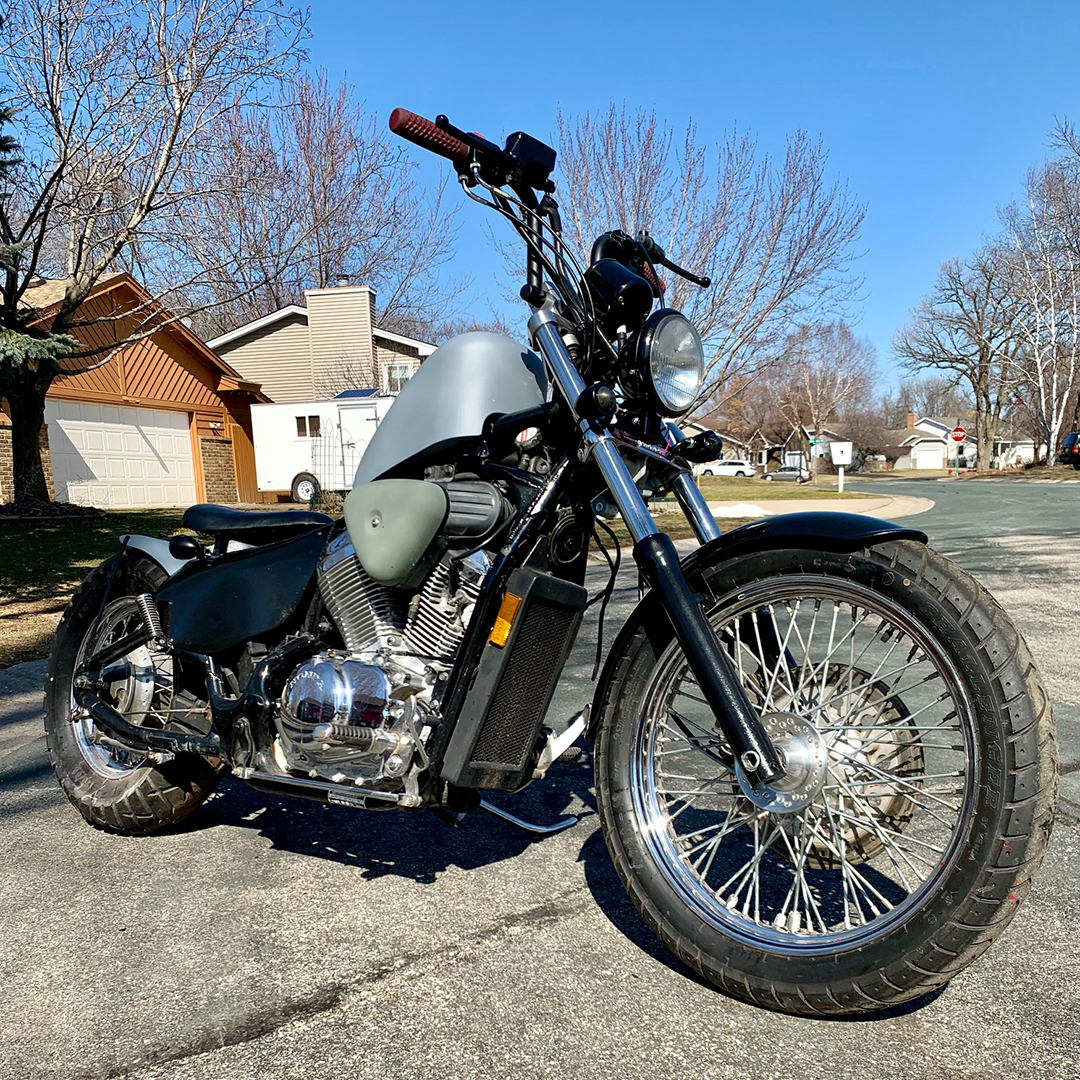
The fender, tank, and air cleaner cover were going to get separate custom paint, so these were left out of the black paint step. For the tank, I went back in and block-sanded to make sure it was smooth. Once again, however, my Bondo rush came into play and a bunch of little air pockets needed to be cleaned up. Because of this, another round of primer needed to be sprayed before the next step of painting could begin. But with that said, now that the other pieces were dry, I could actually start wiring in everything and begin most of the assembly. I also couldn’t help but throw on the tank and fender for a quick peak at the progress!


Is this bike for sale?
LikeLike
Sold it last Summer, right before I blew up the motor on my backup, backup bike lol 🤦♂️
LikeLike