When my wife and I bought our “forever” home, we knew there was quite a bit of work to be done to make it our own. We started by tackling some of the easier projects like painting rooms and updating trim and eventually moved onto buildouts. The first of those was our entryway bench. After that we did our living room to include a board and batten wall. But, the big project that always loomed from day one was the library my wife really wanted.
Connected to our kitchen was this kind of awkward space that was used as a living room / general sitting area by the previous owners. Due to the stairs and the angled fireplace, it made kind of an odd shape for practical use. We had decided that this would be the best place to put her library since we could use some of those oddly shaped areas for built-in bookcases.

The project began by first deciding on a rough plan for what my wife wanted. Actually, let’s back up a minute. It really started when my wife had to remove the old wallpaper that was throughout the house that seemed to be attached using a solid layer of super glue or something. It was awful. Ok, now back to the library… It needed to have large lower cabinets to house a printer and tons of book space above. I am not much of a cabinet builder, so instead of attempting to build them, we went to a builders outlet store and found some good kitchen cabinets that would work as the base. As luck would have it, the size was pretty much perfect for the area we needed.
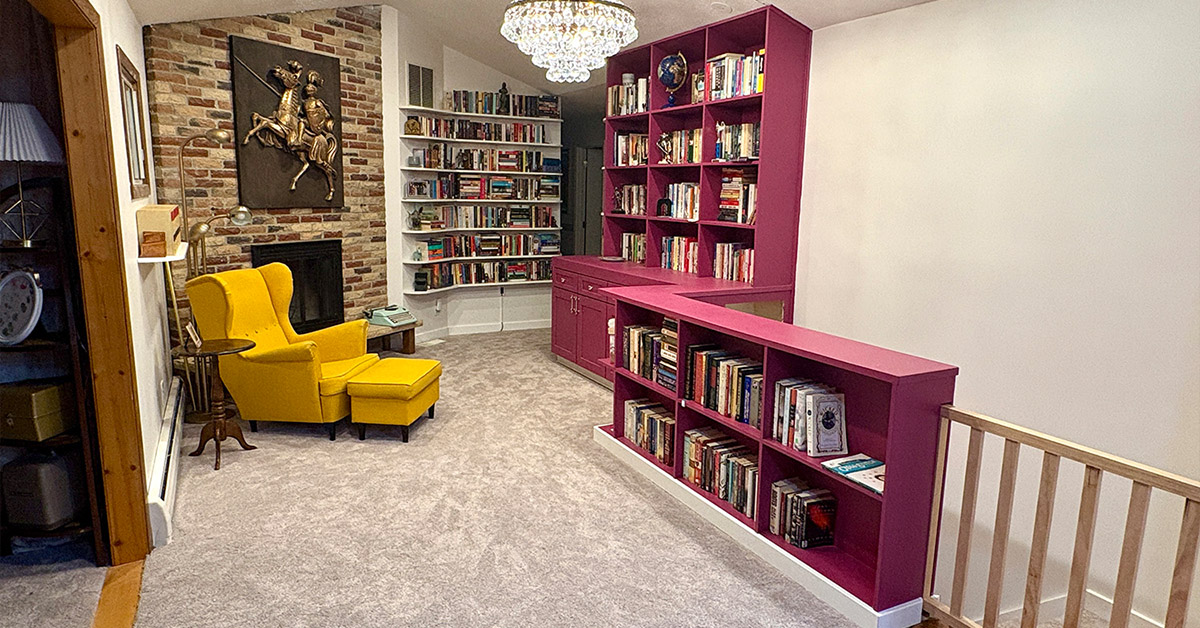
As seen in many of my other builds, I started by mocking up the design in Blender. We went back and forth a couple of times trying to decide on how many columns we should have above the cabinets as well as how they should be spaced. The end decision was to have 3 columns, spaced as evenly as possible, and balanced with the gap in the cabinets. The lower bookshelf would continue around the stairwell and replace the current railing with a solid structure that would also house a hidden gate.

The actual build started by removing the old railing around the stairwell and ripping up the carpet where the cabinets would sit. I did not remove all the carpet just yet as the eventual plan was to get new carpet, but we weren’t sure how long that would be. Once the cabinets were in place and we confirmed the size and location was going to work, it was time for a trip to Home Depot.
The nice thing about designing in blender first is that I can get pretty accurate measurements / estimates for what materials I need to pick up. It was decided that I would build the majority of the bookshelf out of plywood since it was going to be painted later.
Materials and Tools:
- 3/4 in. x 4 ft. x 8 ft. PureBond Birch Plywood
- 1/2 in. x 4 ft. x 8 ft. PureBond Birch Plywood
- 1/4 in. x 4 ft. x 8 ft Sandeply Plywood
- 2 in. x 2 in. x 8 ft. Pine Select Softwood Boards (gate)
- 1 in. x 2 in. x 6 ft. Pine Select Softwood Boards (gate)
- 1-1/2 in. Black Soft Rubber and Steel Rigid Plate Caster
- Hardboard Tempered Panel (countertop finish)
- 1/4 in. x 3/4 in. Oak Screen Molding
- 11/16 in. x 3-1/2 in. Primed MDF Casing (baseboard trim & counter edge)
- SKIL 15 Amp 7-1/4 Inch Magnesium Left Blade Sidewinder Circular Saw Skilsaw
- SKIL 6 Amp Corded Jig Saw
- Cutting Guide with joiner bar
- BANKS 18 Gauge Brad Air Nailer
- Titebond Original Wood Glue
- 1/4 x 1-1/4 inch Fluted Wood Dowels
- Blue Angled Drill Guide Jig with 4 Bits


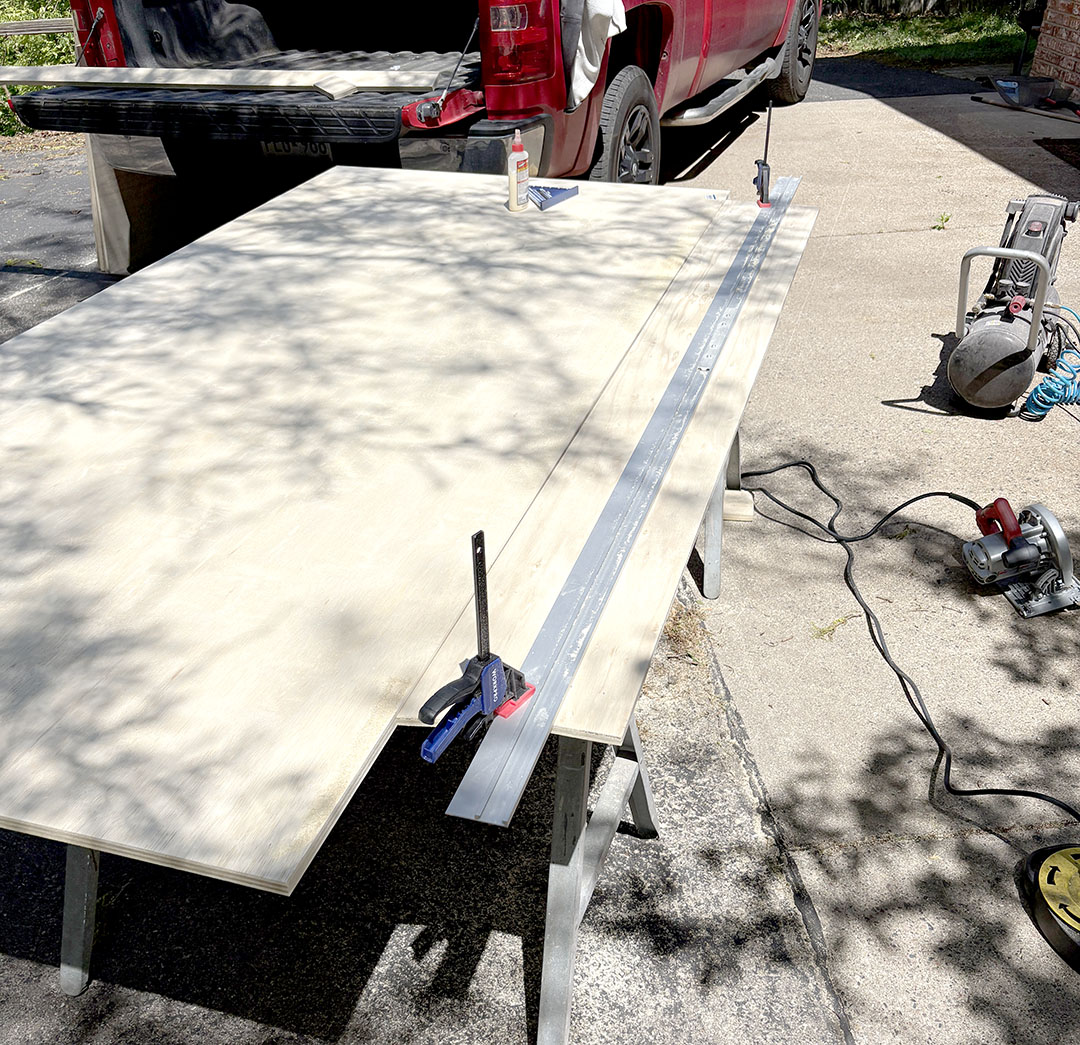
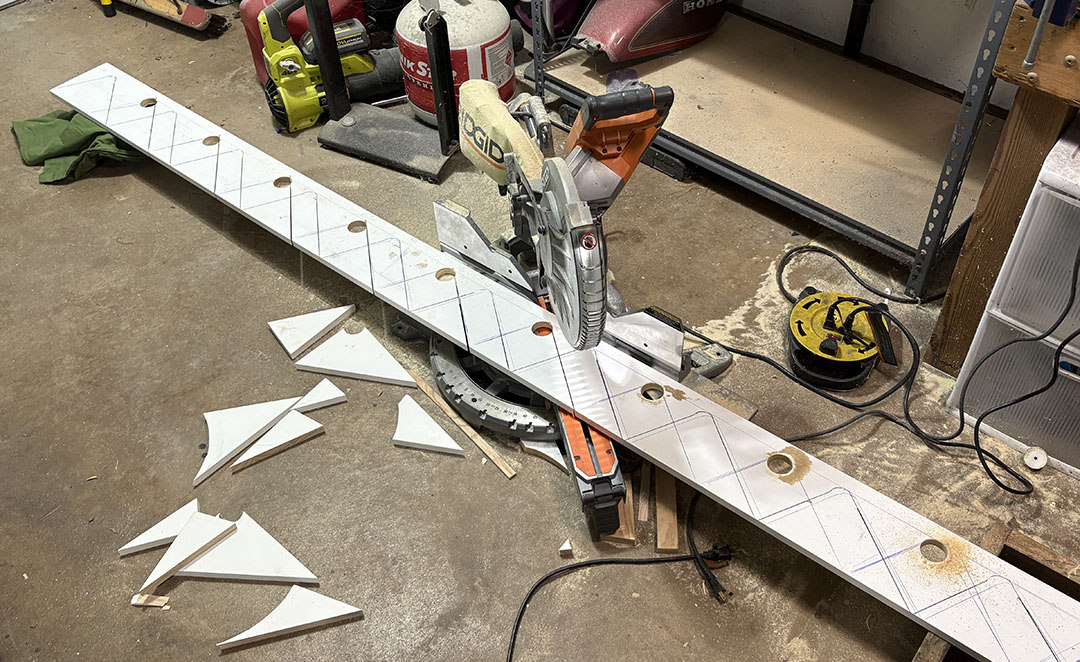
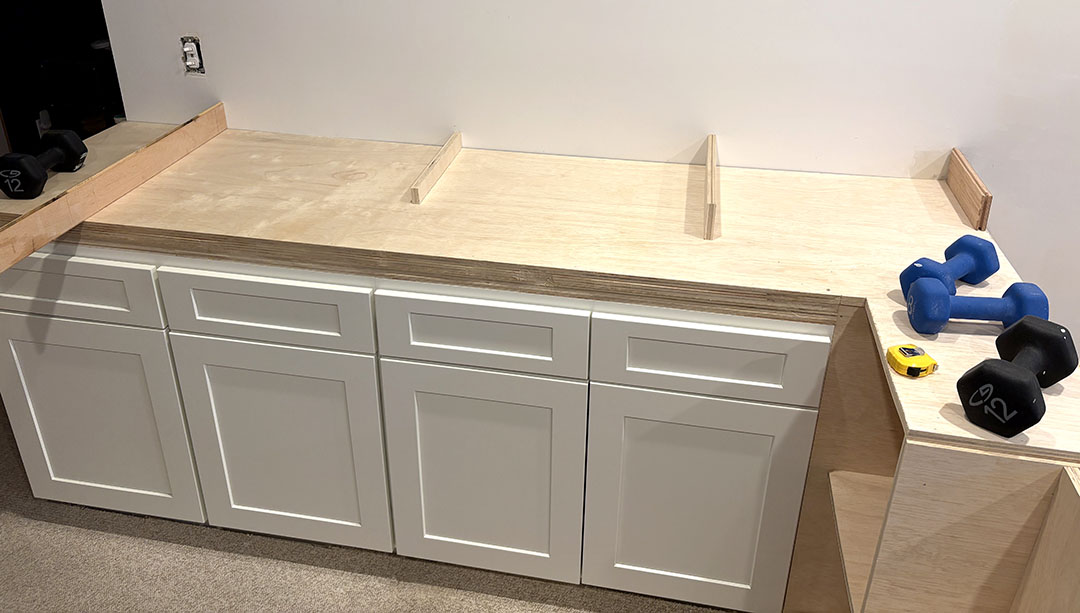
Using ¾ plywood for the bulk of the build meant a lot of rip cuts using a circular saw. I bought a nice metal cutting guide for this purpose listed above. I started by making the lower bookshelf that would wrap the stairwell using a box configuration. The height was determined by MN regulation for a stairwell railing/wall which (from what I could tell) was between 34 in. and 38 in. I went with a 36 in. height as that seemed to be standard. Since the cabinets had a 4.5 in. toe kick height, I used that same measurement for the bookshelf so that I could run the trim perfectly throughout once complete.
A ¾ plywood backer was cut to size and then the main horizontal shelf added with bottom support columns. They were secured into place using wood glue and 18 ga. brad nails. The main end support column was then added using ¼ in. dowel pins for strength. At this point I think it is worth noting that I did all of these cuts with a circular saw rather than busting out my miter saw. That…was a mistake when it came to cutting the support columns. As much as I thought I was perfectly straight, my cuts were off just a bit which made for a non-perfect fitment to the shelves. They were close enough to work, but if I had to do it over again, I would have taken a bit more time with that portion. Since this bookcase was going to house a hidden gate, I added a 2.5 in pocket to the backside with a center support at (I believe) 33” which was the same width as the opening to the stairway. This was then capped with a ½ in. piece of plywood.


At this point I wanted to add the countertop to the cabinets. I decided I was just going to do a doubled up ¾ plywood top and finish it with a MDF surface. The original cabinets were at a height of 33 in. which meant I needed to add a total of 3 in. to the top to match the lower bookcase height. I cut strips of plywood and stacked them around the edges for the first 1.5 in. with the double stack top making up the rest. This actually ended up working better than I thought and came out great with minimal adjustment needed.


As I worked my way around the corner from the bookshelf to the cabinets, I ran into my first real hiccup. When I did my measurements for the top of the bookshelf, I think my tape measure must have been sitting on either some old glue or track strip because the height of the bookcase ended up being about ⅛ to ¼ inch higher than the height of the countertop. I was able to sand it down a bit and at least get it close enough that when I laid down the MDF finish top, it was hardly noticeable. It would, however, cause some other issues later on when I moved to the top bookcase.
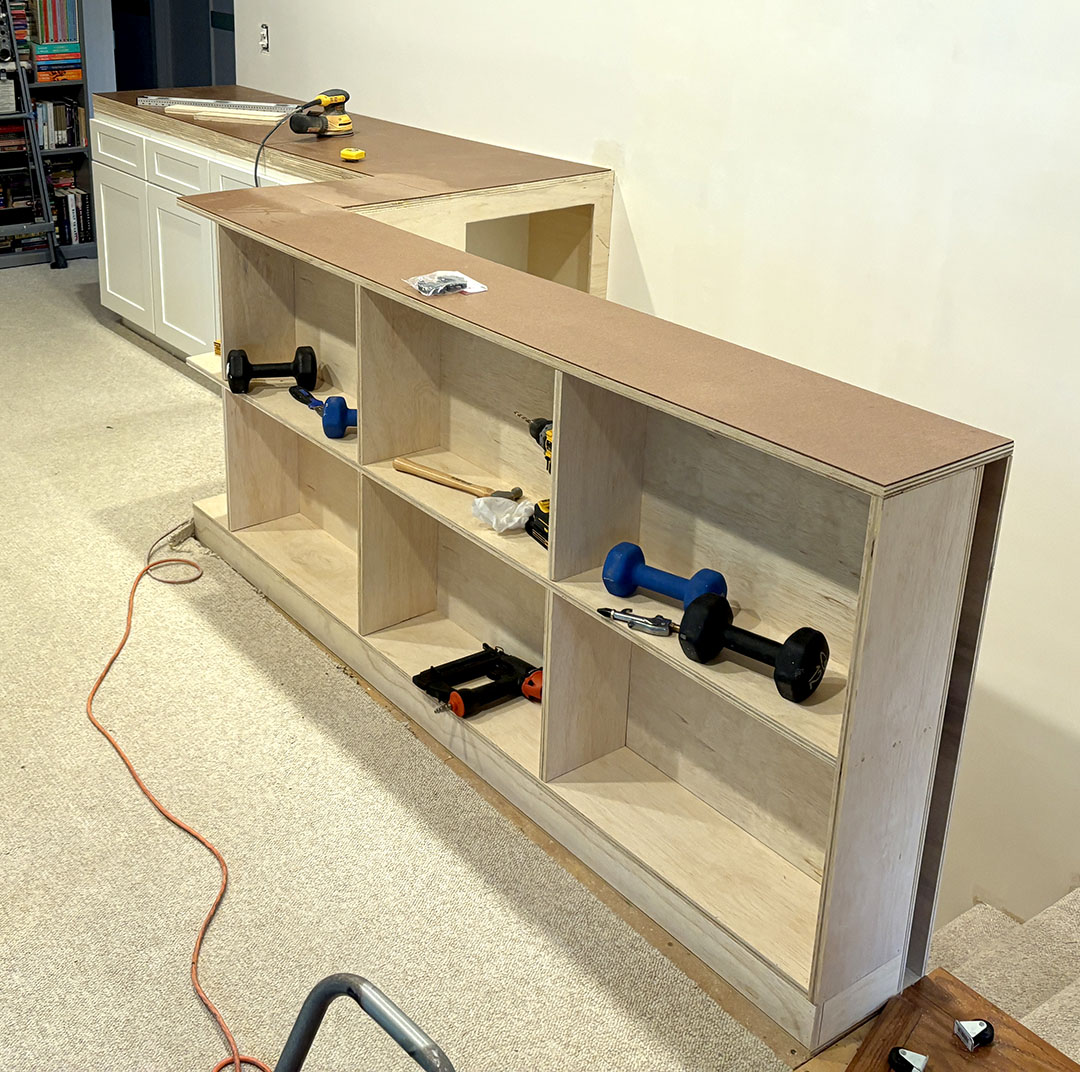
The top bookcase is where the grand majority of my headaches came into play. For one, I had to figure out the best way to match the angle of our vaulted ceiling. I was able to align some boards and make a few measurement lines to get as close as possible, but the popcorn ceiling and uneven drywall made for some difficulty. Rather than try and build the case directly to the drywall, I decided to use a ¼ in. plywood backer. The case would be cut and assembled in my driveway, and then I would move the whole thing as one piece into position above the cabinets.
While in theory this was a great idea, there were a couple of downsides. Let’s start with the use of the ¼ in. plywood. The brad nails I was using to secure the shelf went straight through it, offering very little in the way of holding power. This caused the shelves to move around while glueing, creating a lot of frustration and some choice words. I eventually got that figured out and was able to install the end columns using the ¼ in. dowel pins.

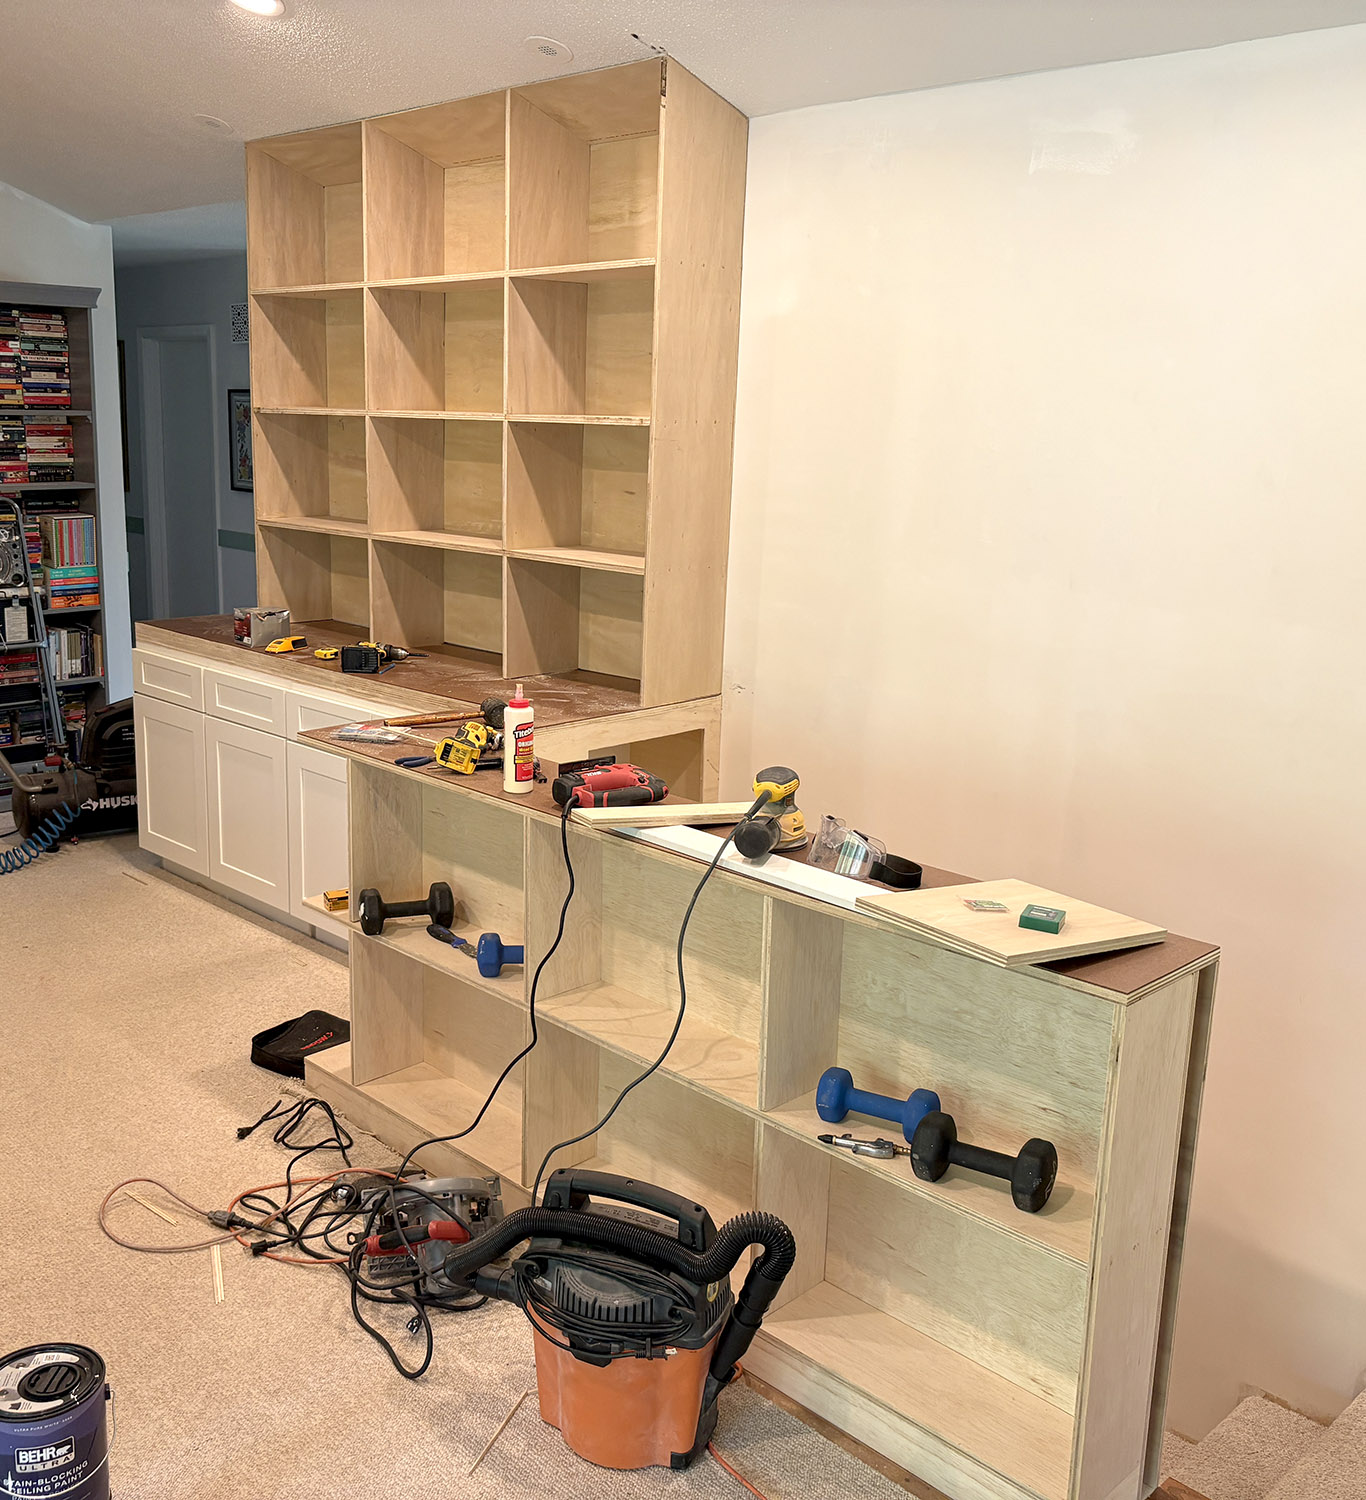
Now, remember how I said that uneven countertops would create some issues? Well, I forgot to take that into account with the right side column so it ended up being slightly too large to fit into place. I was able to cut, chisel, and sand to get the whole thing to eventually align, but it was an unneeded headache. Once I was able to get it to fit, I could then add the vertical supports. This time I DID use the miter saw for the columns, so they fit much better than the lower bookshelf. There were still some gaps along the bottom that I had to fix due to that countertop issue, but overall, they fit well.
I then turned my attention to the gate. Following MN standards, the gaps in the gate spindles had to be less than 4 in. This meant I needed 6 spindles plus outer frame for the correct layout using 1 in. x 2 in. spindles. I started by cutting the spindles and 2 in. x 2 in. pine boards for the frame to length. From there, I drilled holes in the end of each spindle as well as into the frame boards for the ¼ in. dowel pins to sit. These were then all glued into place and then the whole assembly was clamped together. 1 ½ in. diameter rigid caster wheels were then attached to the bottom. For the latch on the gate, I ended up fabricating a makeshift bracket out of some raw steel I had laying around. It was just a matter of bending each piece into shape and drilling some holes for mounting.


At this point, the build was finally complete and ready for paint. We went back and forth on colors A LOT. I didn’t want it to be super girly, but I also didn’t want it to be something she wasn’t in love with. We ended up on this nice raspberry color that was bold but also not overpowering. The corner shelves were also added at this point. Trim was then installed along the base. (we still haven’t painted the gate…OOPS!).


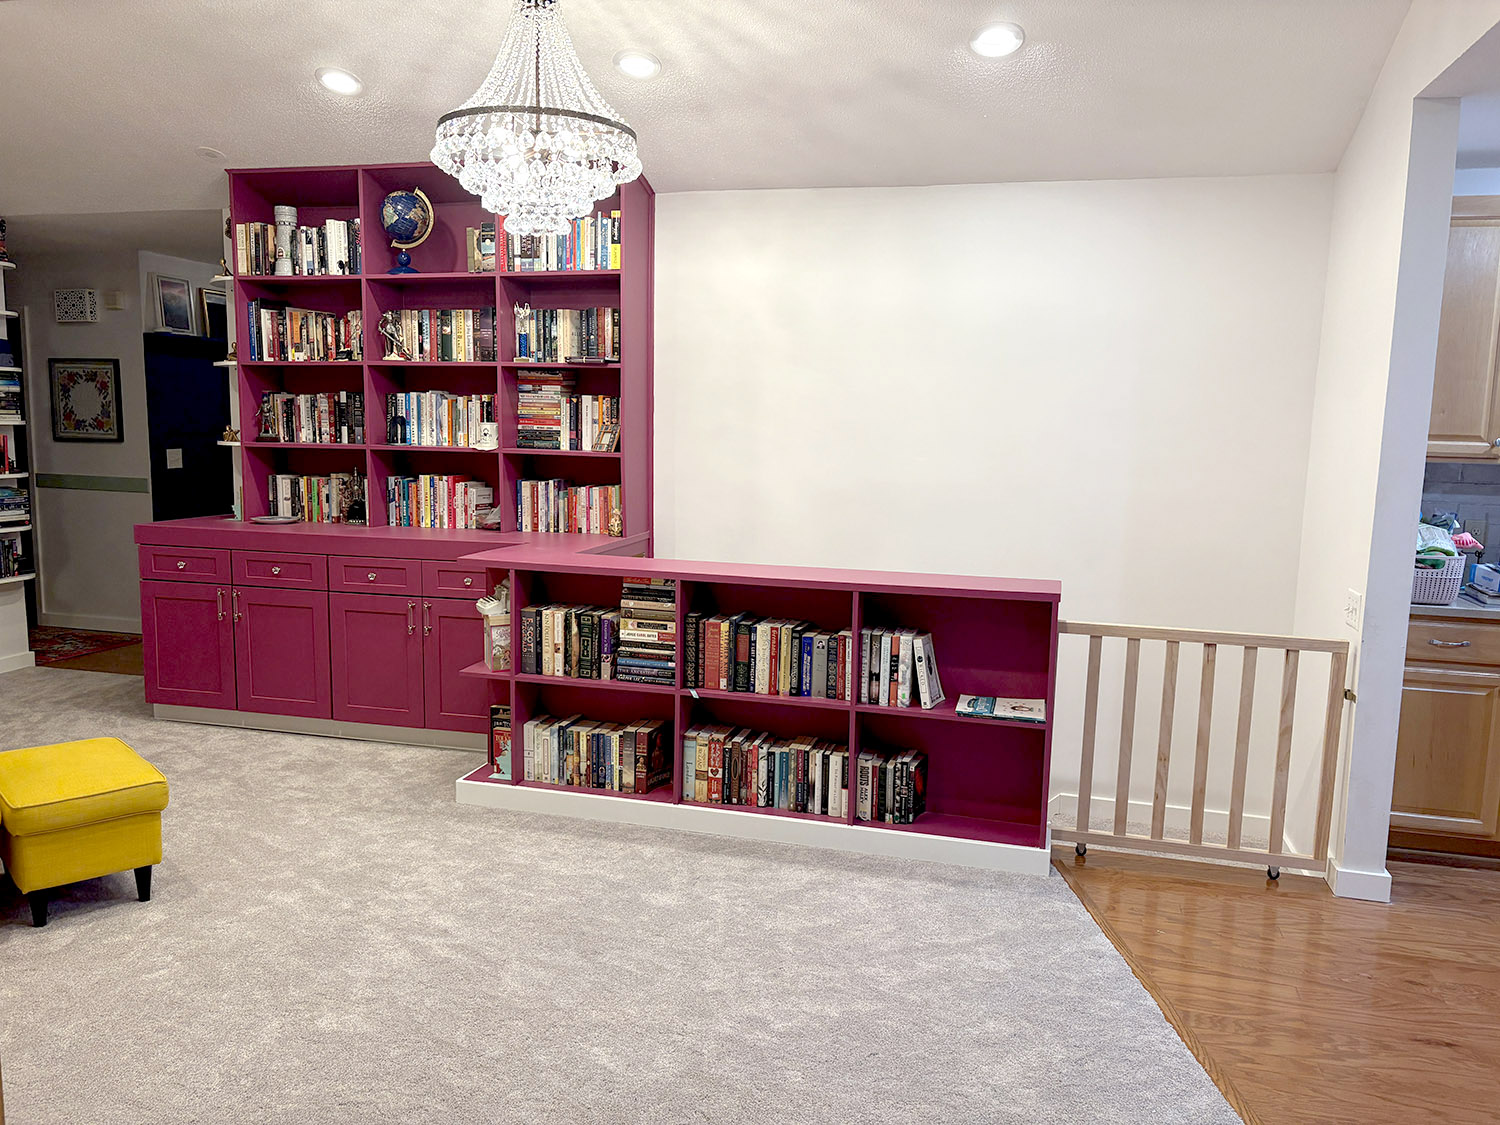

To cap off the library build, my wife also wanted to add some wall shelves for more book storage. I also attempted to tackle doing kickboard trim to the stairwell AFTER the carpet had already been installed. Pretty big mistake, but I was able to get it to mostly work after gluing some shims into place and using caulk to cover it up. Is it perfect? No. But it’s better than nothing.