
Let me just start off by saying the seat itself turned out to be one of the longer portions of a bike-build even though it required less heavy tools. There is A LOT that goes into a custom seat, especially when it’s not your specialty. That’s why it’s getting a full post to itself.


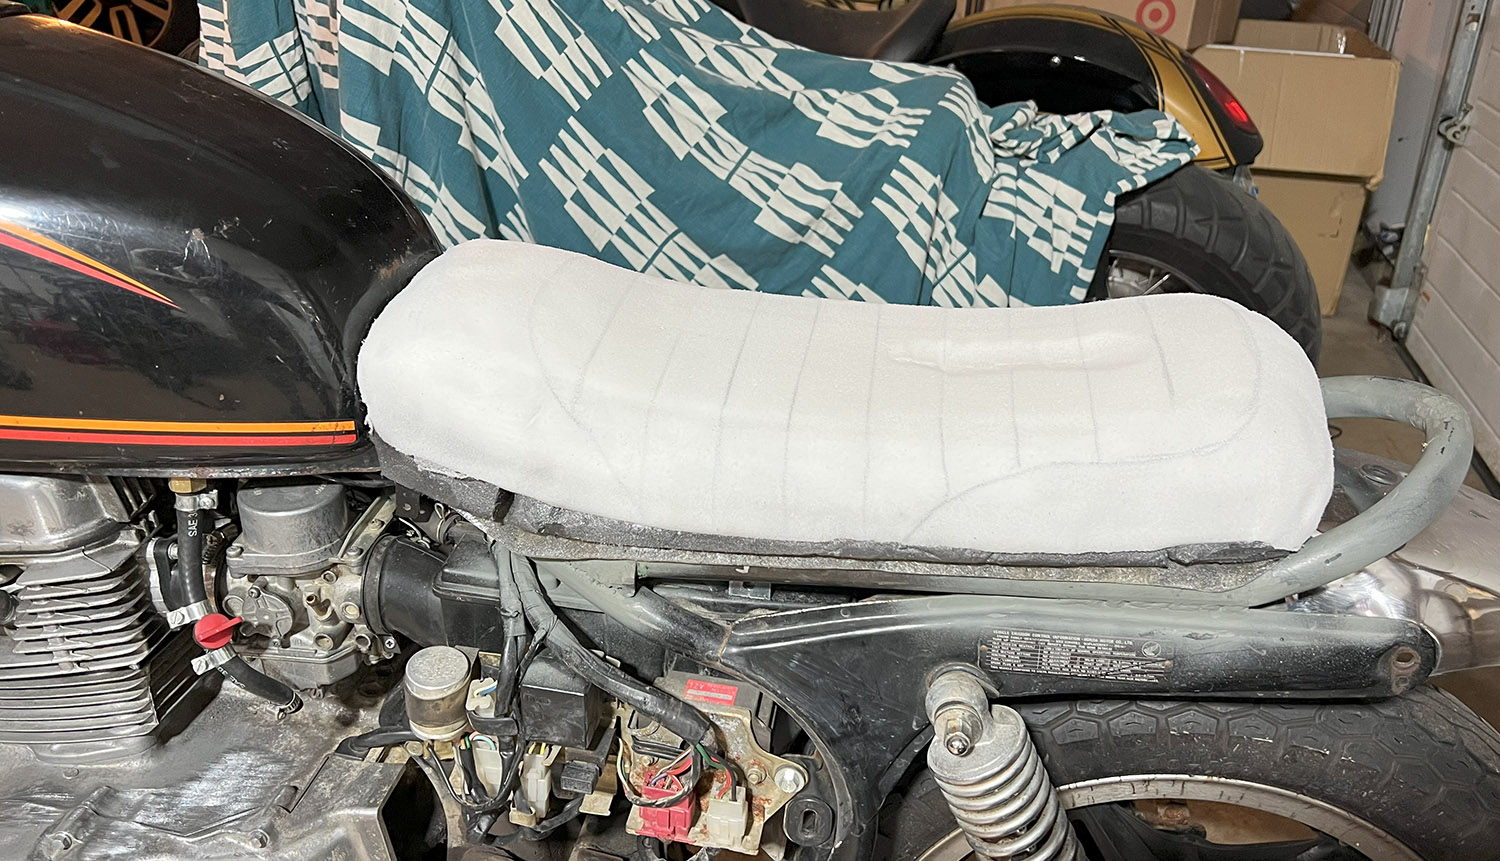
With the seat pan and mounts completed, I could start on the foam for the seat. I initially went with some high-density upholstery foam I got on amazon. I went through the whole process of applying it and shaping it only to realize it was not nearly supportive enough. This was especially true for the type of riding this bike was meant for. I ended up tearing it all off and starting over. Much of the process will be shown with the original incorrect white foam. After some deeper research, I found that people use something called “rebonded foam”. This is recycled foam that is then glued together in a dense, yet flexible state. It was honestly pretty hard to find a place to buy it as a regular consumer, but I went with this Multi/Rebonded-Mixed Foam.
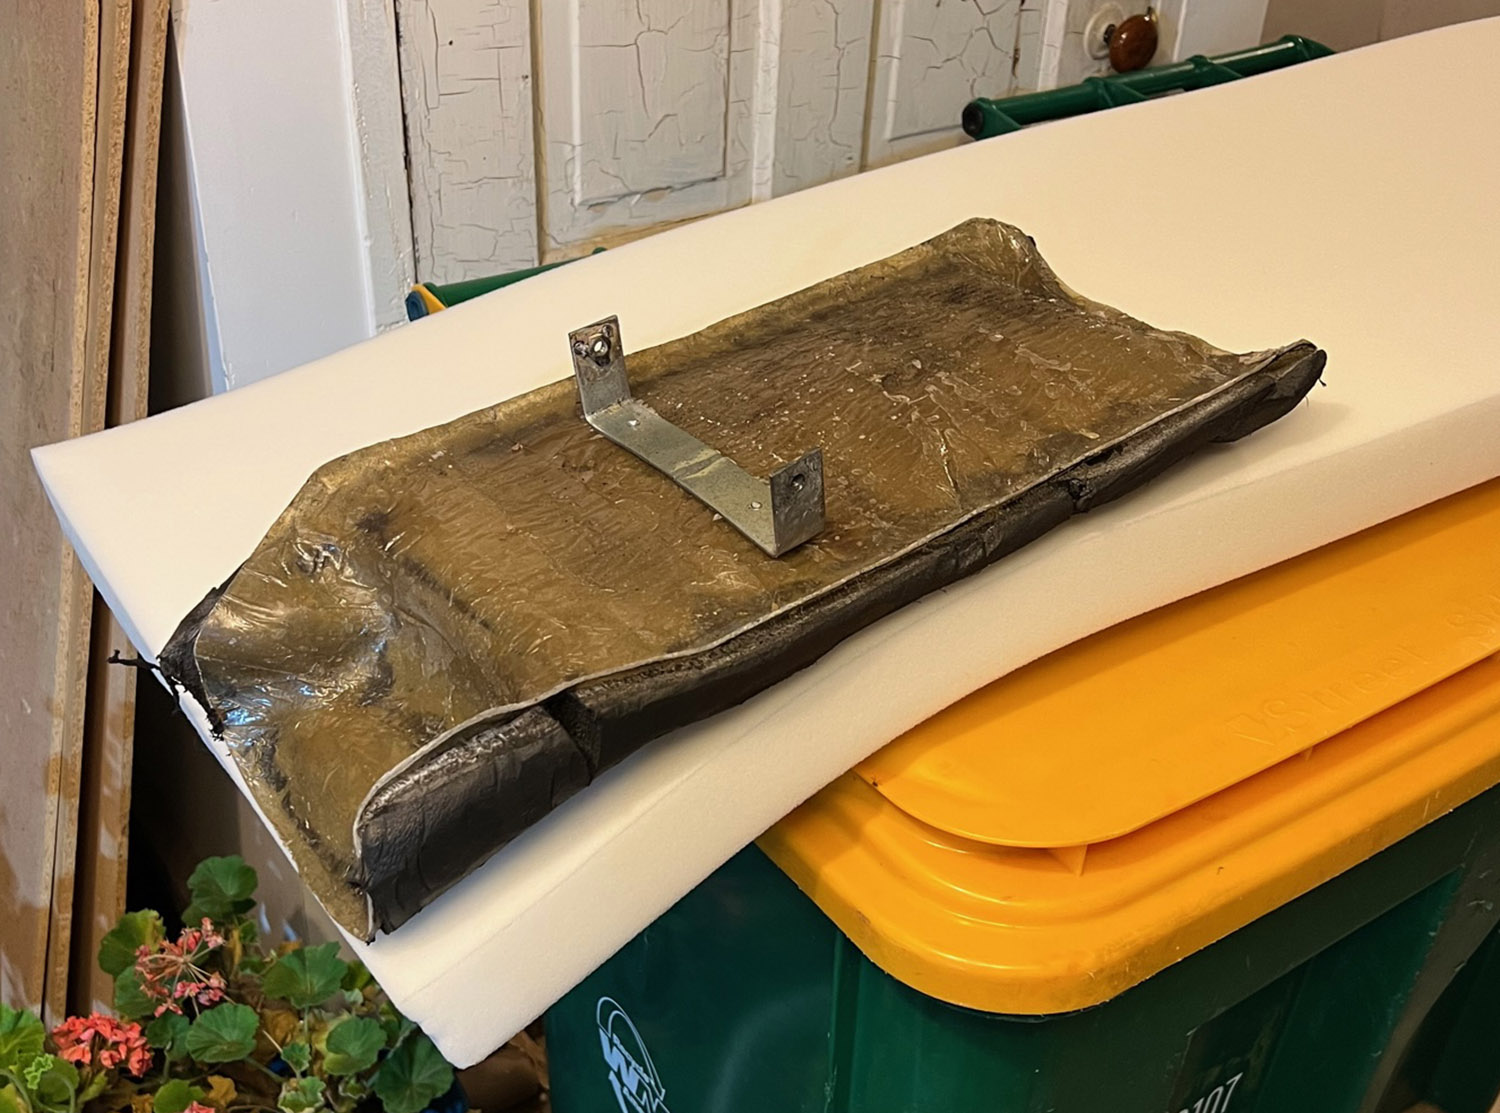


I started by spraying the seat pan with 3M Super 77 Multipurpose Spray Adhesive. Next came a layer of super high density foam (I got this a long time ago and can’t recall exactly what it is). It’s basically just there to make sure on those really heavy hits, you don’t feel any of the bolts and brackets. On top of that went the rebonded foam. Those layers were then ground down / sculpted to the final shape using a combination of an electric knife (such as the one HERE) and an angle grinder. Once that was done, a final layer of 1/2 in Pink Sew Foam Scrim Cloth was glued over the top.


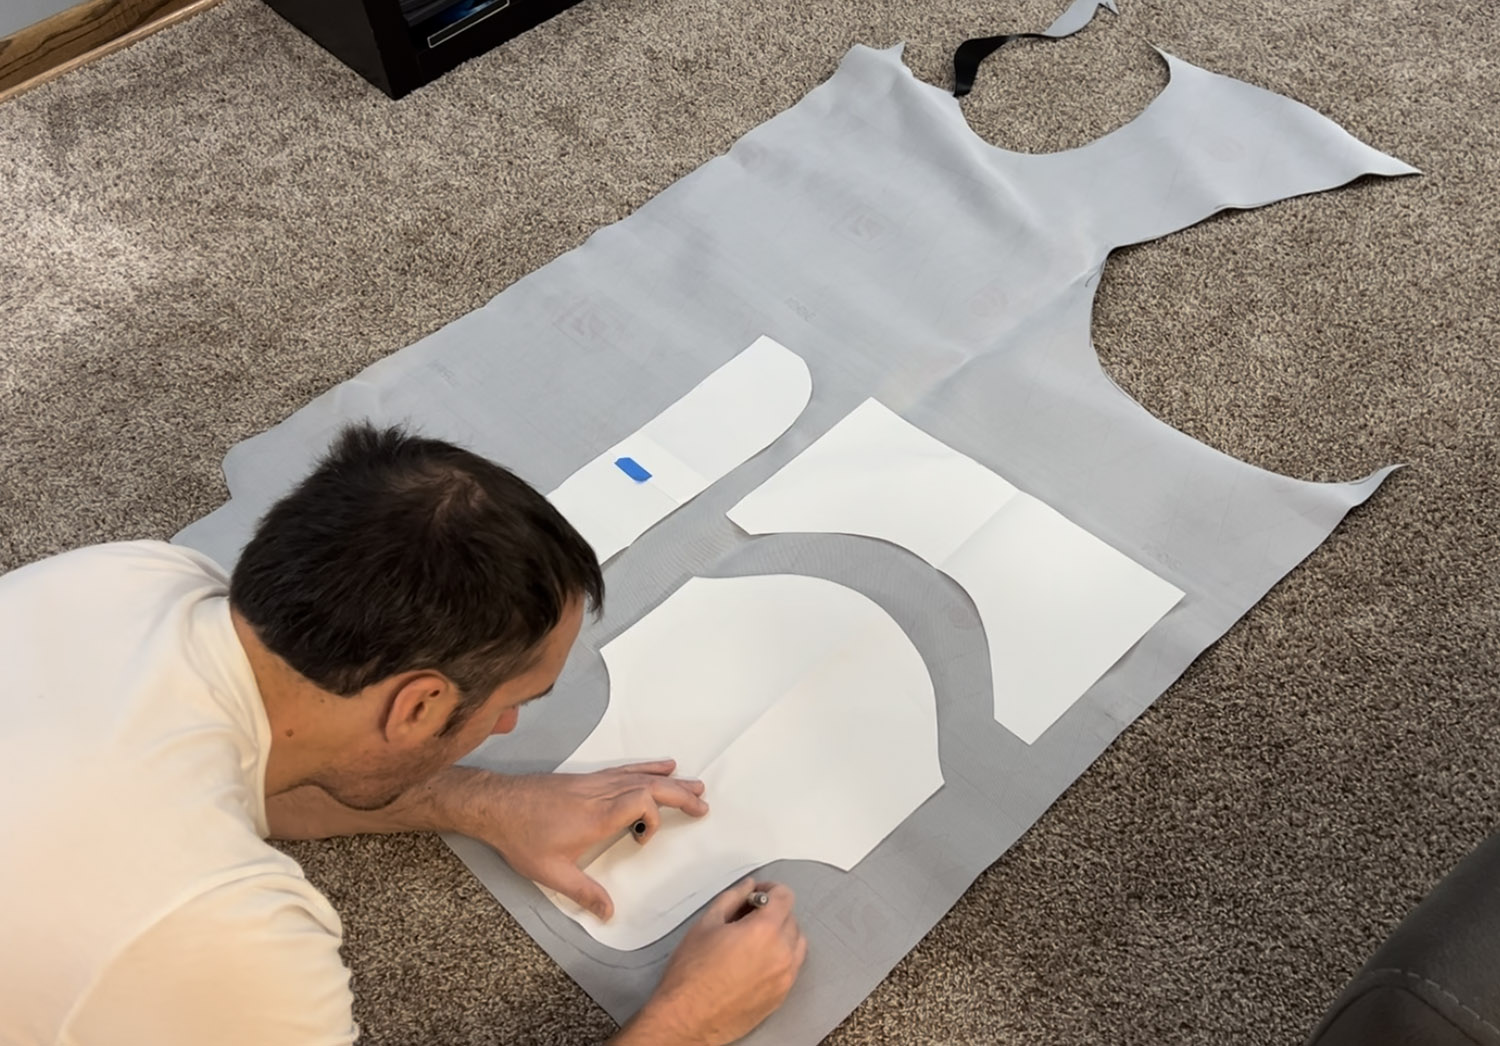
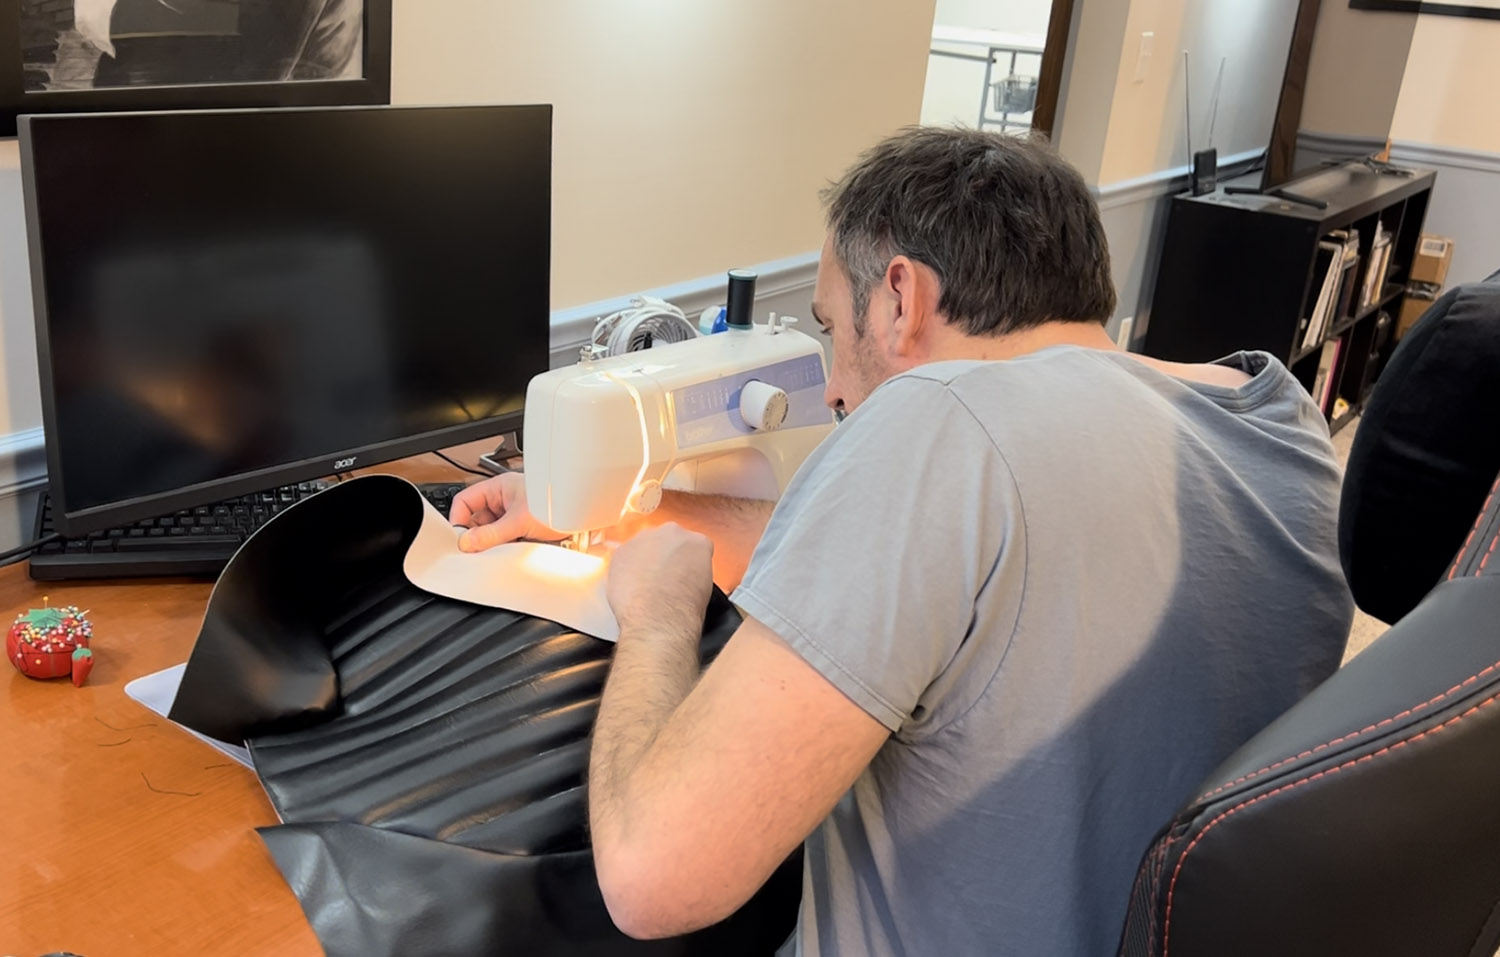
I bought the scrim for use in the next part of the seat fabrication which was the pleated seat cover. Before getting to that step, I first made paper templates for how I wanted the seat cover to look. I am not an upholsterer, so this whole part of the build probably gave me the most anxiety. In order to get those cool looking pleats into the seat, you have to sew the scrim to the marine vinyl. In this case, I used marine vinyl I had left over from the Shadow Bobber. The same spray adhesive was used to hold the scrim in place and then 1 ½” channels were then sewn in. This step was done before the vinyl was cut to the finished size to make sure I had significant overlap and to make sure the seat cover didn’t shrink too much with the pleats.

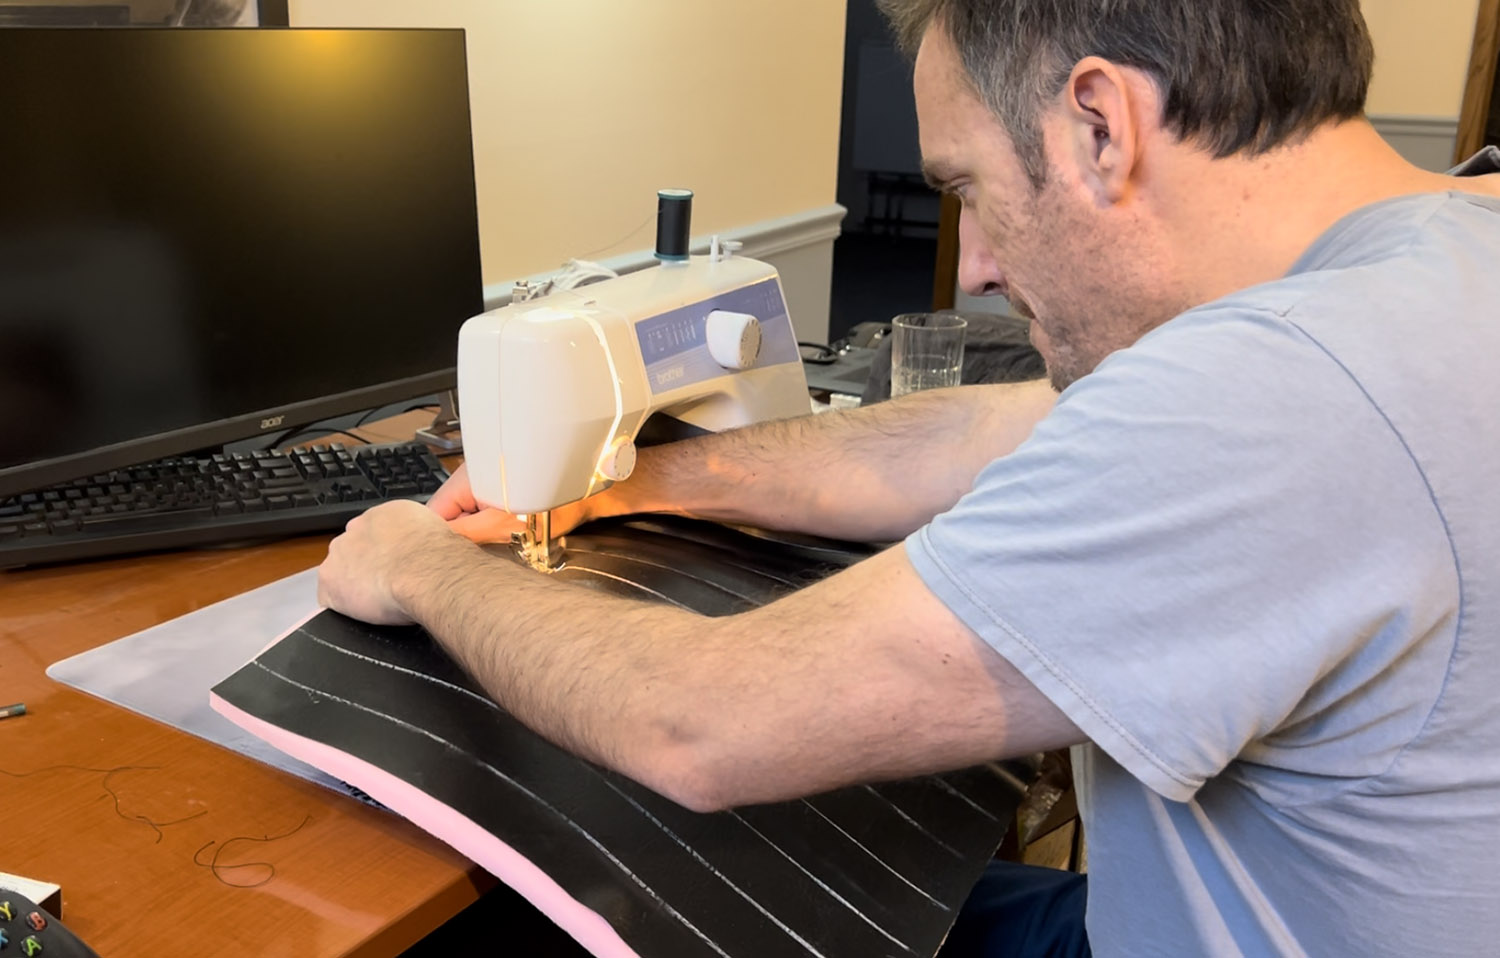
Once the pleat section was done, I could go about the process of sewing the other pieces together. I did the seat cover in 3 sections; the top pleats, the back, and the front sides. In my head, it should have been simple. The templates were made to line up easily while having a ½ inch seam allowance. The actual completion of that, however, was a LOT tougher than I had hoped for. Trying to get a nice round corner sewn into stiff vinyl material was not fun. It took a couple of passes as well as some jammed bobbins in order to get it to work. Make sure you use high-quality outdoor upholstery thread for this. You don’t want your hard work fraying because the sun ate your cheap thread.
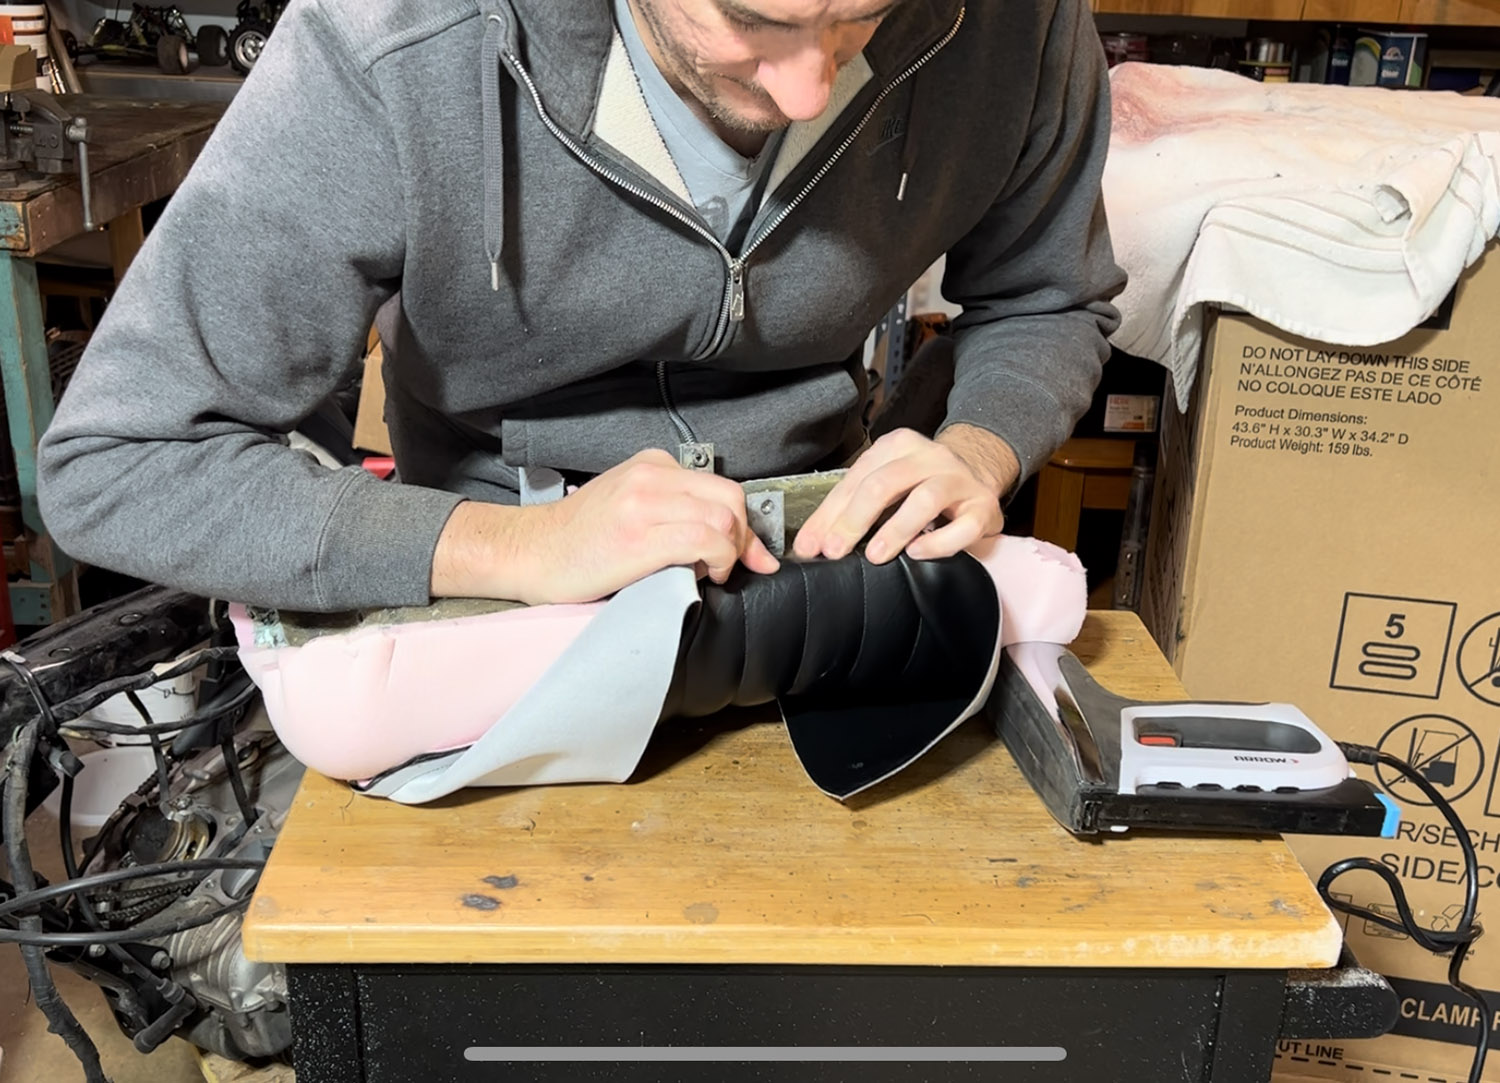
With the cover now done, it was time to attach it to the seat pan. I was under the mistaken impression that staples were used on fiberglass seat pans. Boy was I wrong. I tried over and over to shoot in ½ inch staples only to have them just bend and not penetrate at all. Turns out, those staples you see on the underside of your stock seat go into a plastic seat pan. Whoops. That meant I had to drill holes and rivet the vinyl in place. Not a big deal, but certainly a bit more of a pain in the ass. But with that, the seat was done! Let me know what you think of the completed product in the comments. What would you suggest I have done differently?

1980 Honda CM400 Scrambler Budget Build Part 1
