
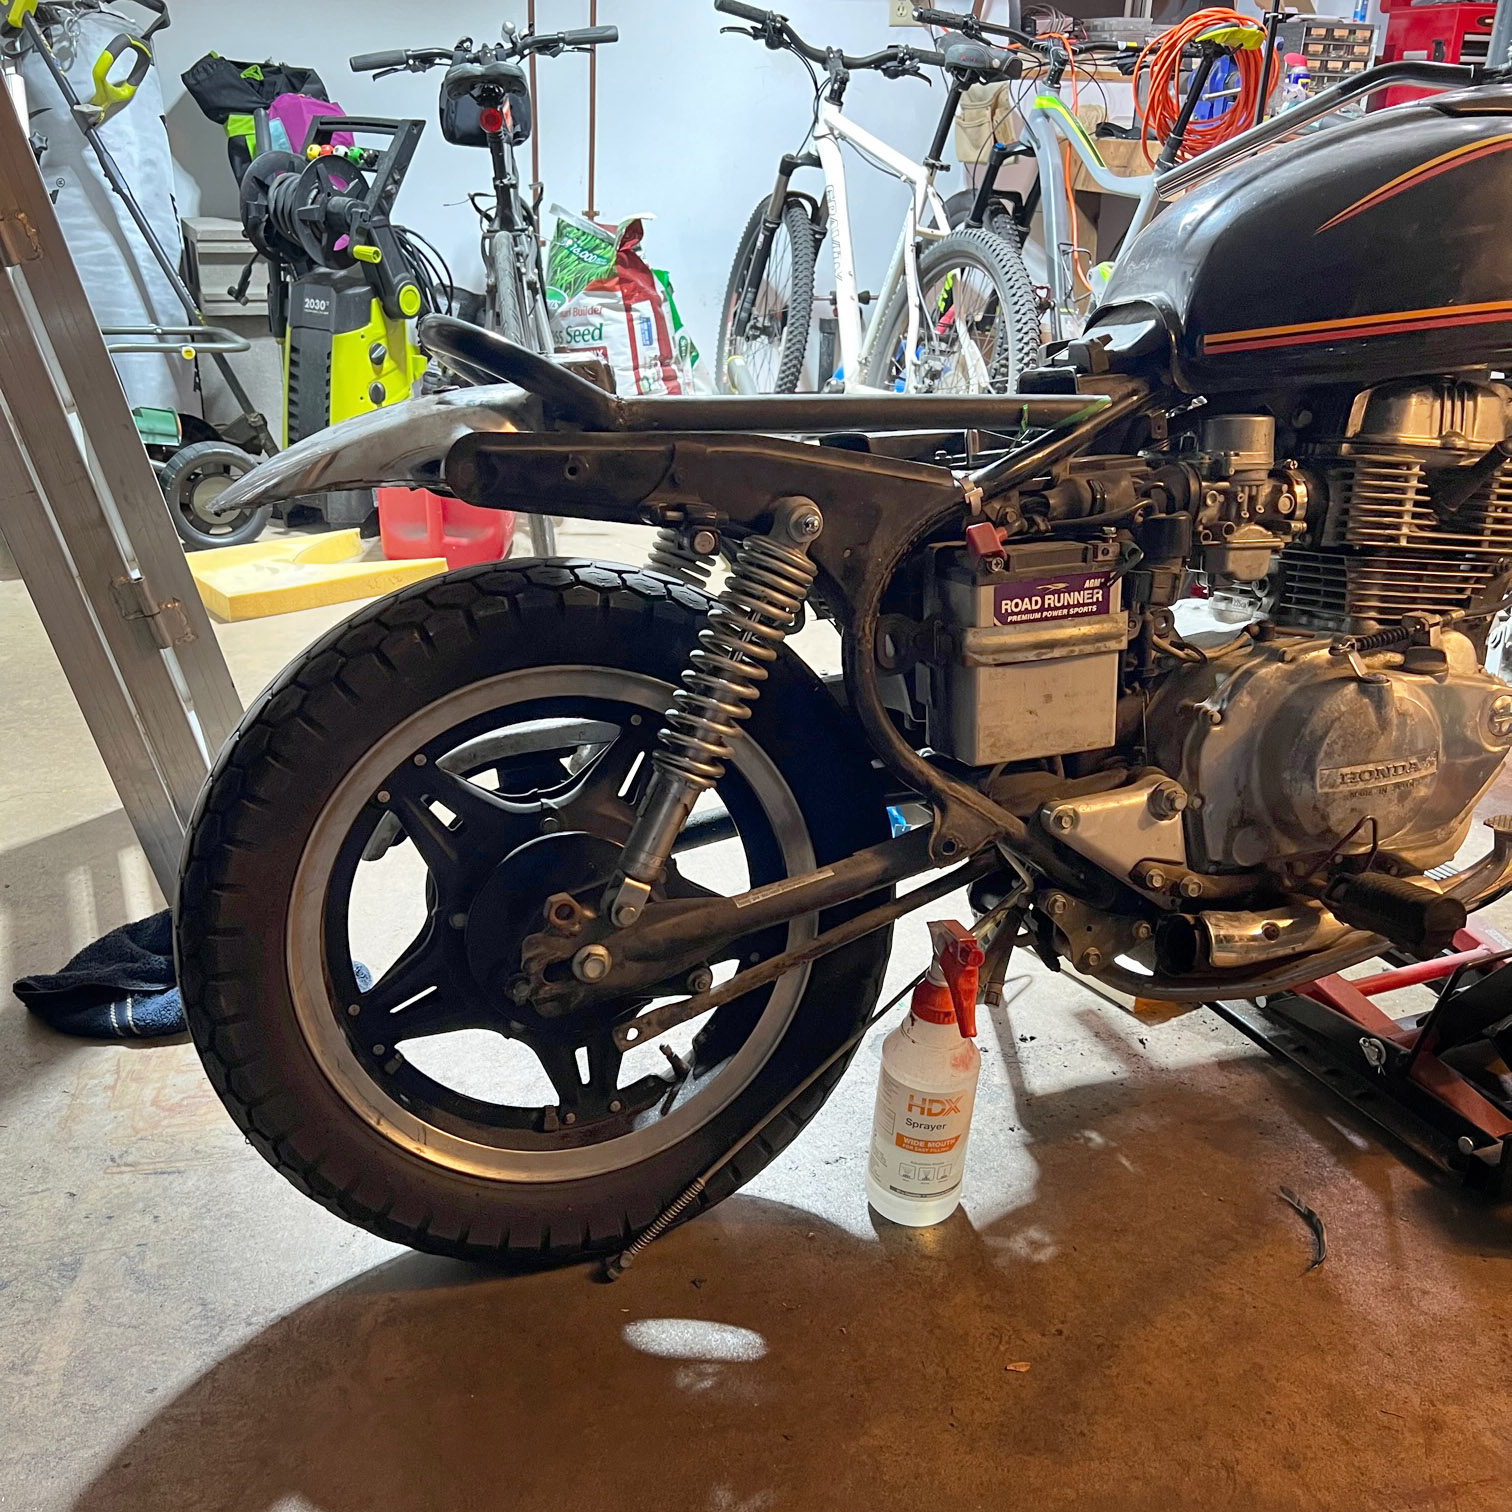
When I had left off the last blog, the rear fender had just been cut out and it was time to move onto other areas of the bike. Keeping towards the back end, the next piece I wanted to add was a new bar frame for the eventual seat as well as creating an integrated grab-bar. This was going to be one of those parts where I looked around my garage to see if I had any material that might work for what I needed. As it would turn out, I had an old piece of workout equipment that had the radius I wanted for the rear. I also had another piece of raw 1” steel to complete the rest of it. SCORE!


I started by once again pulling out the grinder and separating the piece of bar from the metal footplate on the workout equipment. After a couple of test fits, I came to the conclusion that the width was ever so slightly wider than what I needed. I took a couple of measurements, marked my cuts with masking tape, and went to work. It was simple enough to just cut out the small adjustment I needed from the middle of the bend and just weld it back together. The frame bars also took a bit of messing around with so that I could line them up with the backbone bars that met up with the tank. It required a couple of tack-weld test fits to get it right. Once the piece was complete, I could then weld it to the frame and then cut the bars to line up with the original frame bars. I then capped them with some leftover sheet metal I had laying around.


Moving forward on the bike, the front fender was the next piece to be tackled. I went back and forth on either doing a short cut-off fender that traveled with the wheel, or doing more of a motocross look with the fender being high on the forks near the triple tree and being static. I found that the high location appealed more to my tastes and also gave the bike a bit more of that off-road look that I was after.
I started by first cutting the original fender to the shape I wanted. It only required removing a bit of material from the rear of the fender. I also ground down the welds on the original mounting bracket so that it could easily be removed without much damage. From there, I had to make new mounting brackets. Instead of attaching it to the fork tubes, I decided to mount it directly to the triple tree. The front mounts used existing bolt locations while the rear mounts were welded on. It also required that I cut and grind down the handlebar lock. Those mounts then bolted to the fender so that it could still easily be removed when needed. I used some ½ inch flat bar for the mounts and bent them to the angles I needed using my table vise and a rubber mallet.

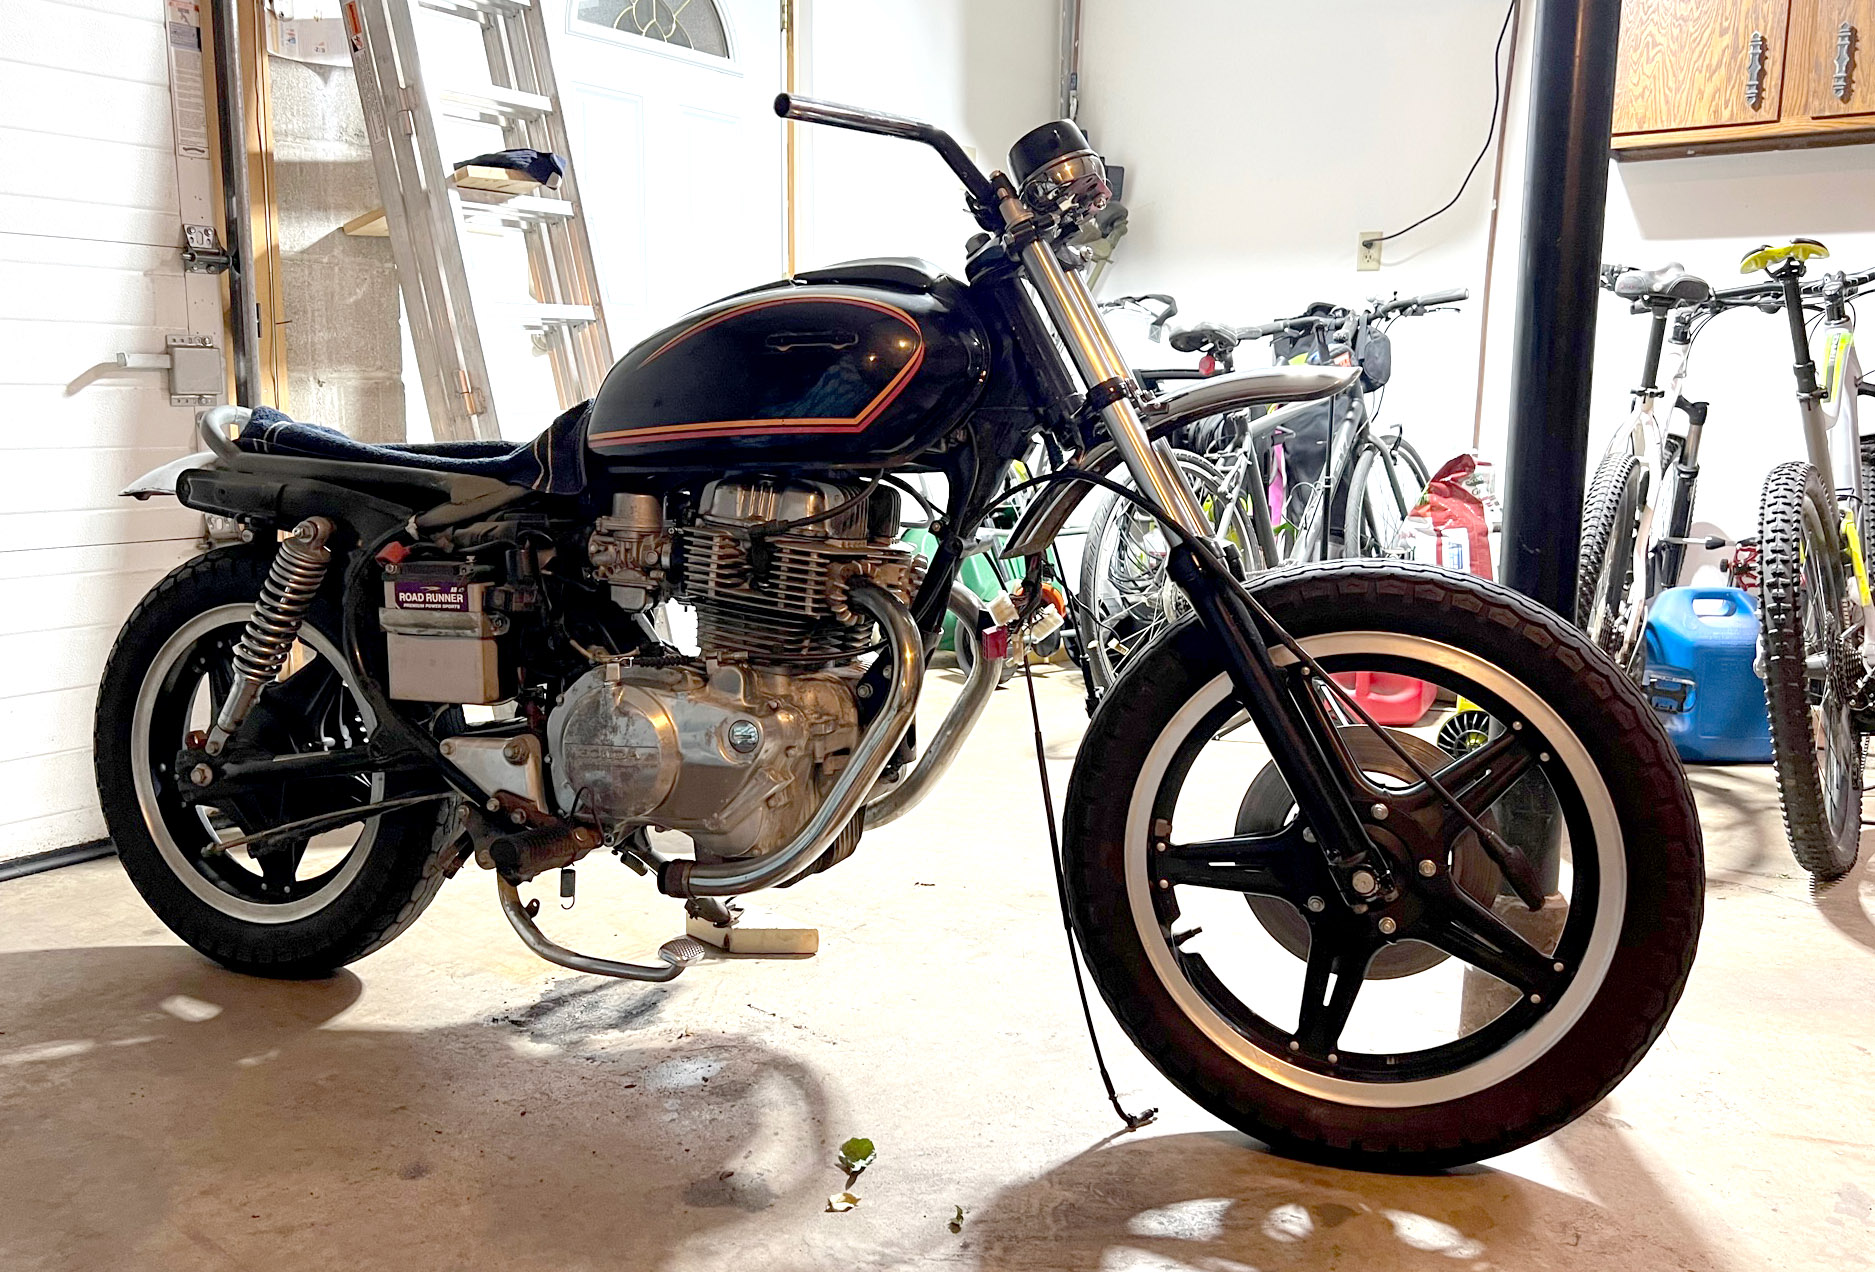
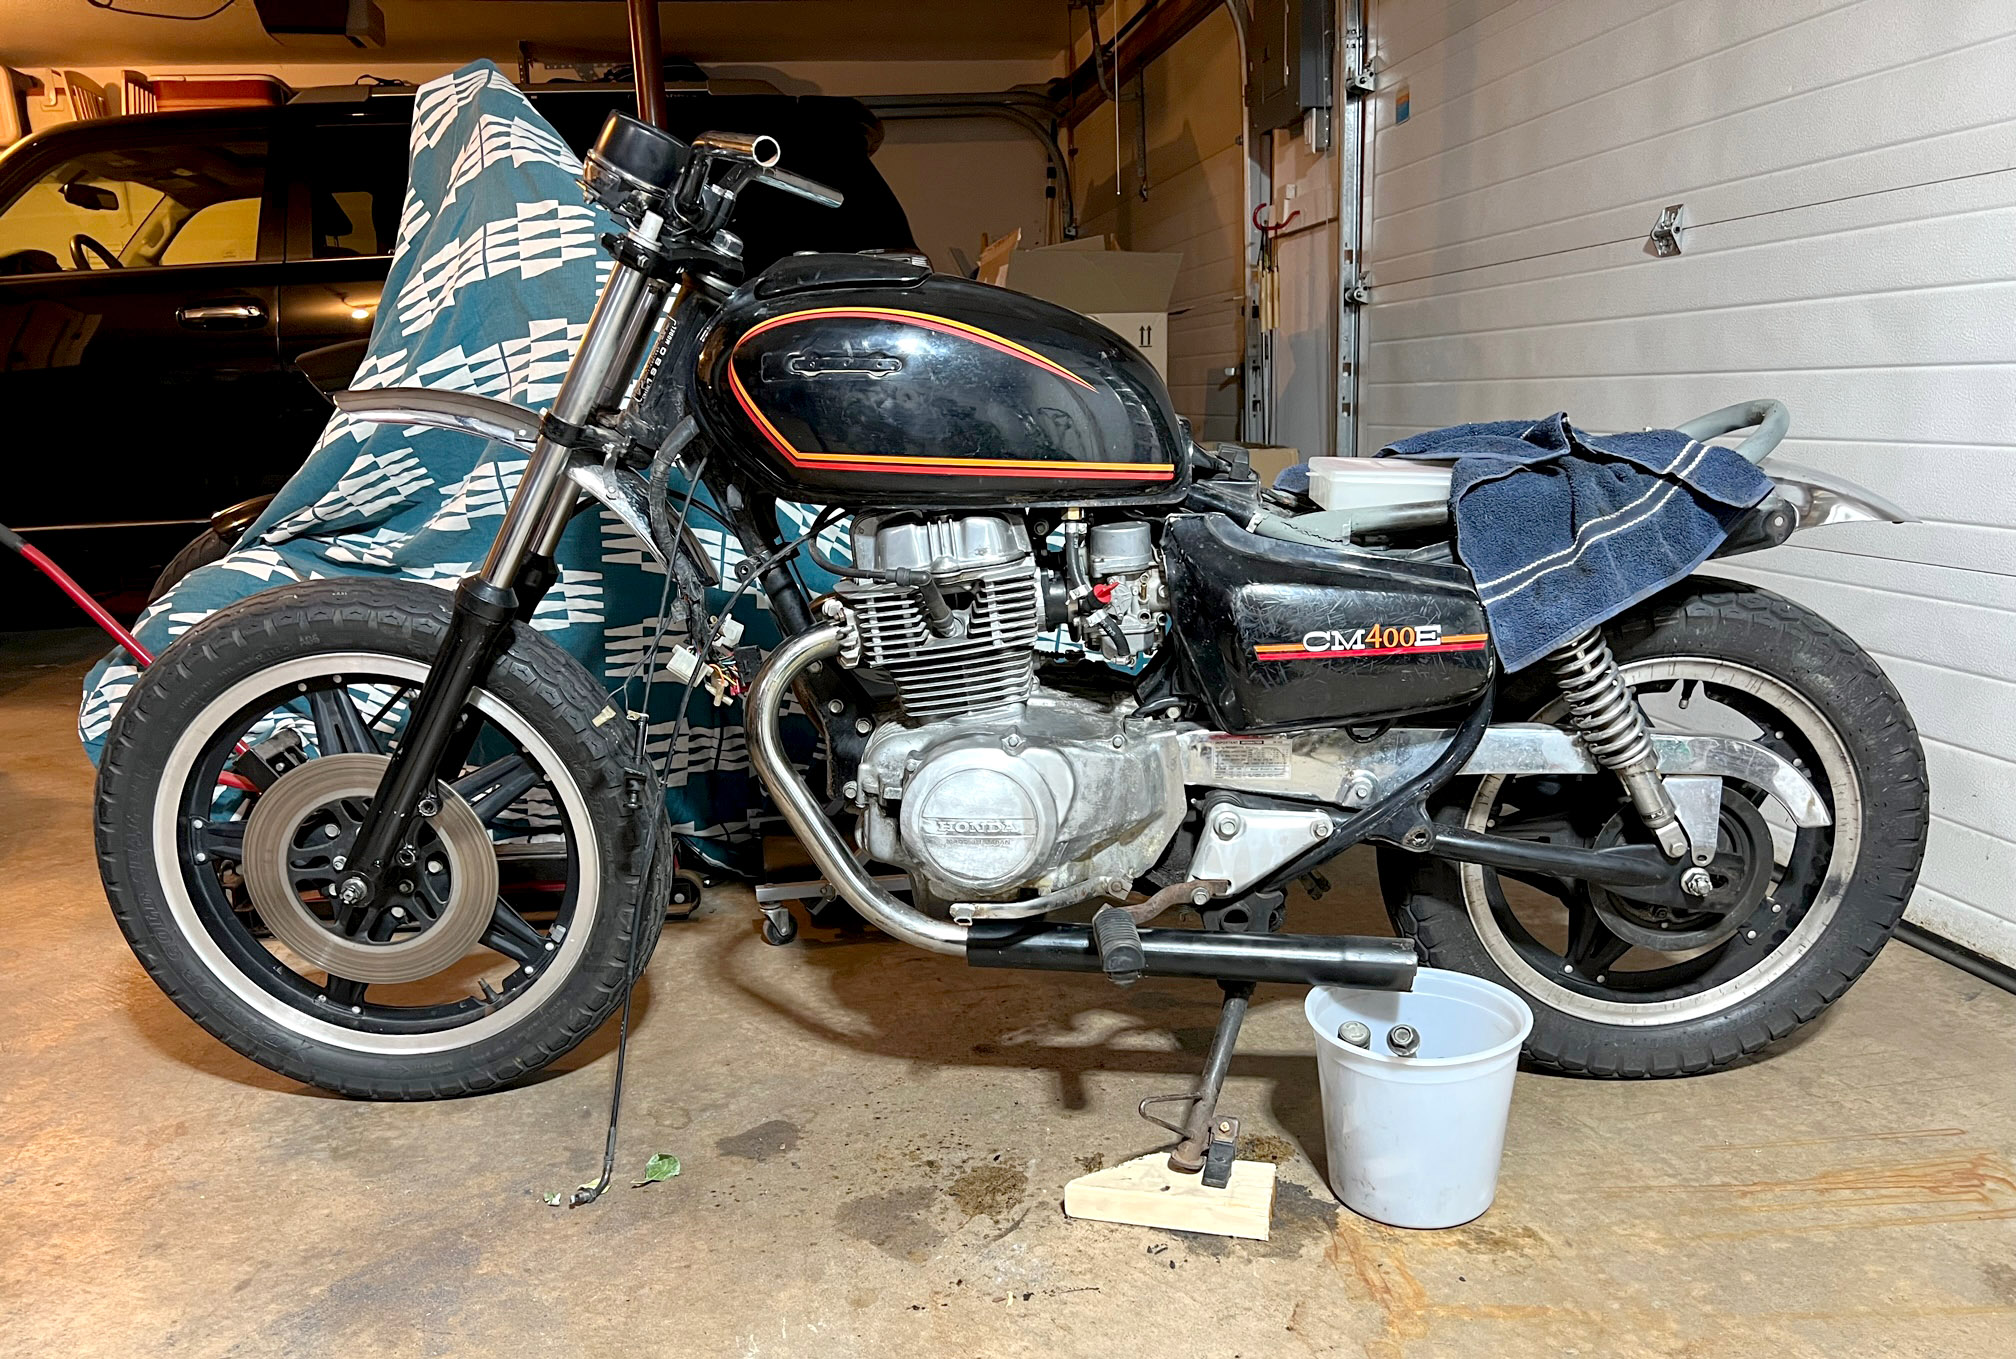
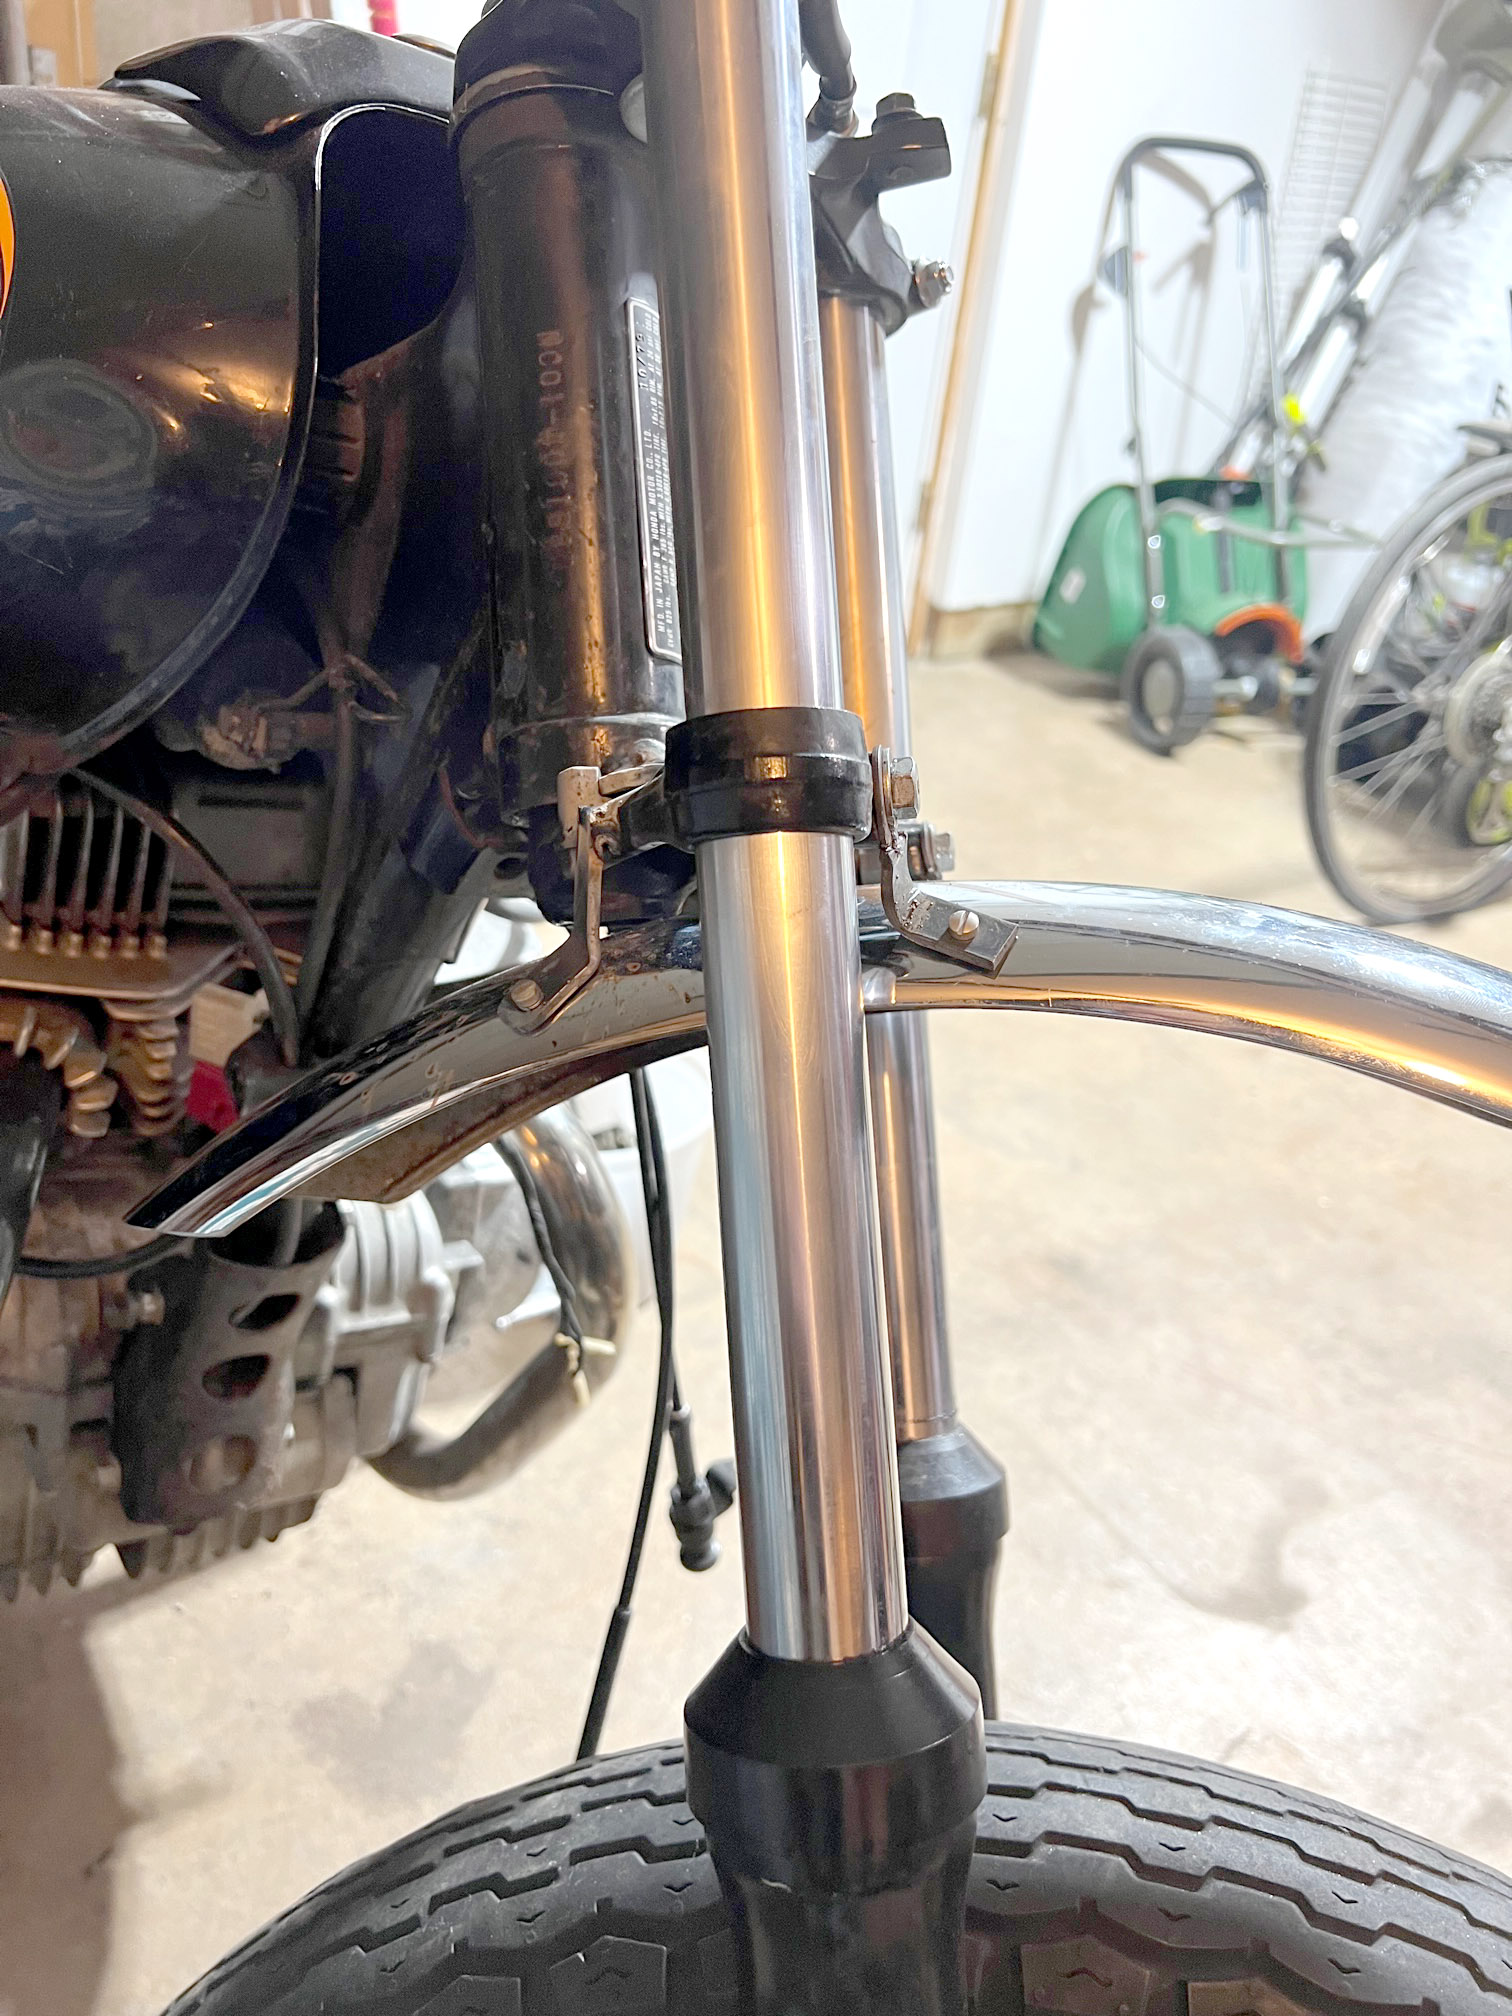
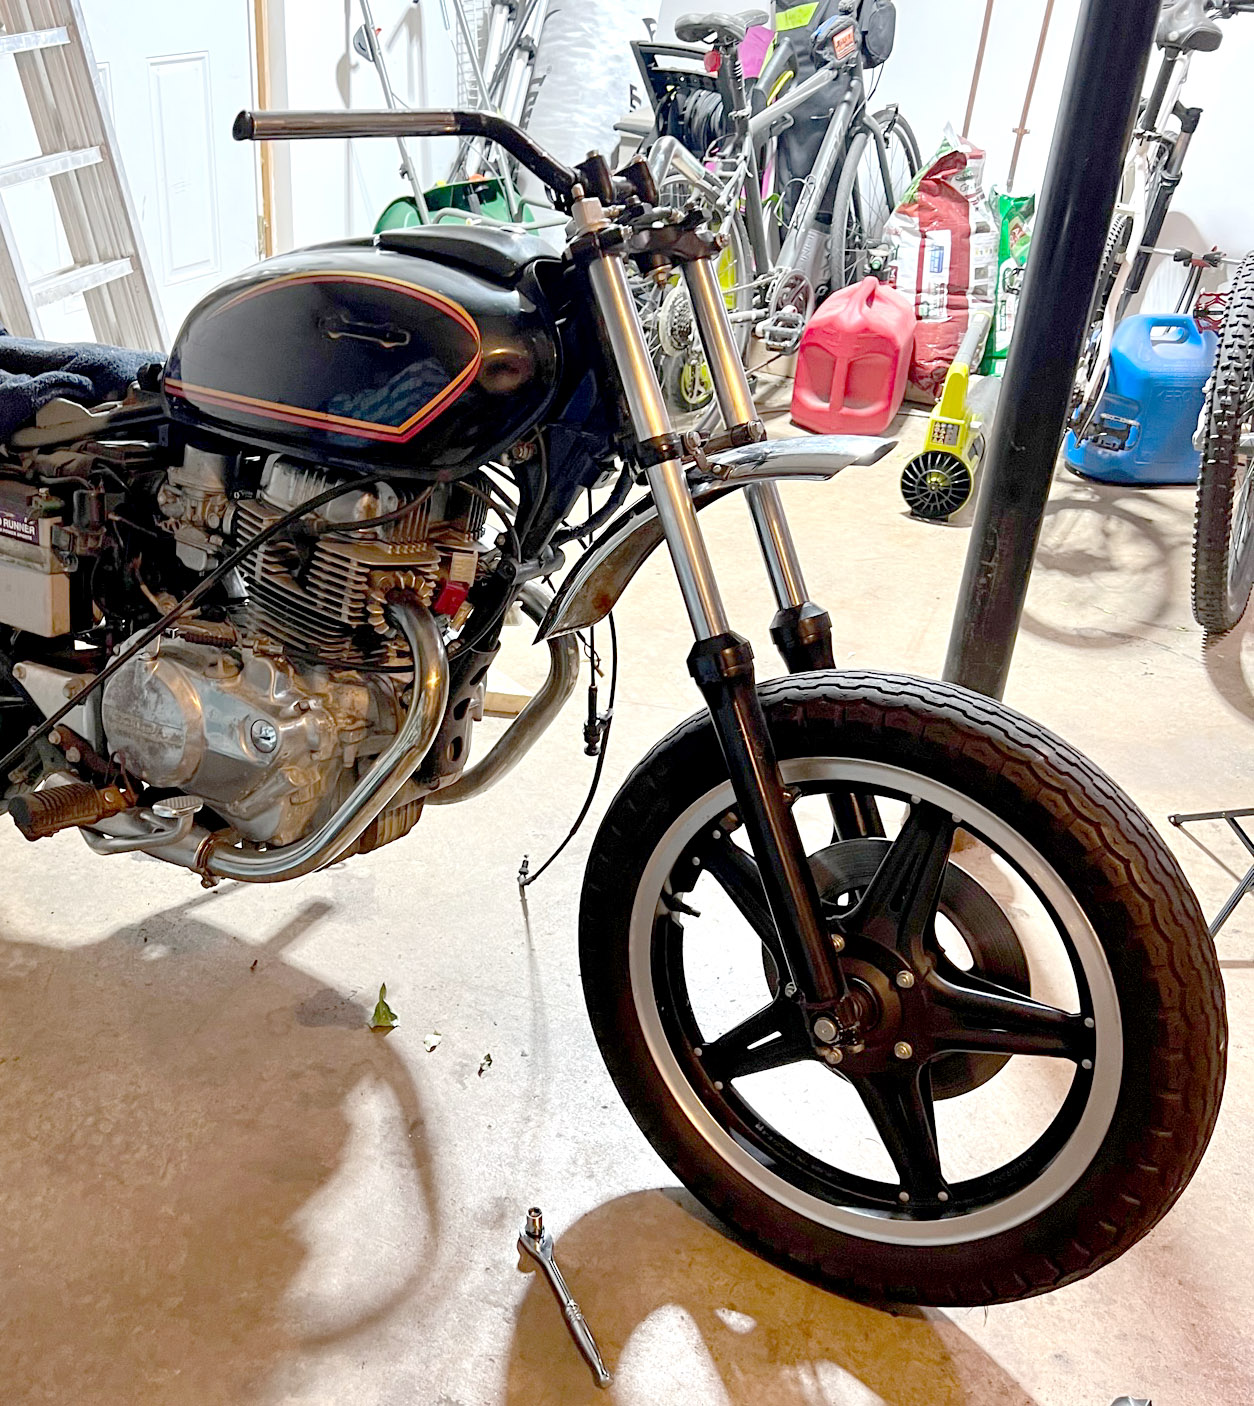
I had originally thought I would have the short side of the fender face forward, but after doing a couple of test fits, it had a cooler off-road vibe with the fender facing the regular way. With those pieces completed, the overall look of the bike was really starting to take shape. Next up we will tackle handlebars, gauges, and headlight! Continue Reading: Part 3.

2 thoughts on “1980 Honda CM400 Scrambler Budget Build – Part 2: Fenders and Frame”