
If you are anything like me, the thought of starting a first bike build can be daunting. Sure, there are a lot of bike videos on youtube that show you a quick run-down of the build, but they are generally in well setup shops with all the right tools. When I first embarked on my custom journey, I had a very bare-bones tool box (a couple of screwdrivers and sockets), no lift/jack of any kind, and no formal mechanical training to speak of. I didn’t have a ton of disposable income to waste on a bike I might destroy and I constantly worried that one mistake was going to ruin the project.
I feel like all of these worries are pretty natural and expand into everyday life. So, it is no surprise that they might become amplified when applying it to a hobby project. Having done a couple of these now, I felt a bit more confident in taking some risks and working outside of my comfort zone while also being able to avoid some of the early pitfalls. Due to that, I wanted to do another starter bike style project, but with a bit more modification.
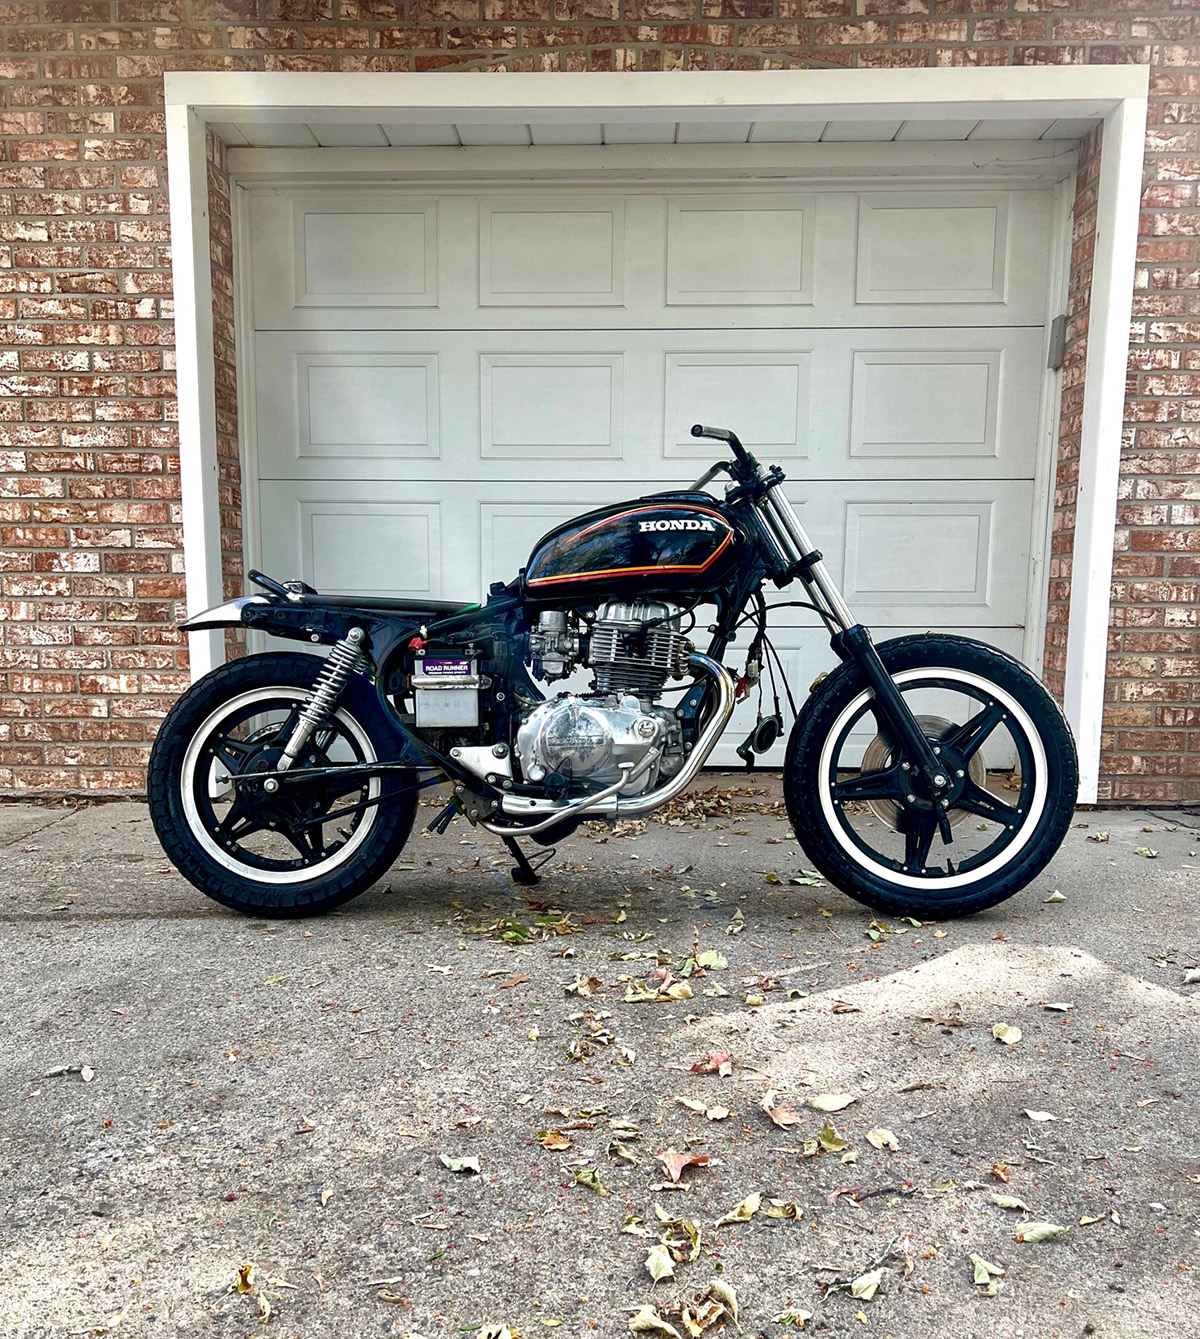
As with all of my projects, I try to find some inspiration online and then go my own direction. Since I hadn’t ridden my WR250R as much as I liked, I decided it might be time to sub it out to something a bit more practical for my area. A bit more street and less dirt focused. I decided a scrambler would be a perfect project that could be both cheap and fun while also filling a hole in my stable. There are a lot of different platforms you can start from with your only real limitation being your imagination. Heck, I have seen people use a Goldwing as a base for one…what? I wasn’t going to go that crazy.


Instead, I found a really cheap running 1980 Honda CM400E for $400. First of all, I will buy any running titled motorcycle for $400 all day long. I don’t care what problems it has. That is a steal. This bike, however, was also in great condition. It was perfect for this project. My only gripe was that I wanted disc brakes for the front. Being that this was a budget build, I ended up finding a parts bike that had the disc brake front end and would basically just sell / junk the rest of it that I didn’t end up using. No need to buy a fancy fork setup. Done deal.


Swapping the front end turned out to be a bit more of a pain than I had expected. The CM400T doner bike uses an air fork which in turn uses slightly different triple trees. It also uses better bearings inside of those triple trees. That lead to a bit of a struggle trying to remove the old bearing and seals from the frame, but I was able to get them swapped over without TOO much difficulty and cussing. The swap also dictated that I sub out the wheels to allow for the discs on the front. That was perfectly fine since I liked the spoke-less wheels better anyway.

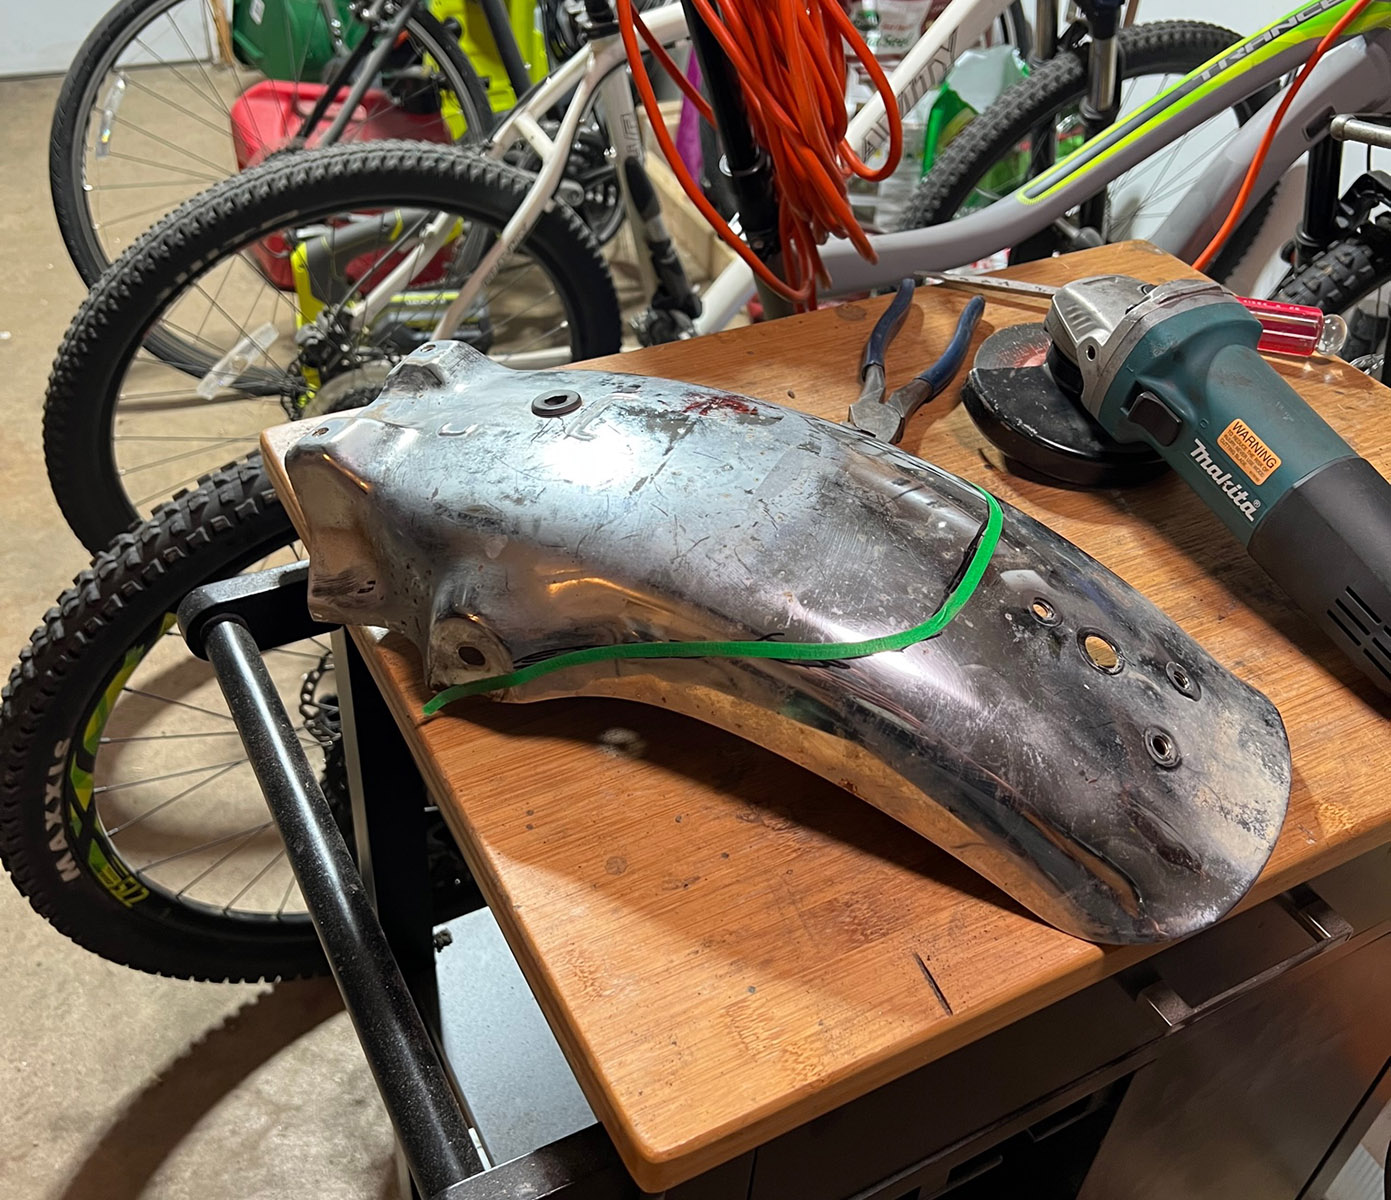
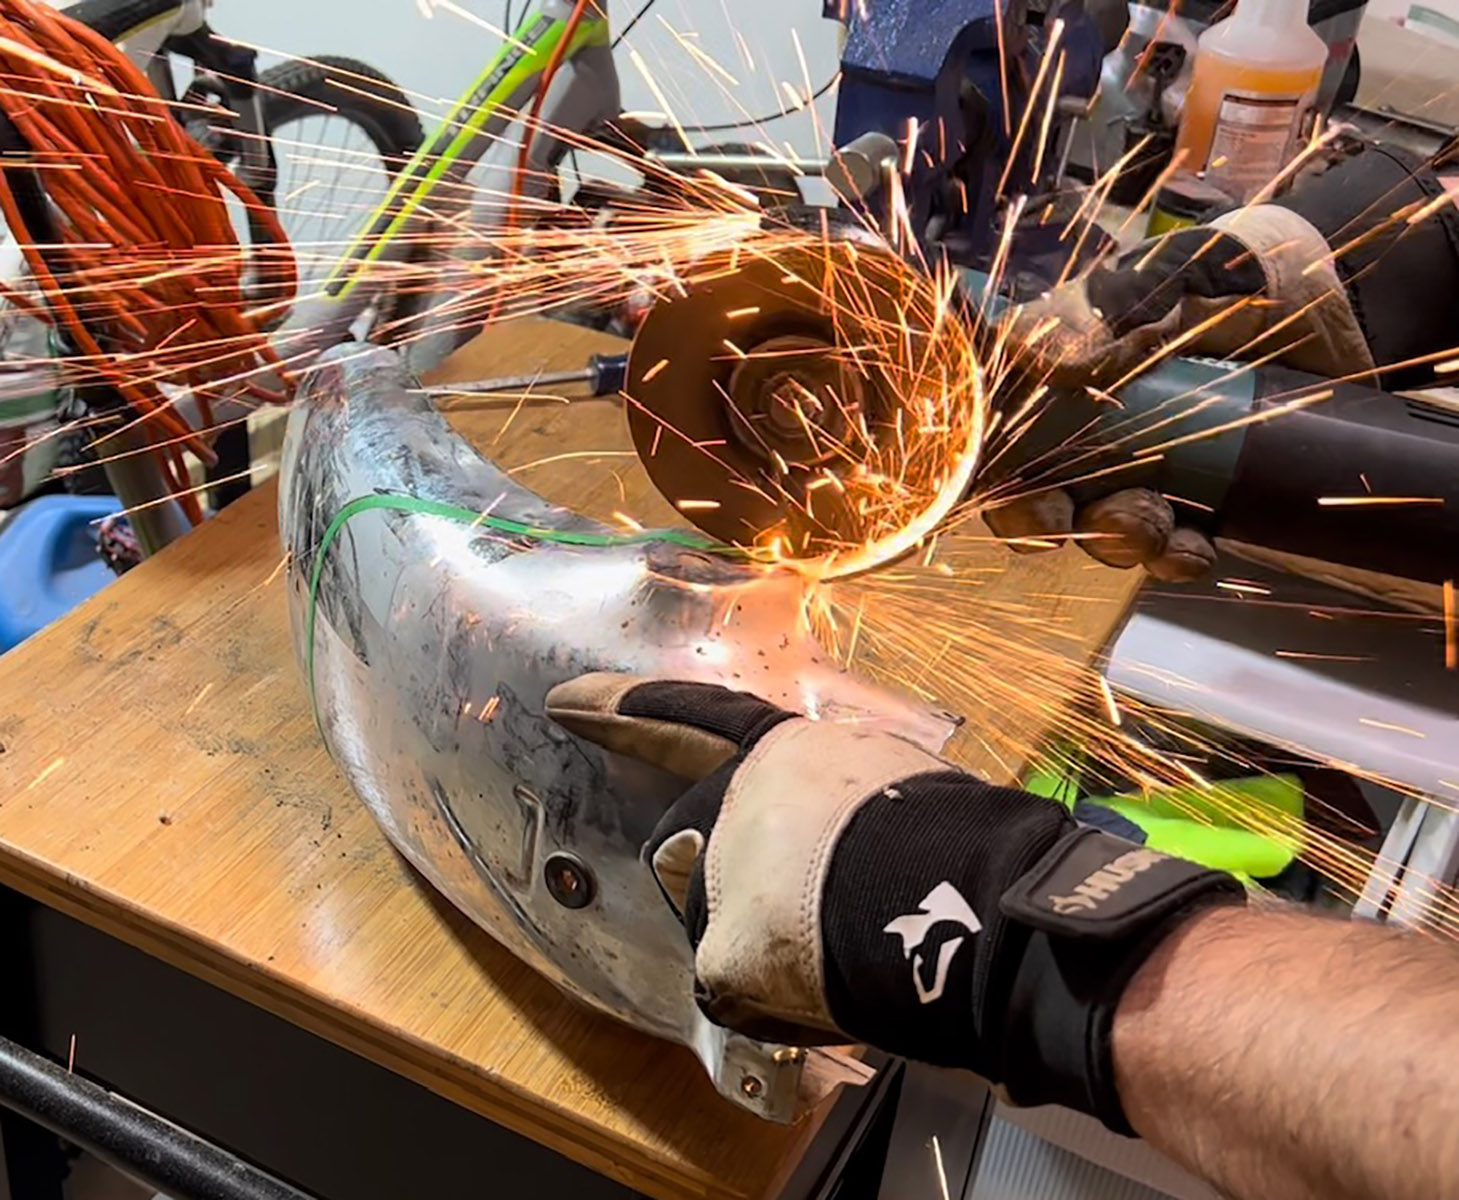
Once I had the new front fork swapped over and the wheels in place, I shifted my attention to the rear-end. One defining trait of a scrambler is a more “motocross” style rear fender. Getting rid of the big, bulky, and ugly original package was a definite need. I stripped off the seat, the grabber bar, taillight and blinkers, and original fender so that only the frame was left. I wavered back and forth for a bit on whether I would end up cutting the frame and slimming it down, but with my poor welding skills, I eventually decided to just follow the line that already existed. I drew a line on the original fender with the rough look I wanted and then took it to the grinder with a cutting disc. The first pass ended up being exactly what I was after.

From there, I could move onto some of the other more complicated fabrication which I will tackle in future posts. Continue Reading: Part 2. Be sure to check back / hit that subscribe link so you don’t miss out!

One thought on “1980 Honda CM400 Scrambler Budget Build – Part 1: Teardown and Early Fabrication.”