
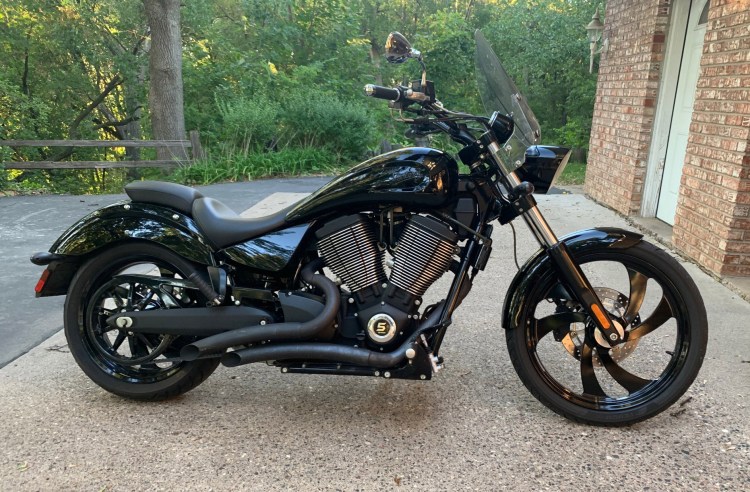
When shopping for a new bike to suit my body type (I am 6’3”, 220), I looked in a lot of the familiar places. Do I get a Harley and if so, do I actually want a bagger like a street glide? Or maybe something a little less bulky like a soft tail or Indian Scout? Triumphs look nice, but I have heard mixed reviews on their reliability. So what is something that has the look, the size, and the power to suit my style? After doing a bit of research on Victory motorcycles, reviews seemed to be very positive even though they stopped manufacturing them in 2017.
I started browsing around Facebook Marketplace and there seemed to be a couple of options that caught my eye. I was between getting a Kingpin or a Vegas 8-Ball. Due to cost and availability, I ended up going with the 8-Ball. Their sleek body lines and somewhat stretched look offered a unique stock setup. But once again, I can’t have anything basic and I knew a paint project was in my future.
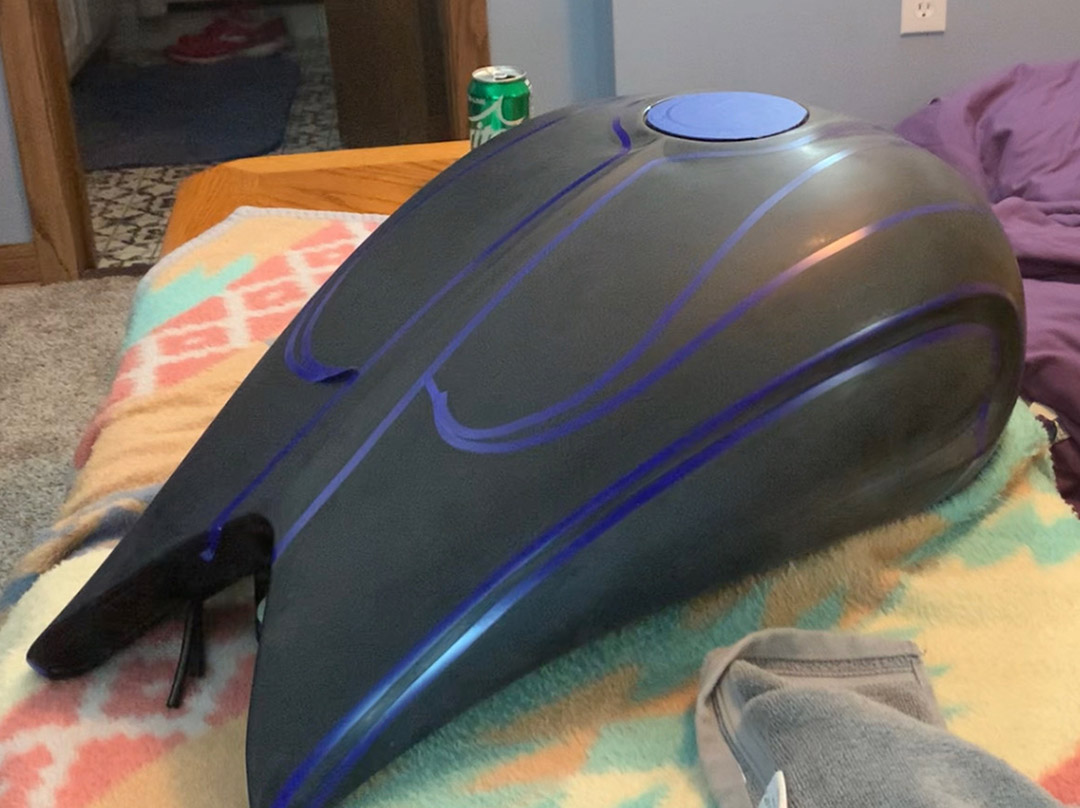
This time around, it was not needed to go down to bare metal. The black base was perfect for what I was looking for. It just needed a bit of character added to the top. There had been some bikes on Instagram that had some cool gold accents that made me decide to go with metallic gold as the color choice. I went with Restoration Shop Autumn Gold Acrylic Urethane. Nothing too fancy. Just a “simple” two-tone paint job. Plus with a name like “Vegas”, how can you not go with gold?
The first step was to remove the vinyl Victory logo from the sides of the tank. This was done using a heat gun and some mineral spirits. Then, since the stock paint was in good shape, it only needed to be scuffed to prep for the design work. Using an orbital sander, 600 grit discs, and a medium interface pad, it took little time to get the surface I needed. What few low spots there were could easily be scuffed using some Scotch-Brite Scouring Pads. Getting the base ready is one of, if not the most, critical steps.

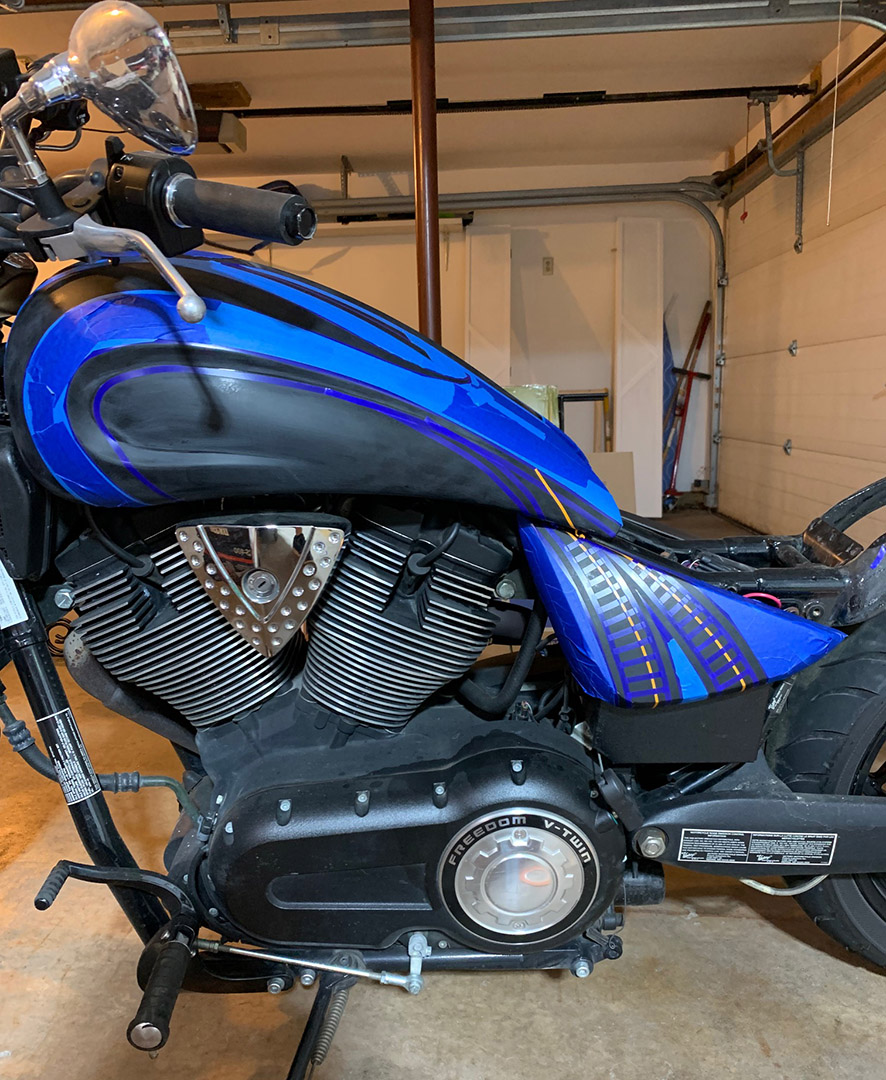
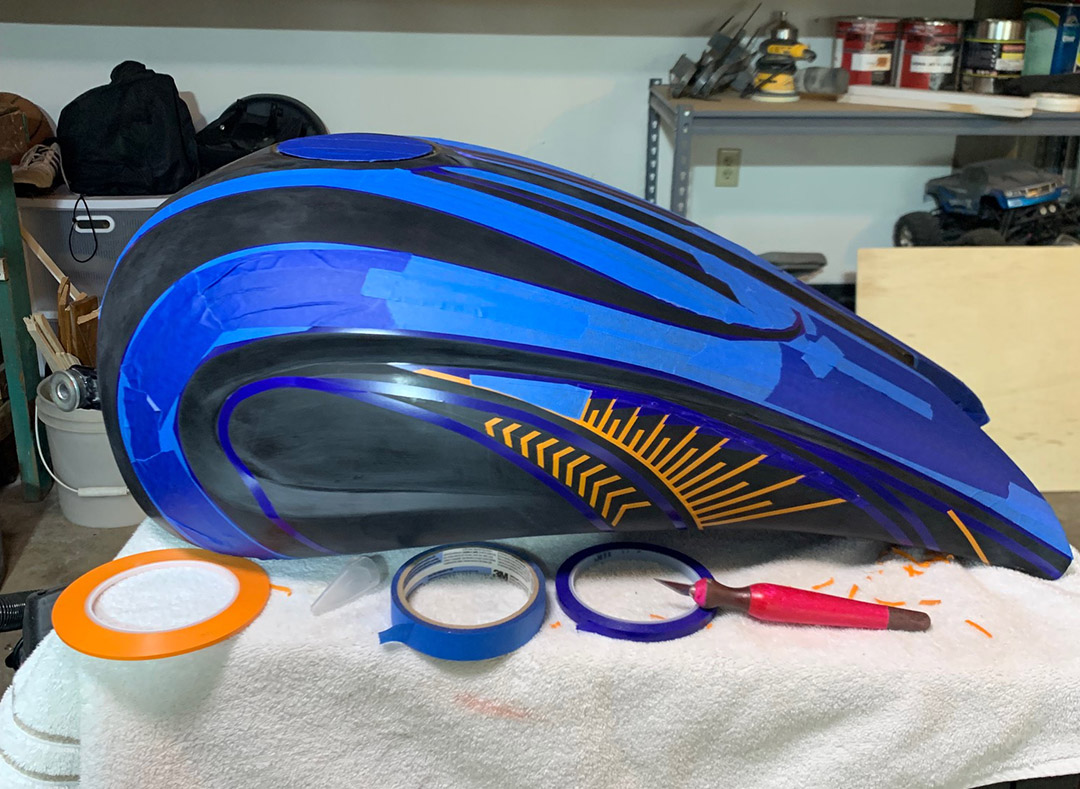
Once the factory clear was scuffed to a nice dull finish, I began laying down the basic tape design. This time around I decided to use 3M Vinyl ¼ Masking Tape. Dealing with trying to peel up the cheap stuff you can find at the hardware store got to be way too annoying. Victory tanks have a very “flowy” shape with some indents on the sides that I wanted to use as a defining edge for some of the abstract pieces. Following the body lines would create a starting point to work the other features into.
My concept was a bit of an abstract play on westerns. Arrows and bullets flowed into one another and ram’s horns adorned the top of the tank. A western setting sun rounded out the sides of the tank. Tape guidlines were used to help make sure the details were as symmetrical as I could get for each side of the tank. Some of the smaller arrow details as well as rounding the bullets took a bit more time than I had originally thought. It didn’t really occur to me when I started that I would have to round each one by hand using a razor and I don’t have the steadiest of hands. Luckily, it worked out in the end (for the most part).
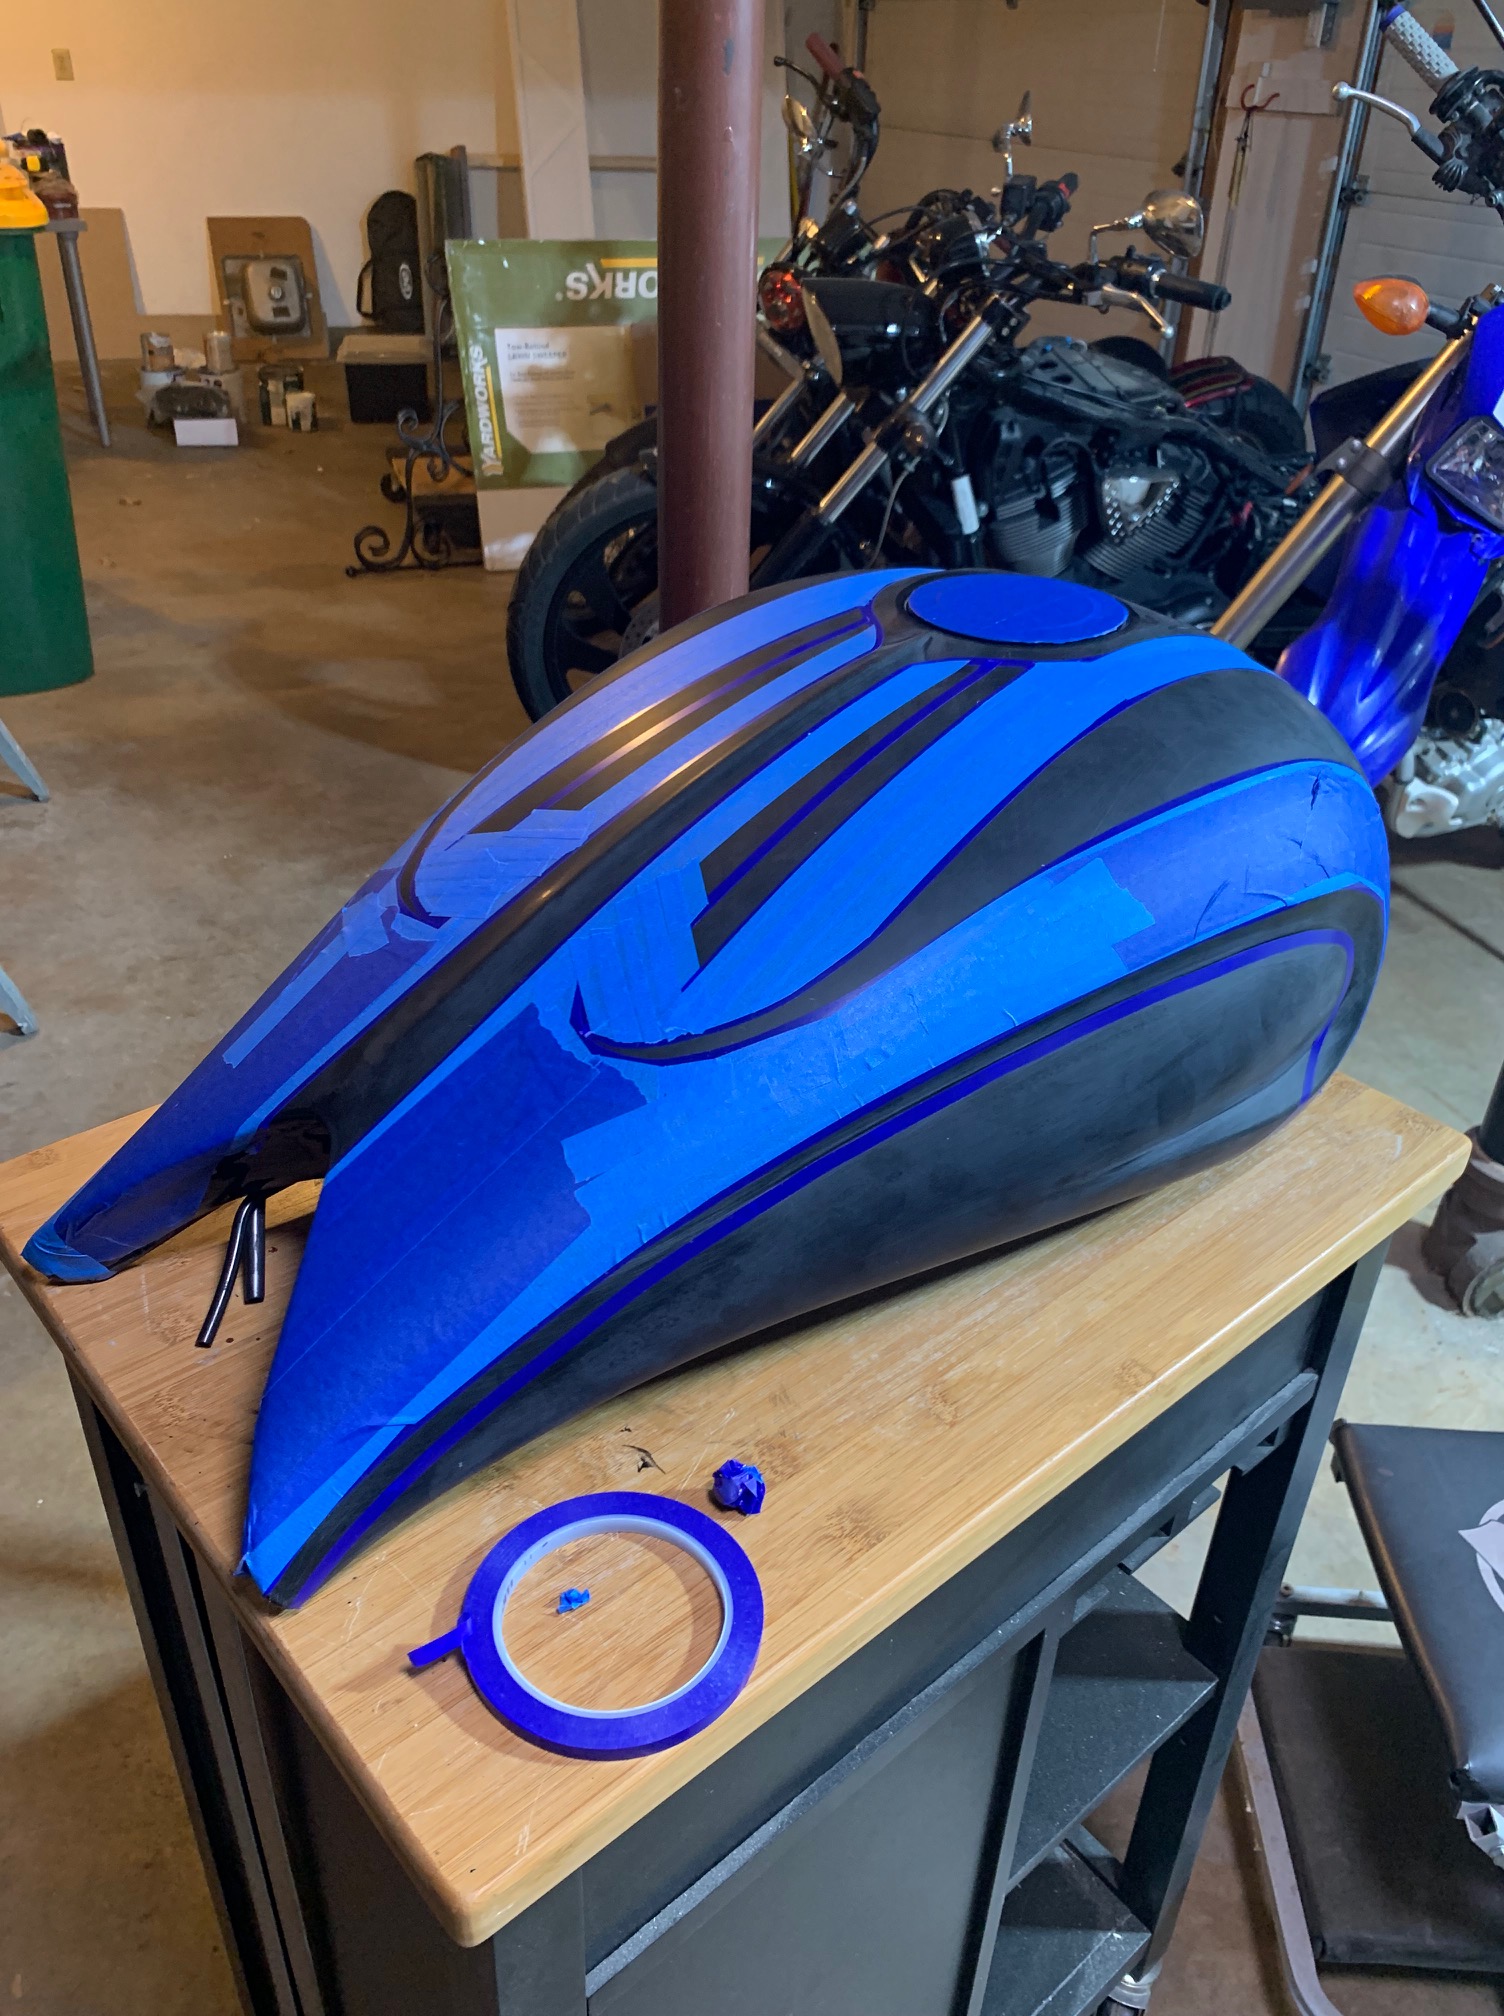

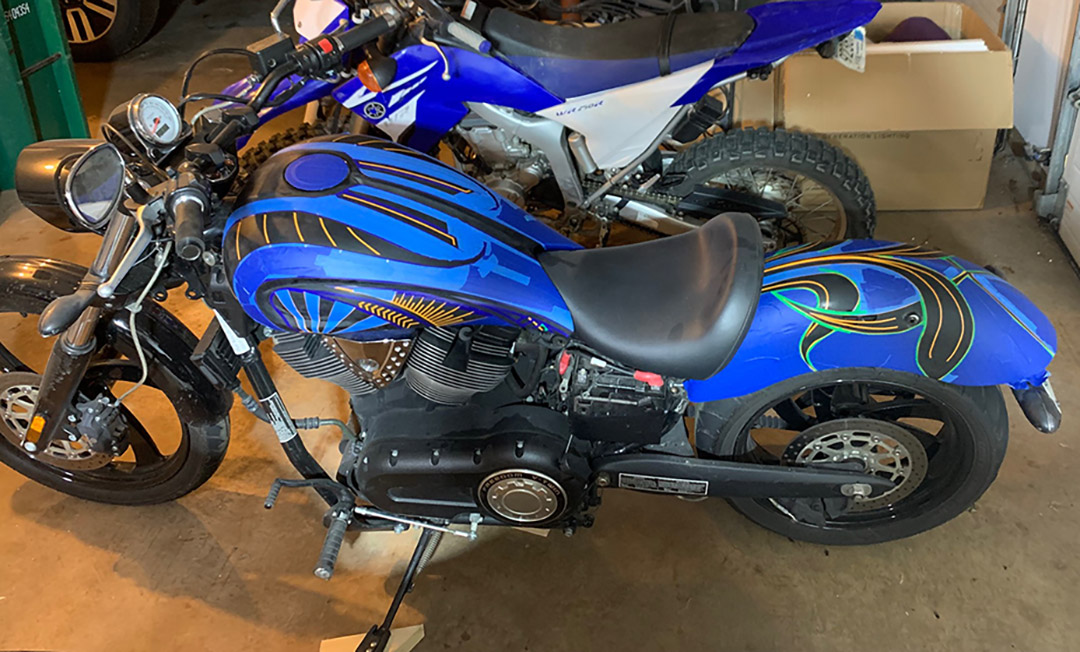
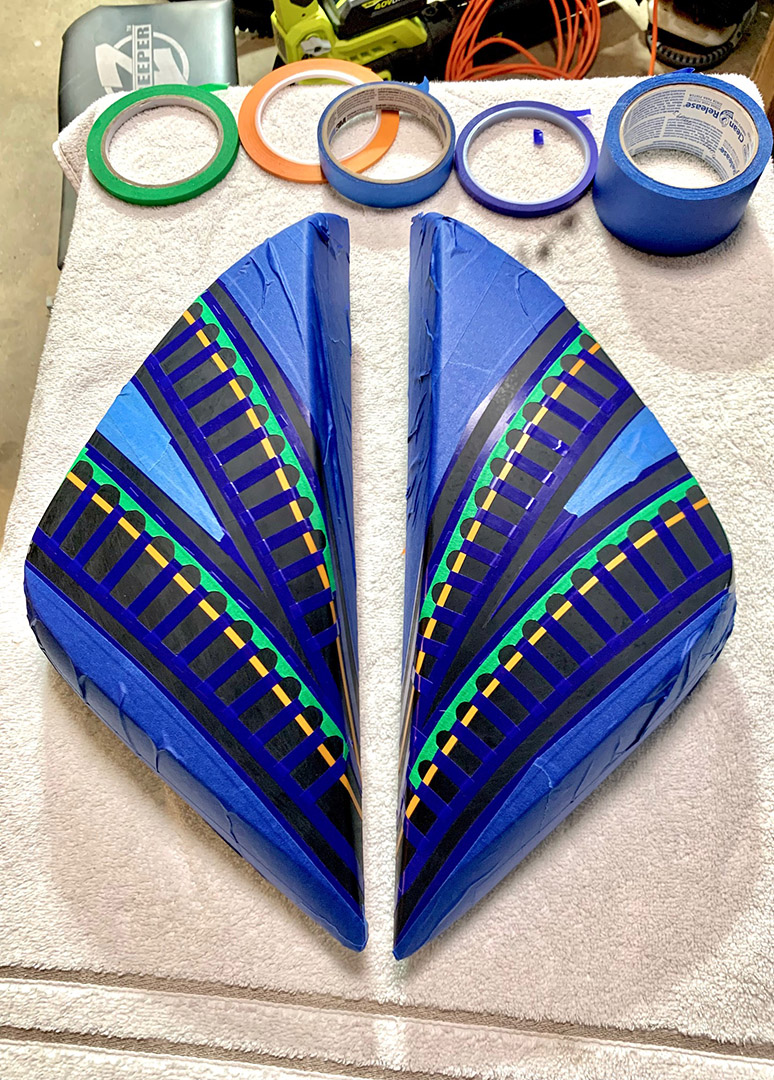
The side panels would match the bullet arcs that would flow from the tank down to the base under the seat. The rear fender posed a bit of an issue in that I originally laid out a nice art neveu design before realizing the rest of the bike was art deco. Yeah, woops. I ended up having to take all the tape off and start over with something a bit more plain to not overpower the rest of the bike. It was decided to create a bit of an arrow as well on the back, finishing at the arrow nock.
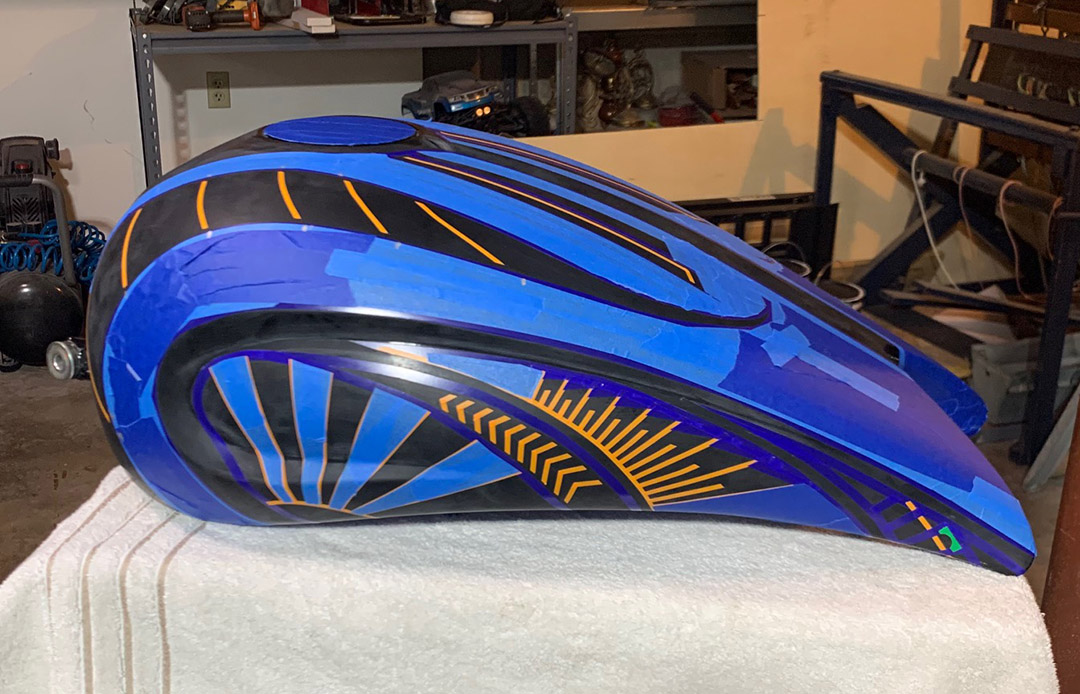
Once the graphics were all down, all that was left was to paint! It was nice to know I only had one color to lay down the time and finish with clear. None of the painting, then clearing, then sanding, then painting, then clearing and so on. But as much as I do my best to keep my garage dust and bug free, invariably, I always get a dust spot or two. This time was no different and there were a few imperfections that I just didn’t have the patience or desire to fix this time around. I wanted to get the bike back together and not waste the summer riding season. The issues were minor and can easily be fixed in the future if I chose to go that route.

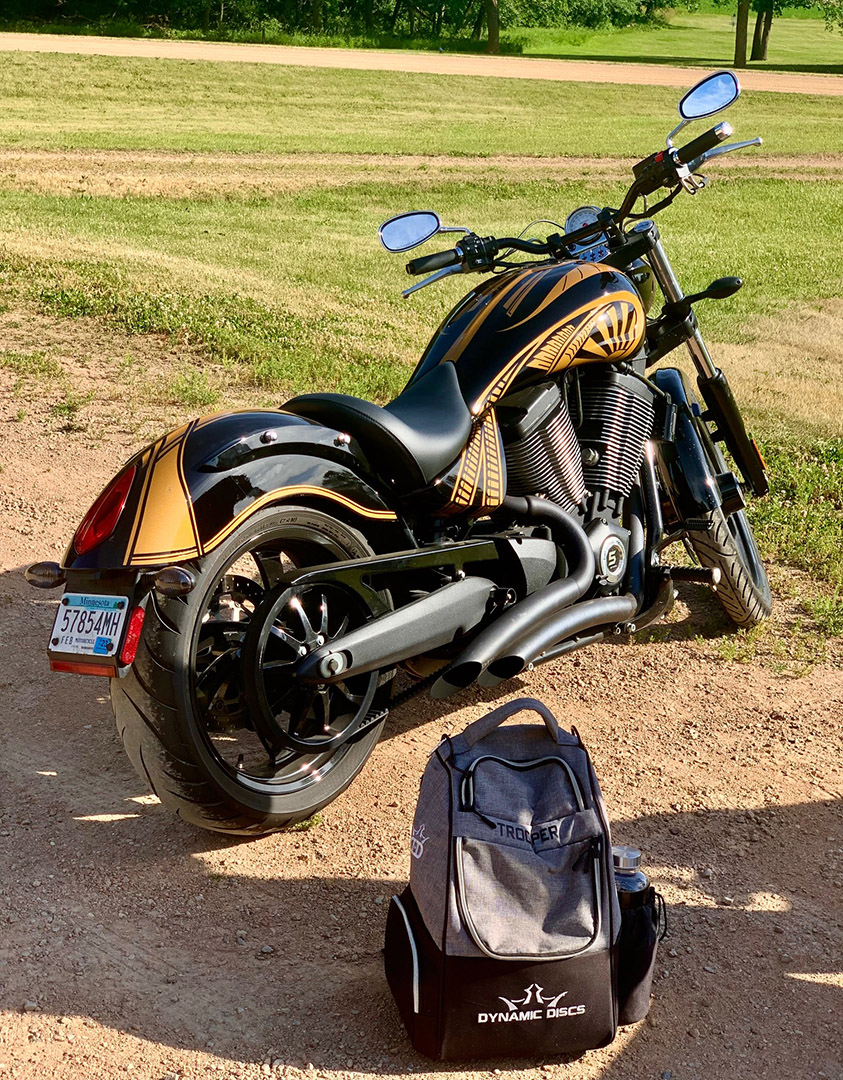


So there it is. My 2006 Victory Vegas 8-Ball all painted up and ready to ride! I have to say, I have mixed feelings about the gold. It did not come out nearly as shiny as I was hoping but I think it will grow on me over time. Let me know what you think in the comments and be sure to follow for more pics on Instagram!

One thought on “2006 Victory Vegas 8-Ball”