
Winter in Minnesota can be long, cold, and quite frankly, boring. It doesn’t get enough snow for fun activities to make the cold worth it. It also doesn’t have mild days in order to get out unless ice fishing is your thing (it is NOT mine). So, what is one to do to stave off cabin fever? Well, when I was in high school, one of my friends built a climbing wall in his garage. It was an amazing way to have some fun and also get in great shape. When I owned my first townhouse, I built a small wall and figured it might be time to try again in our new place.
My wife and I have been fortunate enough to have an amazing property that has a detached garage that has mostly just housed lawn equipment until now. It seemed like the perfect spot for a new home climbing wall. While the ceiling height left a bit to be desired (about 9 feet to the rafters), the long walls gave more than enough space for a variety of angles. The first step was just to find a way to clear out the junk that was in there.
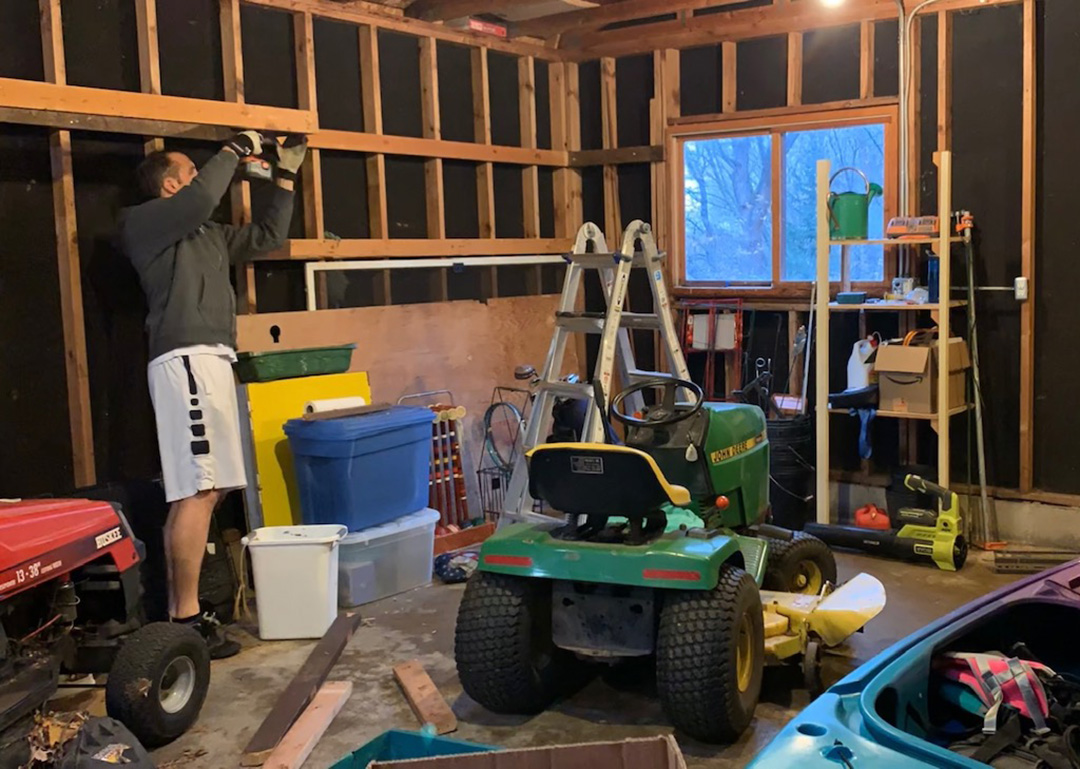
The previous owners had nailed a ton of make-shift shelves to the walls that first needed to be removed. I have never seen so many random nails just sticking out of a wall for no apparent reason other than maybe as hooks for tools. Much of the tear-down was spent pulling nails. I planned to repurpose some of the 2x4s, so it was important to get them as clean as possible.
Once the wall had been cleaned of all the junk and shelves, I was able to visualize a bit of what I wanted. Rather than spend a bunch of time measuring and figuring out a good layout, I simply built a basic design using Blender 3D so that I could quickly throw shapes at the wall. It took a couple of rearrangements, but eventually I settled on a design. I would have 5 different wall faces, each with a different pitch. This would give a lot of variety as well as creating little nooks to use as aretes and dihedrals.
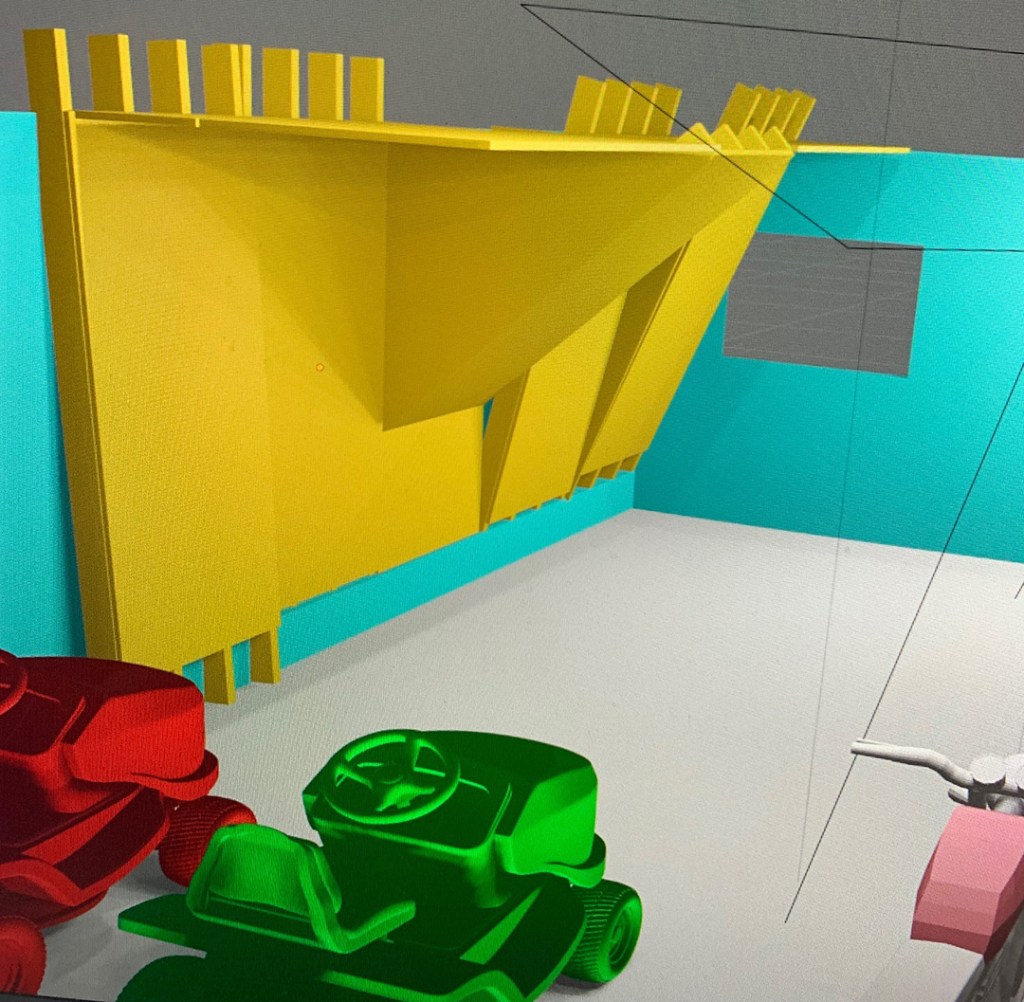
With the layout basically complete, it was time to get supplies. The great beauty of doing the design in a 3D modeling program was that I could simply count and measure the boards needed to fill the space without any guess-work. My original design would need about 20 2”x6”x10’ boards and 9 ¾” 4’x8’ plywood sheathing. I had also planned to have around 72-100 bolting locations per 4×8 panel. This meant that I would need 600-1000 t-nuts. I ended up buying multiple 100-pack bags of 3/8″ zinc t-nuts. The last pieces I needed to get started were a whole bunch of 3” and 2” screws. I bought a 5lb box of 3 in. Tan Exterior Self-Starting Star Flat-Head Wood Deck Screws. While these screws seemed to do the job, I will say that they were a little more difficult to get started than screws I have used in the past.
Materials List:
- 20 – 2”x6”x10’ boards
- 9 – ¾” 4’x8’ plywood sheathing
- 8 – 100-pack bags of 3/8″ zinc t-nuts
- 5lb box – 3 in. Tan Exterior Self-Starting Star Flat-Head
- 5lb box – 2” phillips head screws (I got these at my local ACE hardware)
- 6 – 10-packs 3/8-16 x 2″ Socket Head Cap Screw Bolt, 304 Stainless Steel
- 4 – 10-packs 3/8-16 x 1″ Socket Head Cap Screws, 304 Stainless Steel
- Variety of Climbing Holds from Nicros
I started on the right side of the wall and worked my way left. This seemed to be the easiest for logistics as well as anchoring. Cross members were mounted between the rafters to give the studs a place to rest. The 2×6’s were cut to fit between the existing studs on the walls to reduce the need for kicker boards since I didn’t plan to finish with drywall. The first 2 panels had only minor inclines (about -21 degree and -13 degrees from right to left). These went up relatively quickly and did not require many complicated cuts. I would cut one beam and check fit first, then use it as a template for the other 3 beams for each panel.
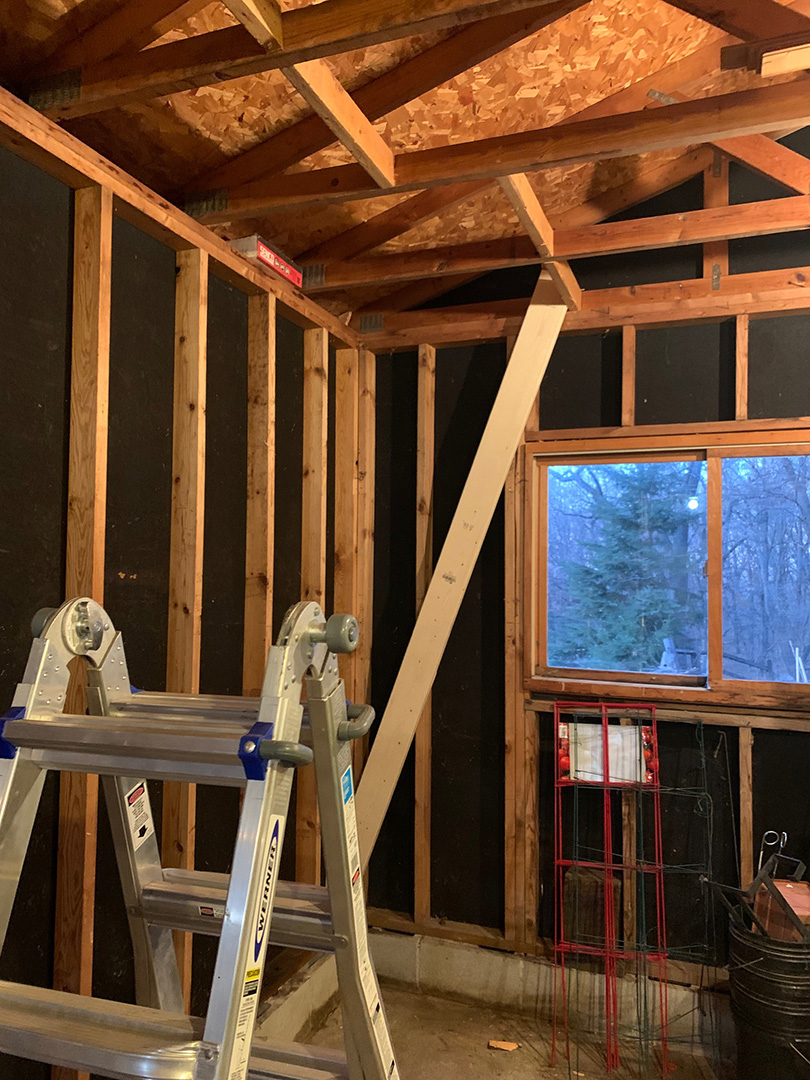


Moving onto the steep overhang got a bit more complicated and required a couple of re-cuts. I also did not screw in the cross members in the rafters as straight as I should have, so the top connection wasn’t perfect, but still usable. The base of the beams were screwed into the wall studs 3 feet up. This was planned so that they could eventually partially rest on the plywood panel that would go below to offer extra support.
The next panels are where my first on-the-fly change occurred. Due to having already installed some insulation before the home climbing wall build began, I decided to swap the slab panel and the straight vertical panel. For the slab, the 2×6’s were cut so that they would rest at a slight angle on the cinder block foundation. The slab had about a 4 degree pitch.


Now that the beams were all installed, I could go about installing the panels. Before they would be installed, however, I first had to drill a crap-ton of holes. First, a chalk-line was used to create a grid for where I needed to drill. I originally did this using a drill-press attachment and a BOSCH CO2155B 7/16 In. x 5-1/2 In. Cobalt M42 Drill Bit. Have you ever heard the old adage “right tool for the right job”? Well this was NOT the case. I bought this bit thinking it would be great for both plywood as well as any metal work I may need it for later. It really struggled to get through the plywood. Luckily I thought of stacking the plywood 3-sheets high and clamped them together so that drill time would be reduced. I later used a 7/16″ Threaded Spade Bit that went a TON faster and even reduced some of the blowout on the backside of the plywood.
Key note here, make sure if you build your own wall that when you drill your plywood that you start your drilling from the side you want facing out. The backside of the panel will have splinters / chipping around the edges of the hole unless you back it with something during the drilling.


Once the holes were drilled, I could then start pounding in all of the t-nuts. Getting these in as straight as I could was fairly important as it dictated how easy it would be to later attach the climbing holds. I opted for the simple hammer-in style rather than the t-nuts that require screws for ease and speed of install. Wearing ear protection during this part was crucial. Each hammer blast was like a small caliber pistol firing off.


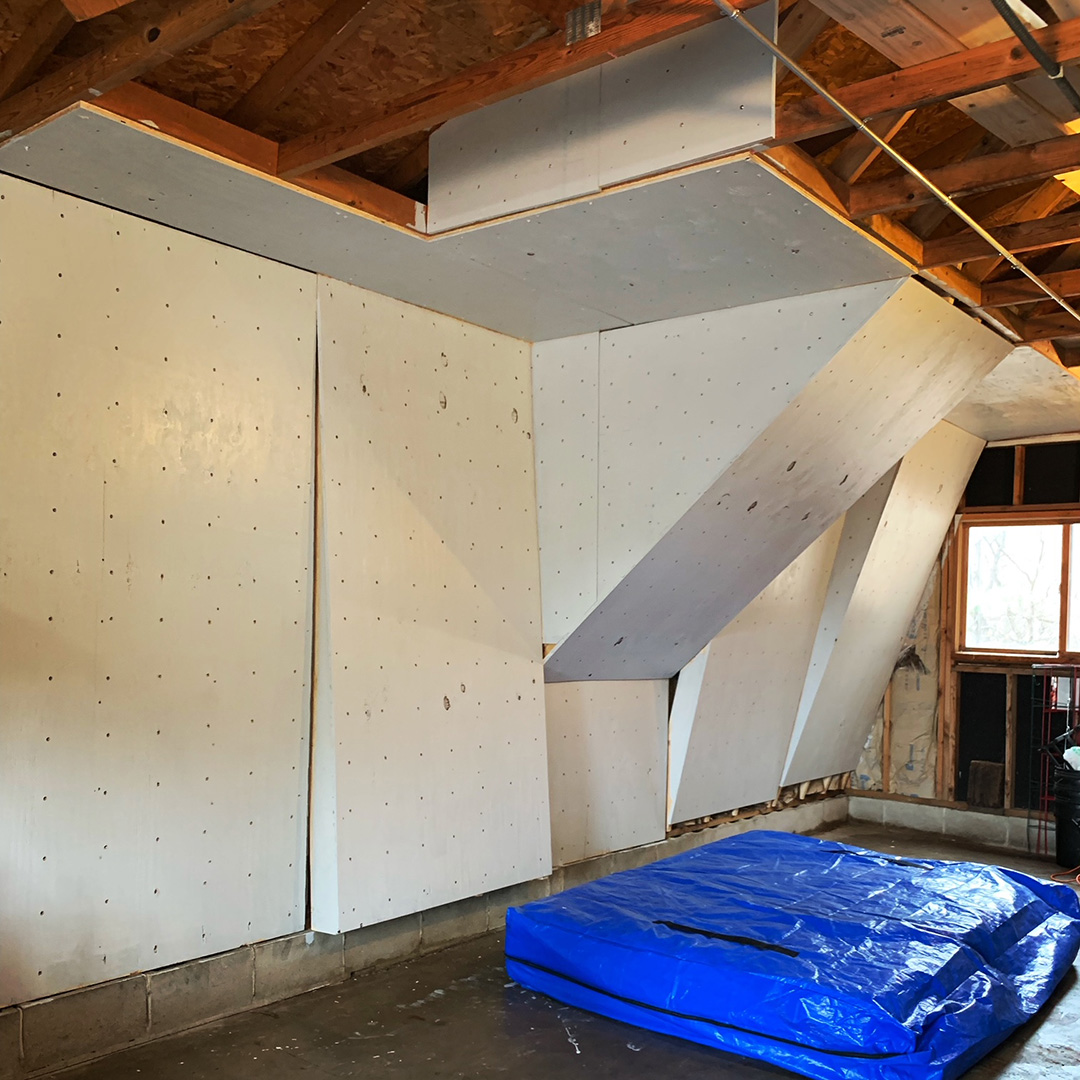
Hanging the panels was the most physically demanding part of the project. The large sheets of plywood were NOT light, especially when trying to maneuver them on an incline. Bracing was first installed between the rafters to make sure the ceiling panels had enough support. I was able to install all but one of the wall panels by myself. The steep overhang required my brother’s help to get into place. While installing the ceiling panels, I came upon my other change to the original design. I decided I wanted the wall to extend above the rafters rather than have one giant ceiling section. Luckily it didn’t require any further bracing. It was just a matter of cutting some plywood scrap to shape to fit into the new area.
Throughout the build process, I was also taking every opportunity to score some sweet climbing hold deals from the great people over at Nicros. Pam went out of her way let me come in and grab some holds-by-the-pound on a couple of different occasions which made the actual use of this wall possible. It was a really great experience to be able to go to the actual plant and talk with the people who make the holds. I got to learn a bit of indoor climbing history as well!
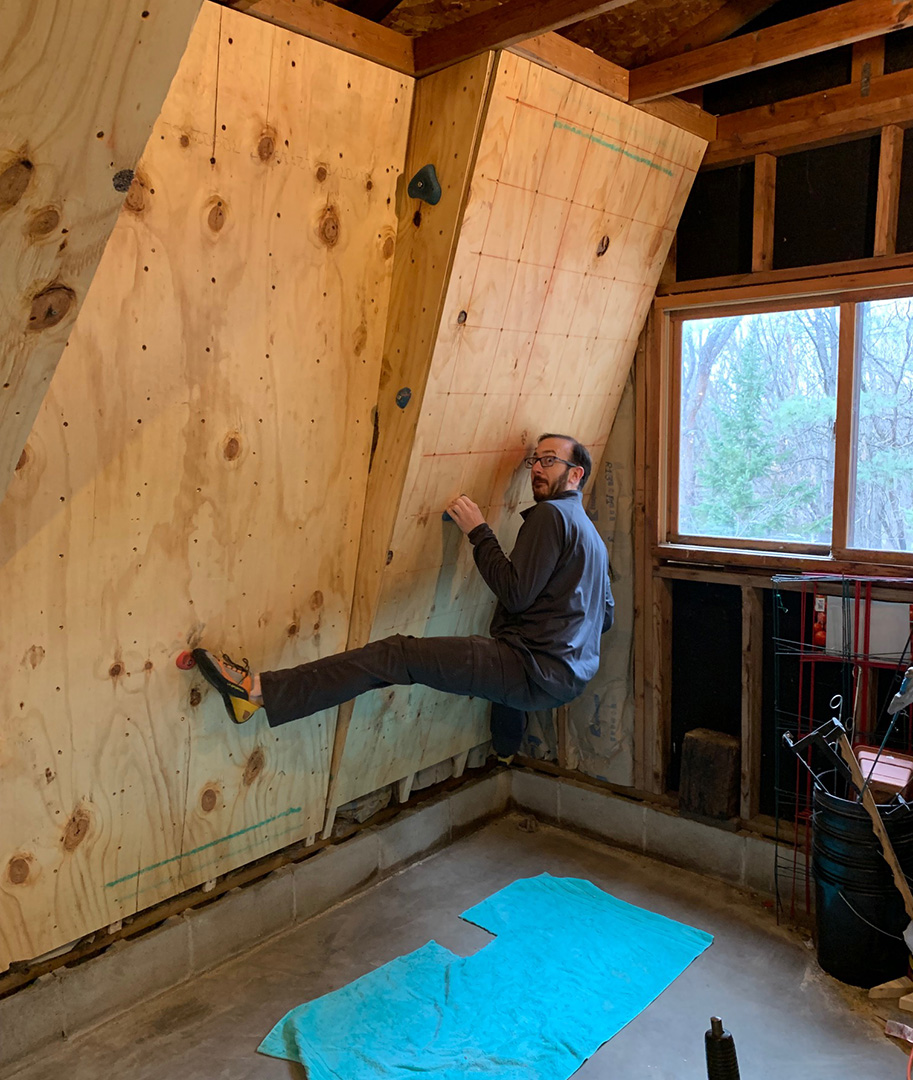
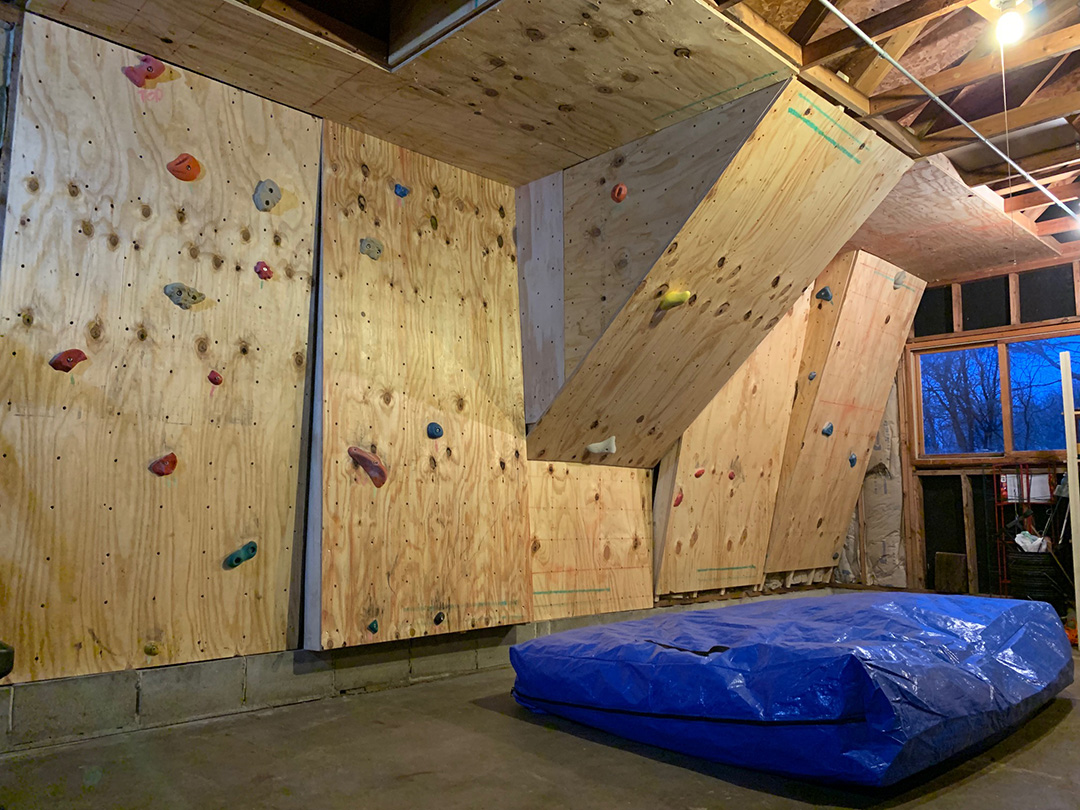


With all the panels installed, I decided to give the wall some paint. I had some unused paint from the original homeowners and was able to mix 2 cans together to make nearly a complete gallon. To my surprise, the color that came out was pretty close to what I would have hoped for had I chosen it myself. After giving the paint a day to dry, I couldn’t help but get started setting some routes.


The variation in angles and inclines made for some fun options. I am excited to explore what can be created once I have some better practice, strength, and technique!

One thought on “Climbing Out of the Winter Blues”