
It’s every rider’s worst nightmare. You go outside to see your bike laying on the pavement. Someone has just knocked over your bike and there is damage. This is what happened to my brother’s bike about a year after doing custom paint work for him. Luckily, the lady that knocked it over was the parent of a student he teaches and she sought him out to make things right. This is not usually the case for the rest of us. Chalk this one up to the karma gods.
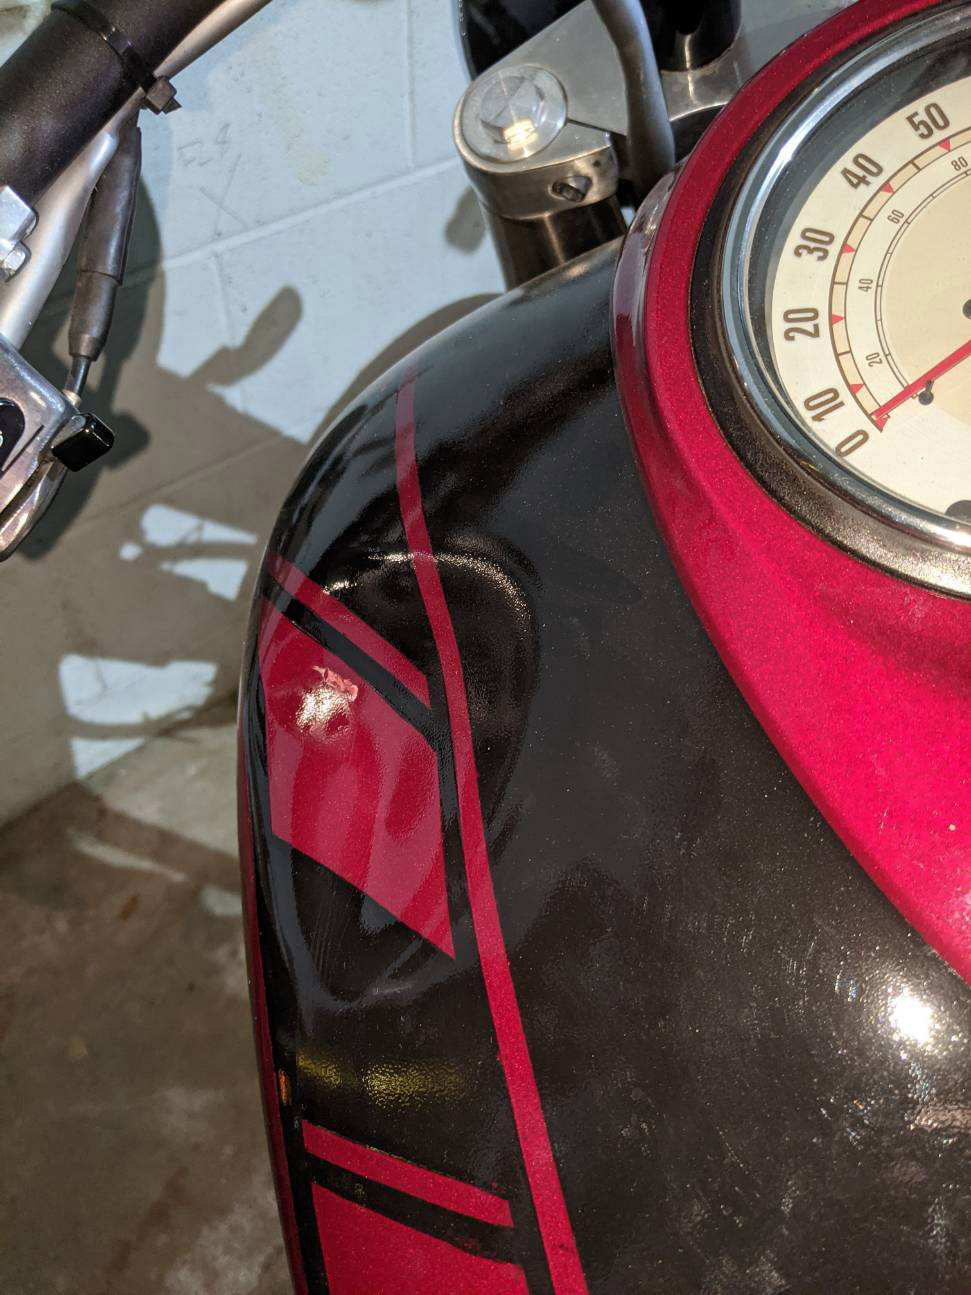
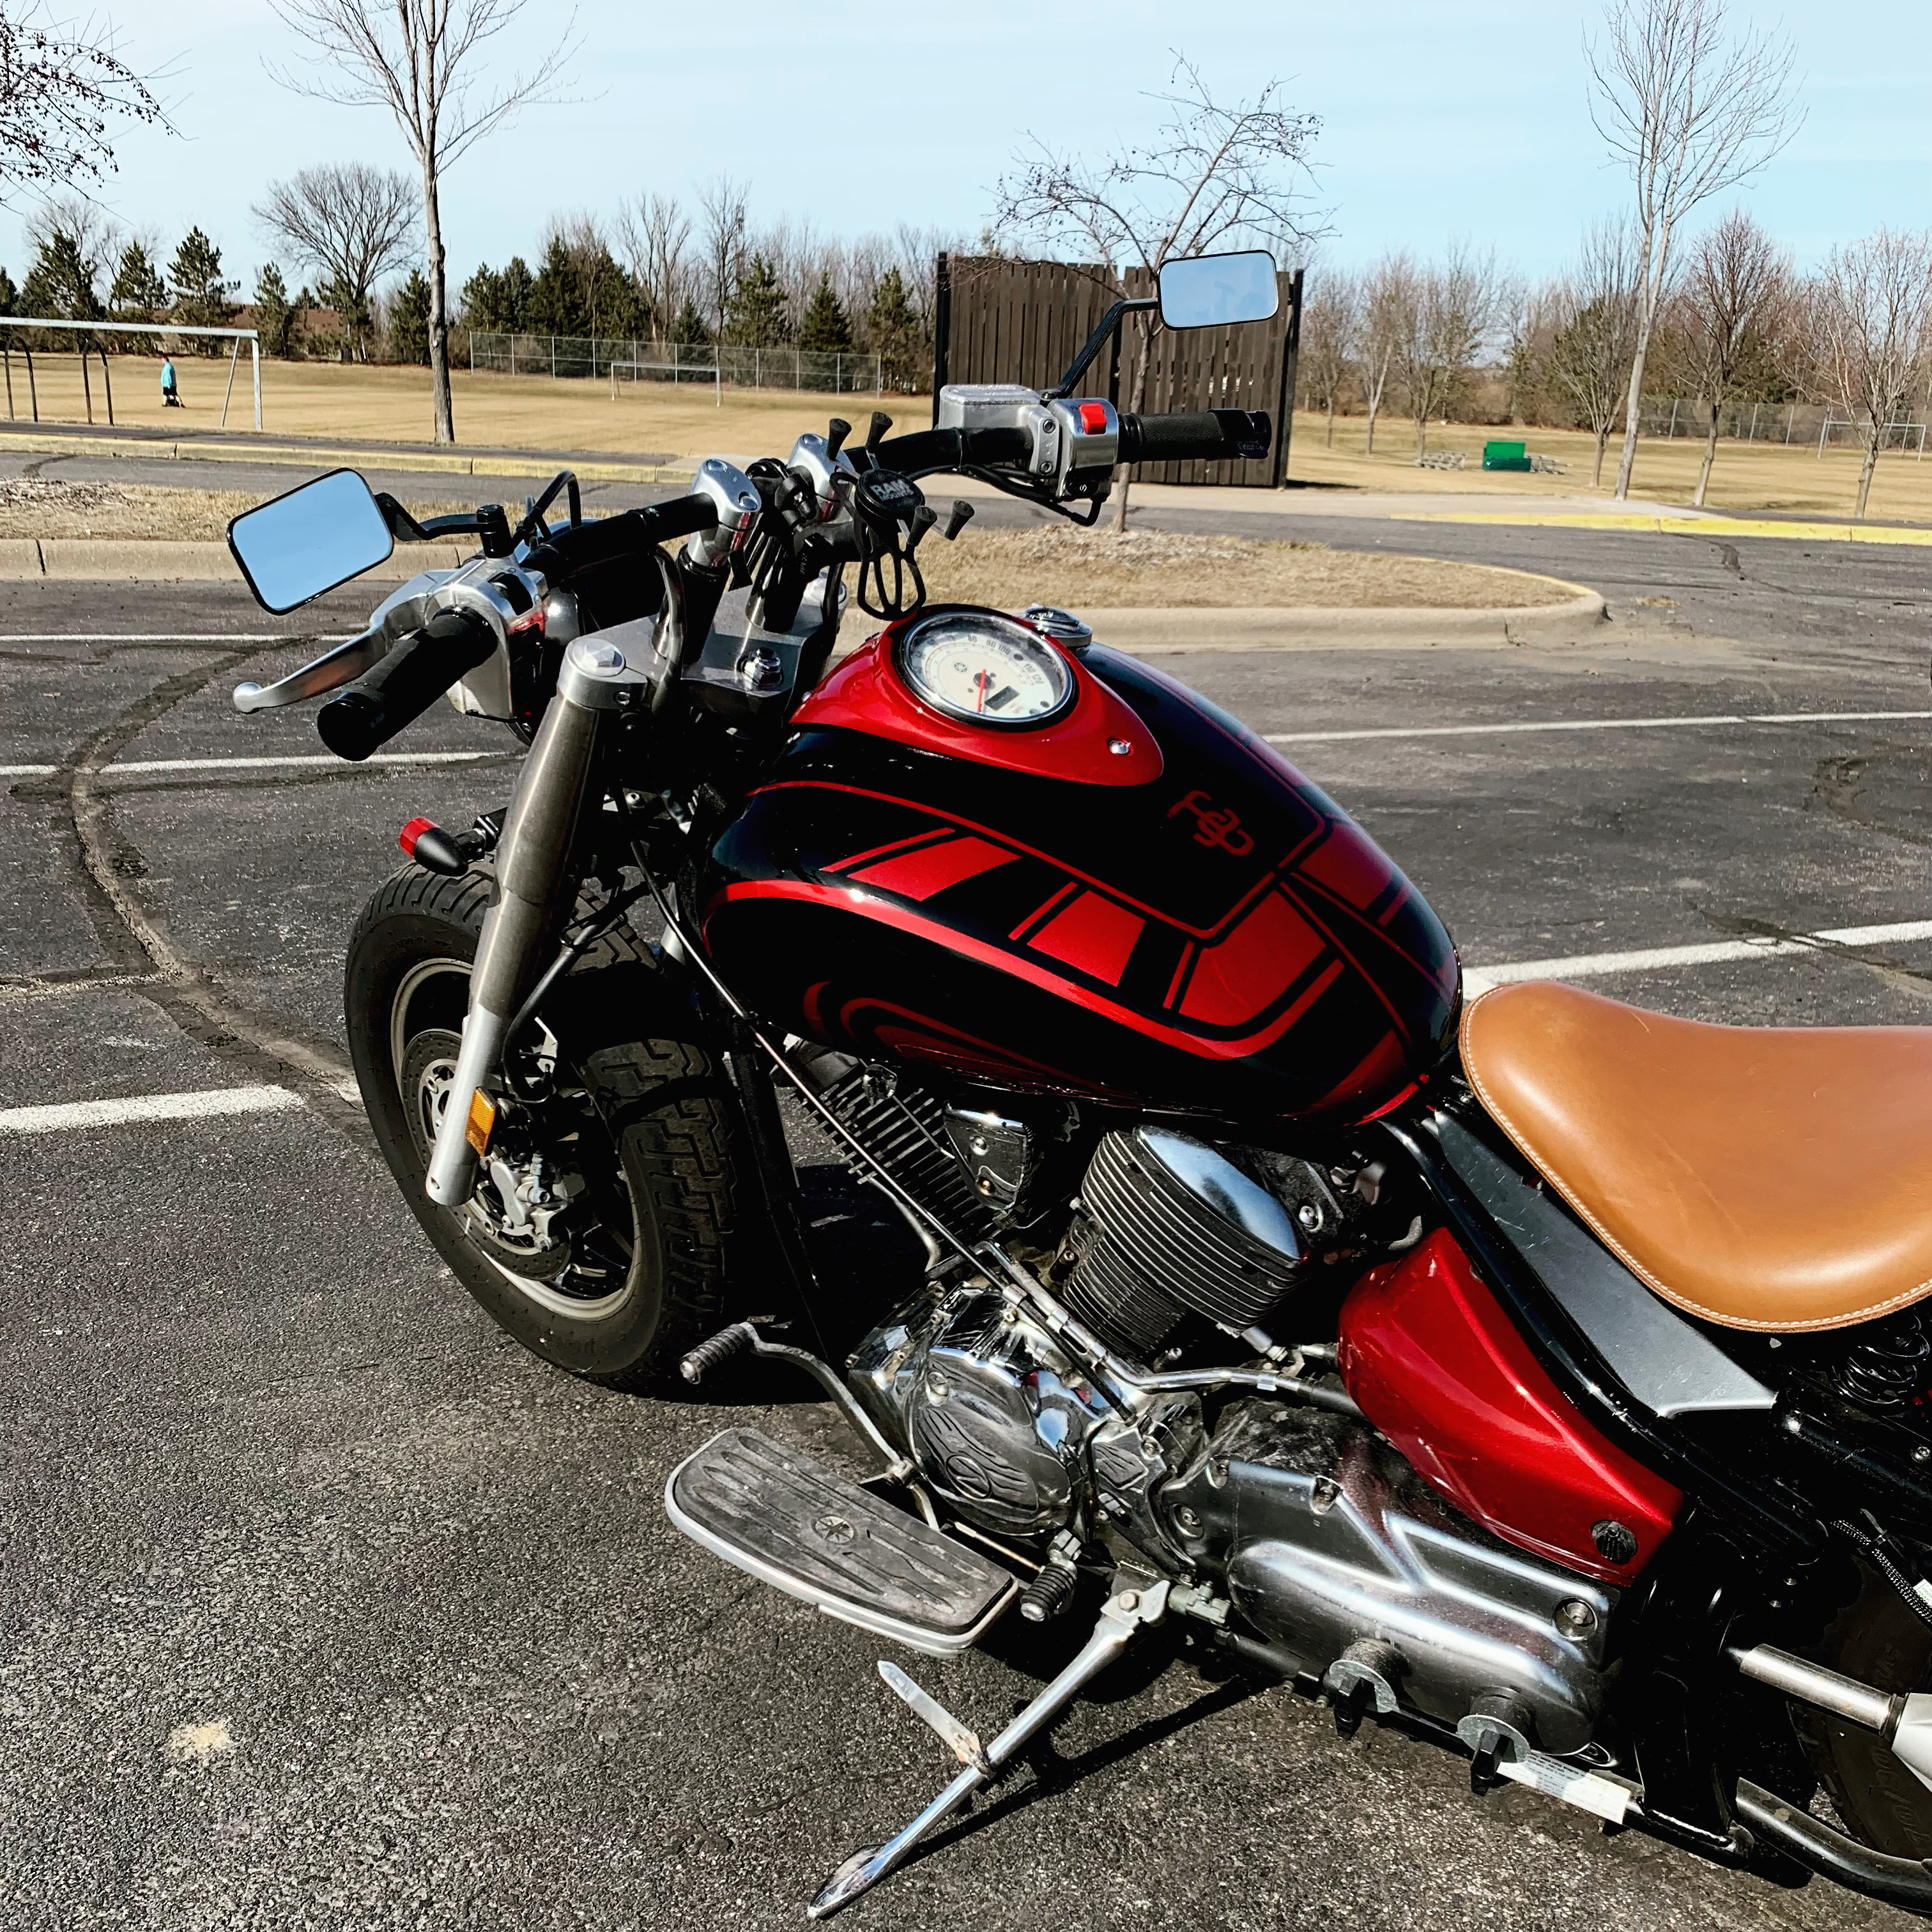
The bike in question is a Yamaha V-Star 1100. These bikes have a fairly large tank, double walled steel, and are VERY difficult to pull dents. Due to the double backbone and large area for the air cleaner, accessing the dent using spoons or similar through the gas cap was also not an option. That left only a couple of other options. 1) Drain the tank of gas, wash it out with distilled water, and weld / pull the dent. This is still a very dangerous proposition as vapors could still reside in the tank and I really didn’t feel like risking blowing myself up. 2) Buy a new tank that has no dents. There are no real aftermarket options available for this bike which made the tank prices crazy expensive. 3) Fill the dent in with bondo and hope it doesn’t shrink / pop over time.
Since the money he got for the repair was based on a body shop’s initial bid after they said they could pull the dent and primer the tank, it didn’t leave any room for option 2. Once he took the tank to that same shop, they then decided they couldn’t actually pull the dent after all and wouldn’t do the repair. It was now up to me to do the best I could with what was available to try and at least give him something that would work well enough.
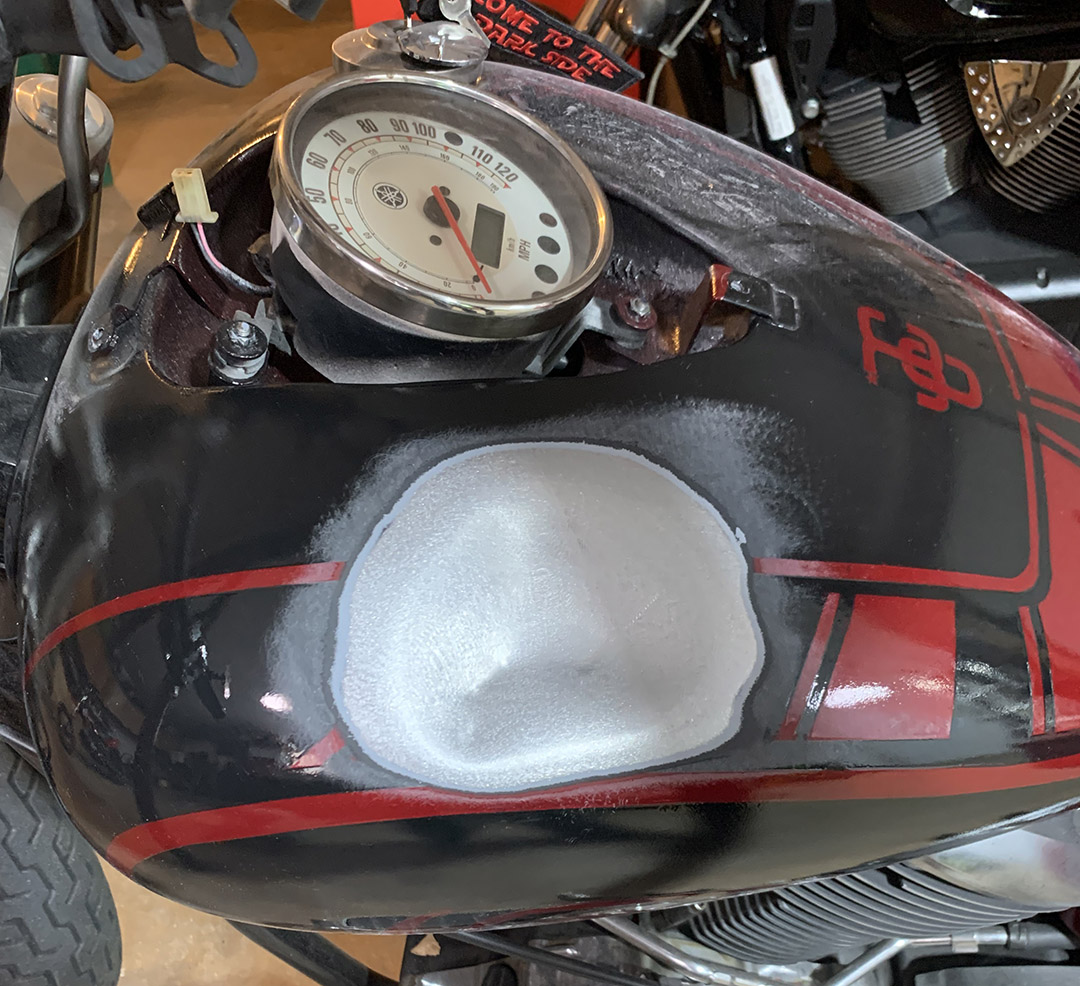
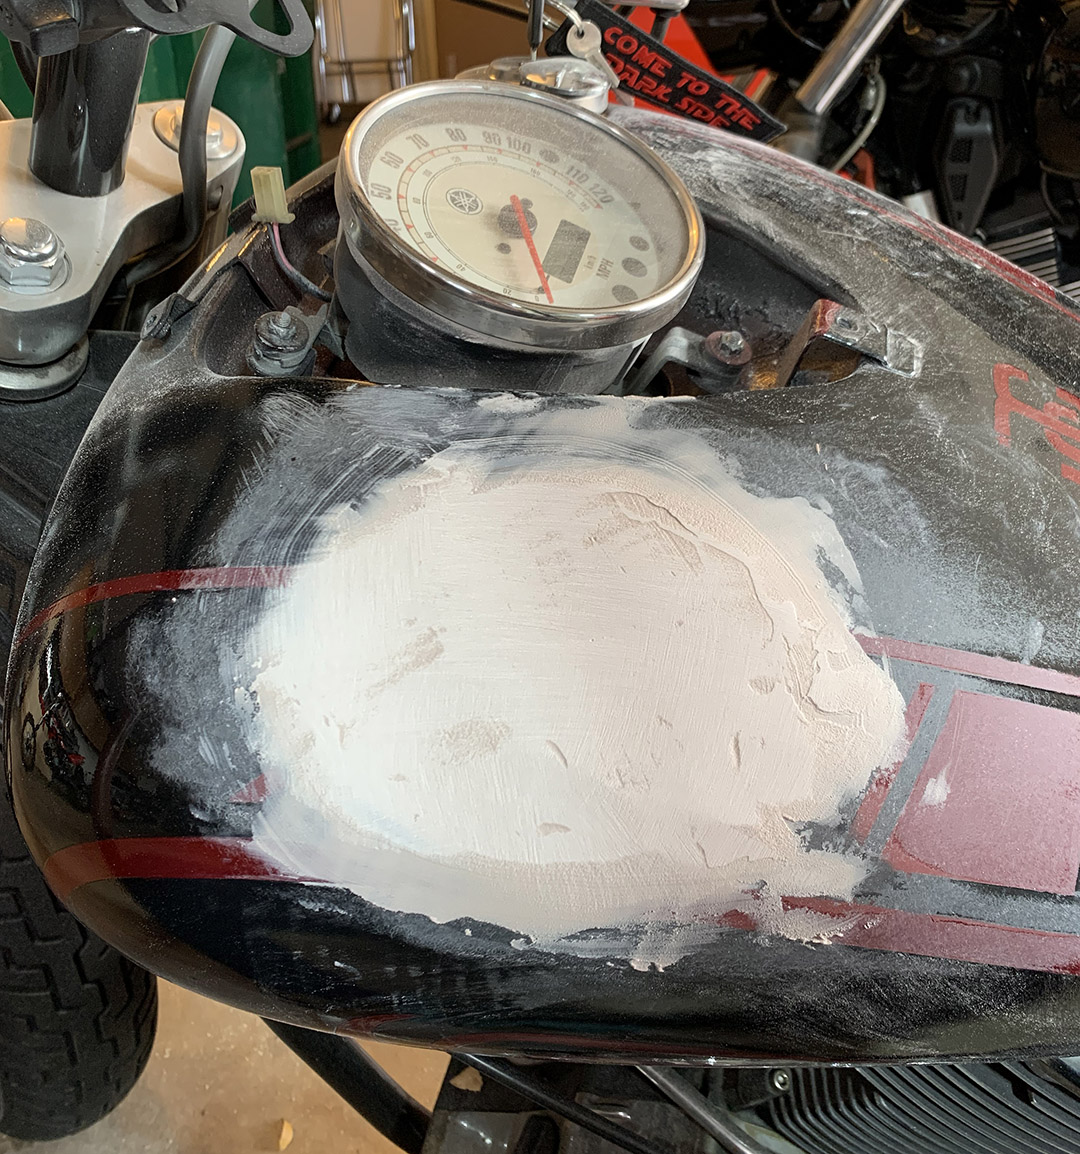
I started by stripping all the paint down to bare metal where the dent was. Luckily the dent wasn’t quite as bad as initially expected. It was maybe ¼ to ½ inch deep. Right at the edge of what is usually determined safe for bondo. Once the surface was sanded with 60 grit and cleaned thoroughly, I laid down thin layers of bondo to build them up over time and let them dry between each layer. If you have read my other blogs, you know that bondo is probably my least favorite thing to do. No matter how much time I take trying to make things right, there is always something about this substrate that just doesn’t agree with me. This time went a little better, but getting out air pockets still proved to be a bit of an issue.
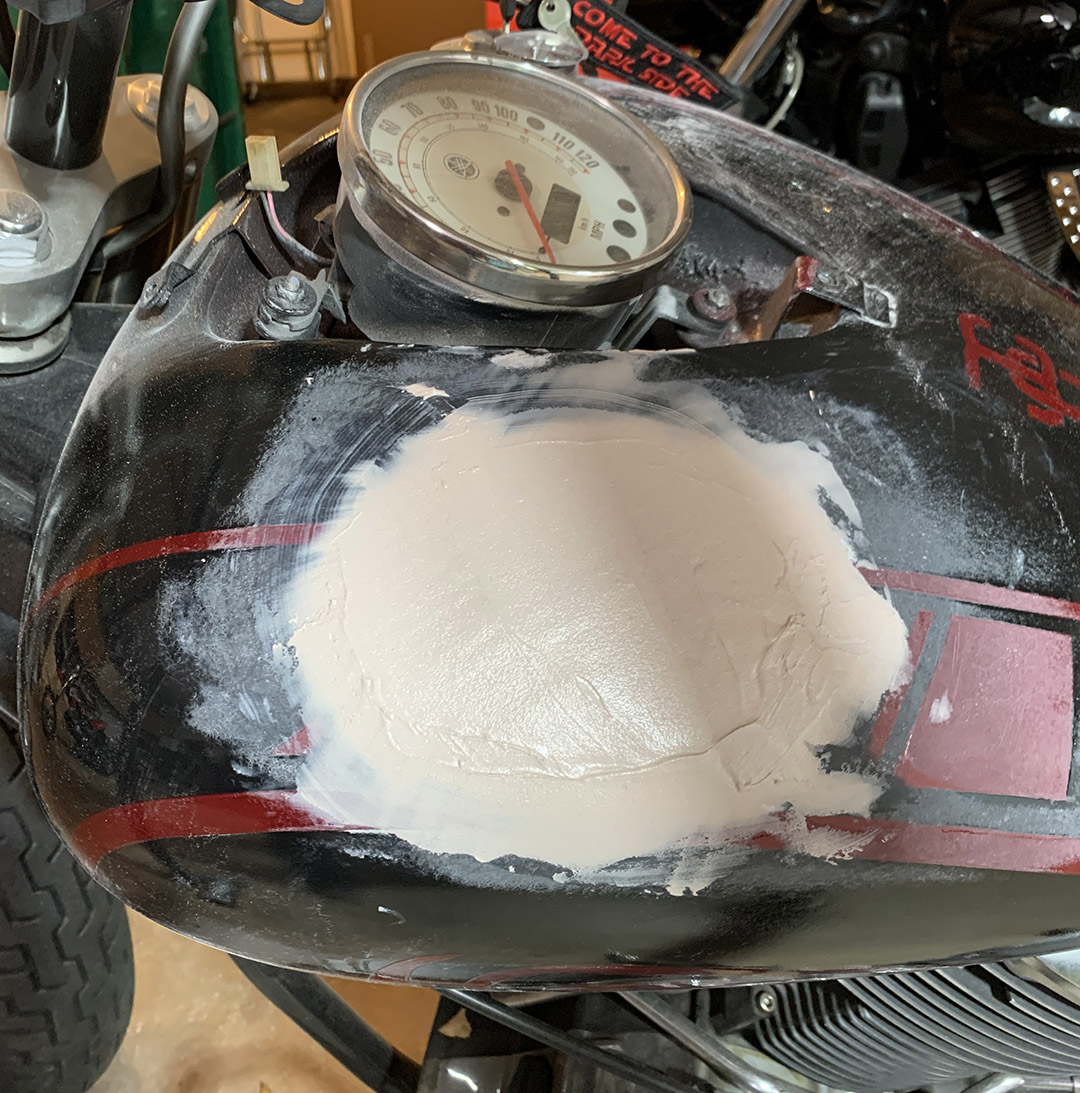
The body-filler was extended beyond the dent in order to feather the edges. I lightly sanded between each layer of bondo to make sure my coverage was evening out well. Using a sanding block, the bondo was then shaped to match the curve of the tank and finish sanded by hand to be ready for paint. I like to use an epoxy DTM primer from Speedokote for my base primer layer. It has very good adhesion and covers well. While not the best sanding primer out there, it’s a great inexpensive all-in-one option for those of us on a tight budget.

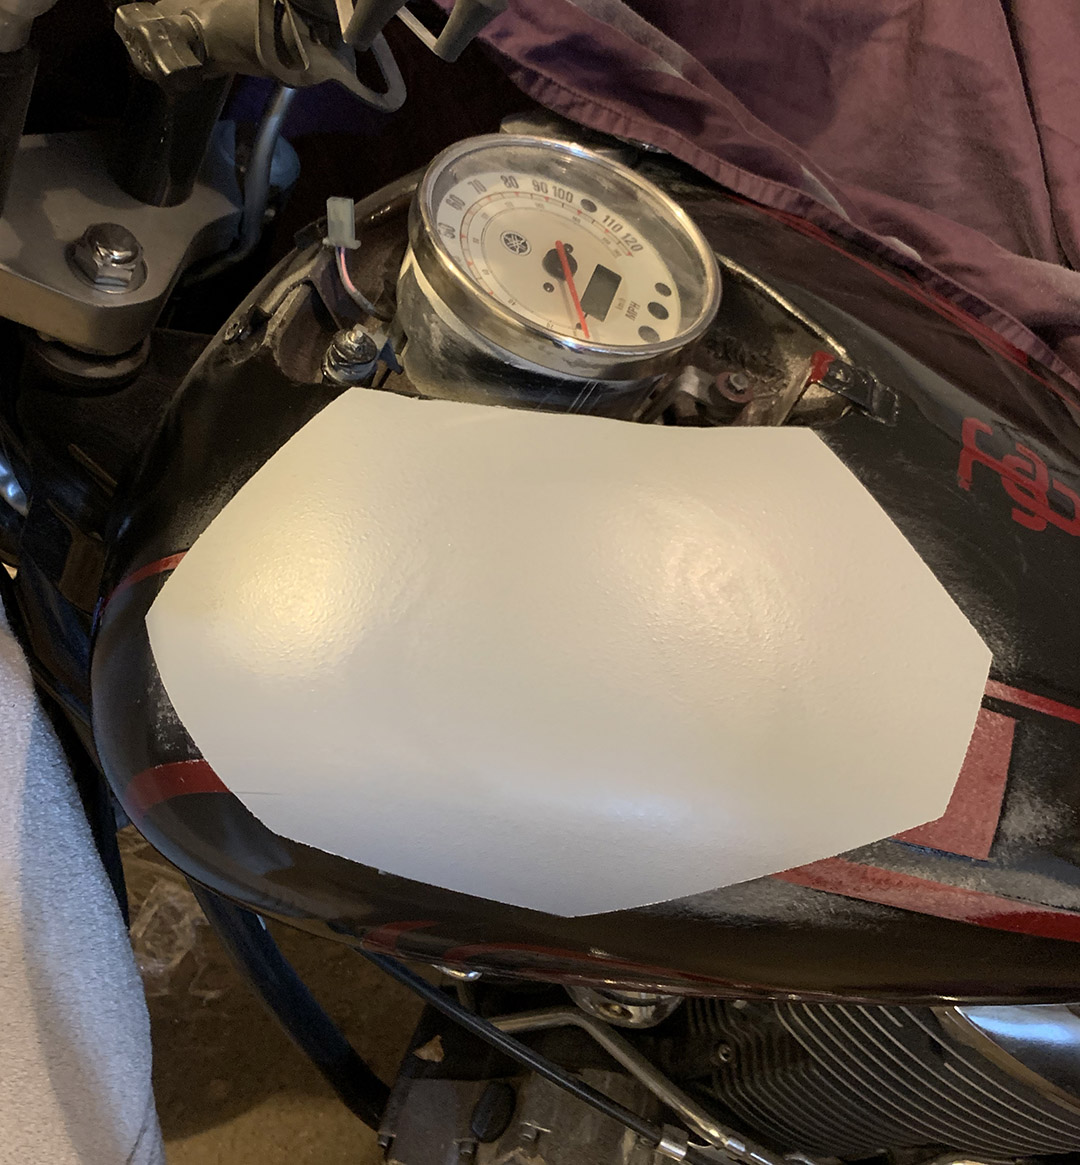

I started by taping off a rather large area for the primer knowing that I was going to be sanding a lot of it down. I wanted to make sure the transition from old paint to new was as smooth as possible. Once the primer was laid down, it was time to sand. For this step I used 320 grit wet-sandpaper. I keep a spray bottle filled with mostly water and a bit of dish soap. It makes the sandpaper glide better while also making clean up a bit easier. I had to be very careful during this step to make sure I didn’t sand too deep into the original clear / paint.
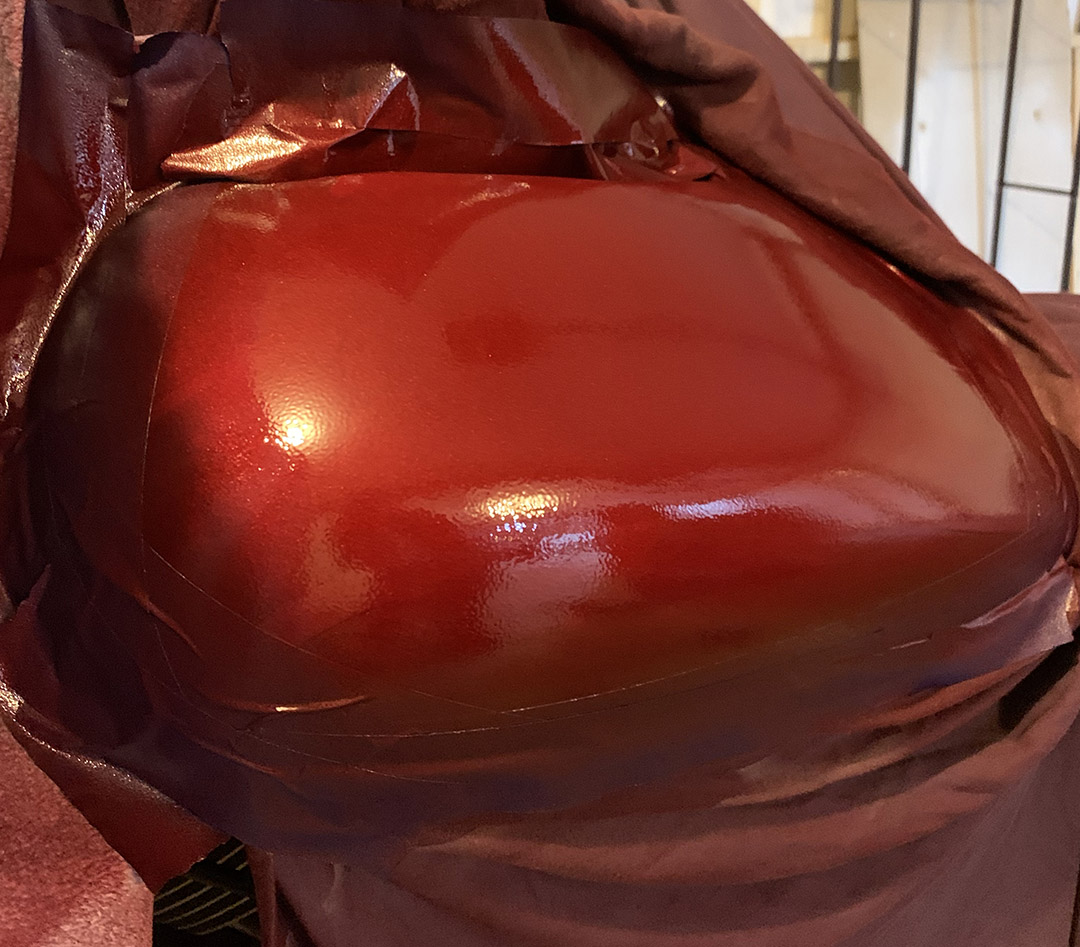
Once the primer was smoothed out, it was time to start laying down paint. Luckily, there was some Restoration Shop – Fire Red Pearl Acrylic Urethane left from the first time the tank was painted. This was sprayed beyond the edges of the primer so that it could be sanded back for a smooth transition without worrying about any of the primer showing through. So it was once again, time to sand. It’s crucial during each of these steps to make sure that the full surface gets a good “scuff” to it. There should be no glossy patches at all when you go to paint your next layer. This is done through a combination of wet-sanding as well as using scuff pads that can be purchased at most home improvement stores (example). The scuff pads work much better than sandpaper when you are trying to scuff-up contoured areas without removing a lot of material.
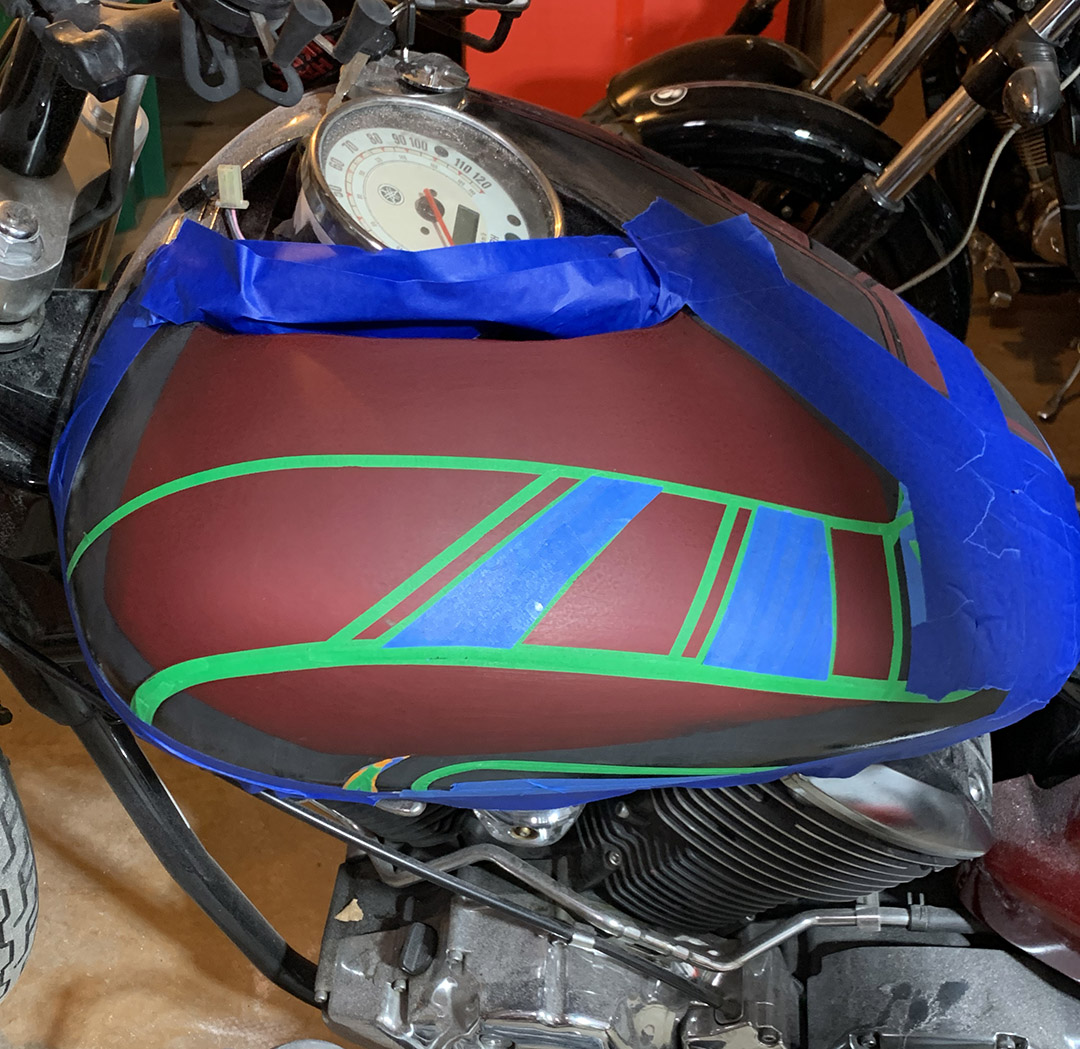
Now that the red had been sprayed and sanded, it was time to tape out the design to match the old layout. I tend to like to use ¼ inch masking tape first and then go back over with a wider masking tape to cover up the gaps. It’s very important to make sure your masking lines are pushed down tight to the tank to not allow any paint to bleed through. An exacto blade was then used to cut out any finer details to finish up the design.
This is where the project took a bit of a turn. The first time this tank was painted, I used a black paint from a different company that turned out to be crap (avoid paintforcars.com unless you really need to save pennies). It was lighter than it should have been and did not spray smooth. Knowing this, I decided to go with Restoration Shop – Jet Black (Gloss) Acrylic Urethane even though it would require a bit of color blending. This paint did not disappoint. It went down silky smooth and had great coverage.
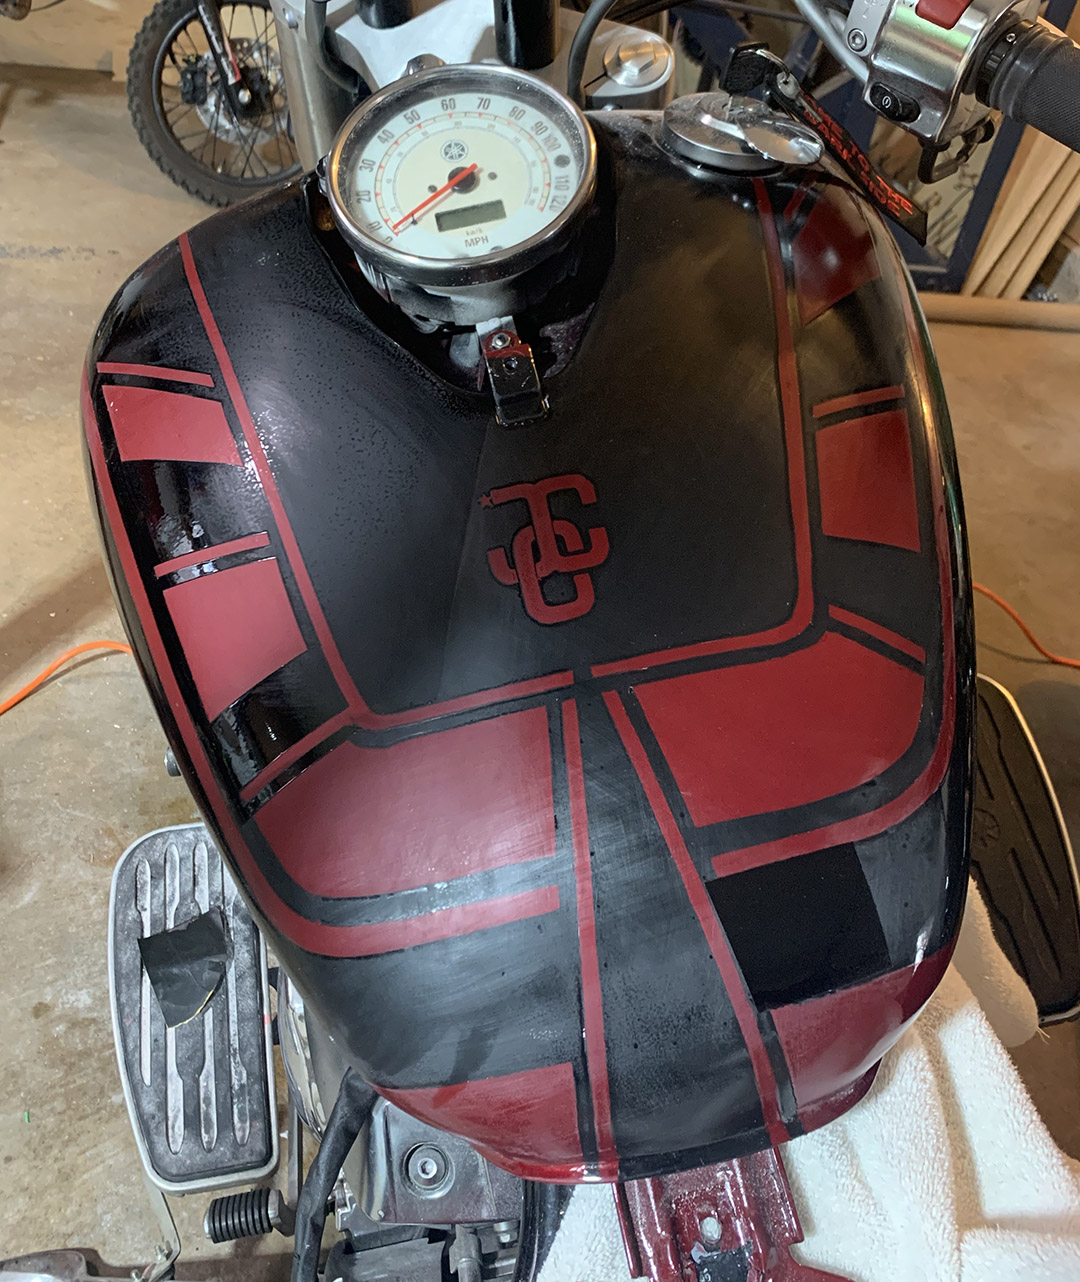
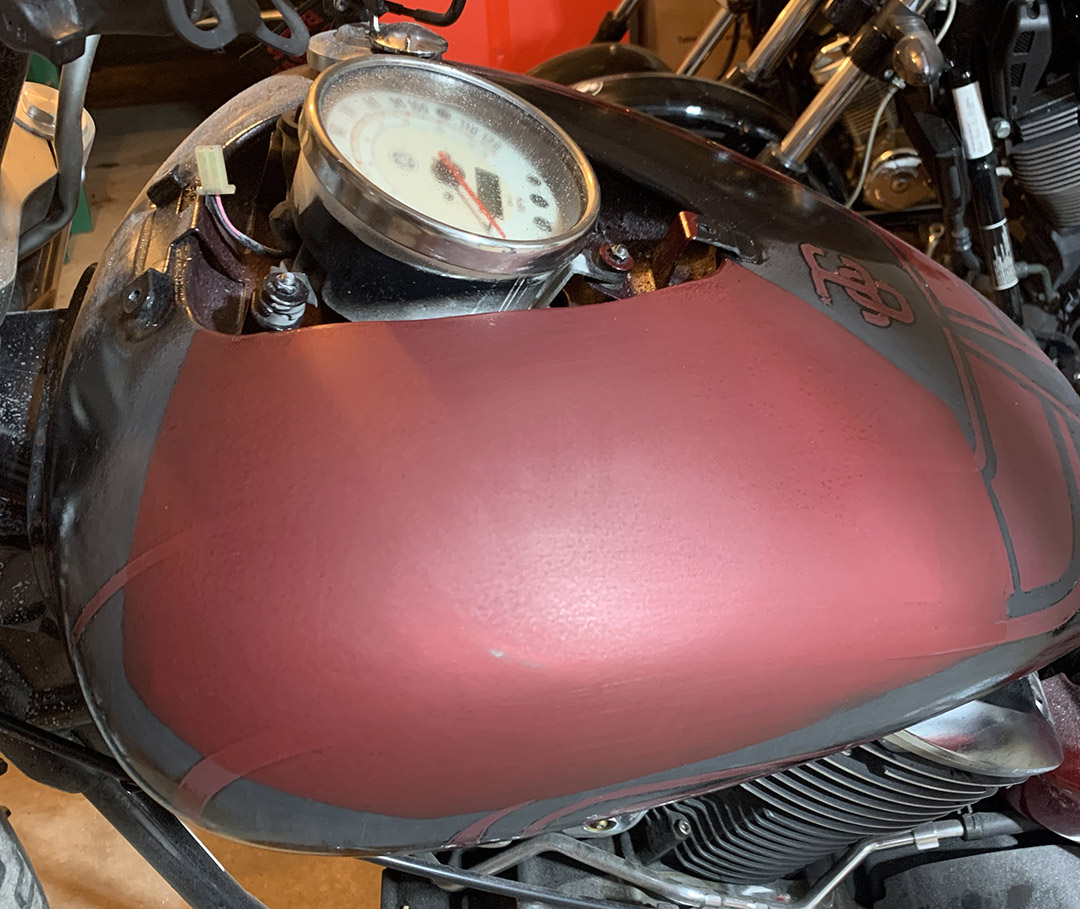
After removing the tape and again sanding the edges, it was pretty apparent where the color did not match. I used an airbrush to then blend out the lines to hopefully make them a little less noticeable once the clear coat was on. Not the greatest of situations, but there were some concessions I had to make in order for the whole bike to look decent upon completion. Again, everything was sanded and scuffed to prep for the clear coat. I used Speedokote Automotive Clear Coat Fast Dry 2K Urethane. It lays down really well, is easy to spray, and has a great crystal-clear finish.
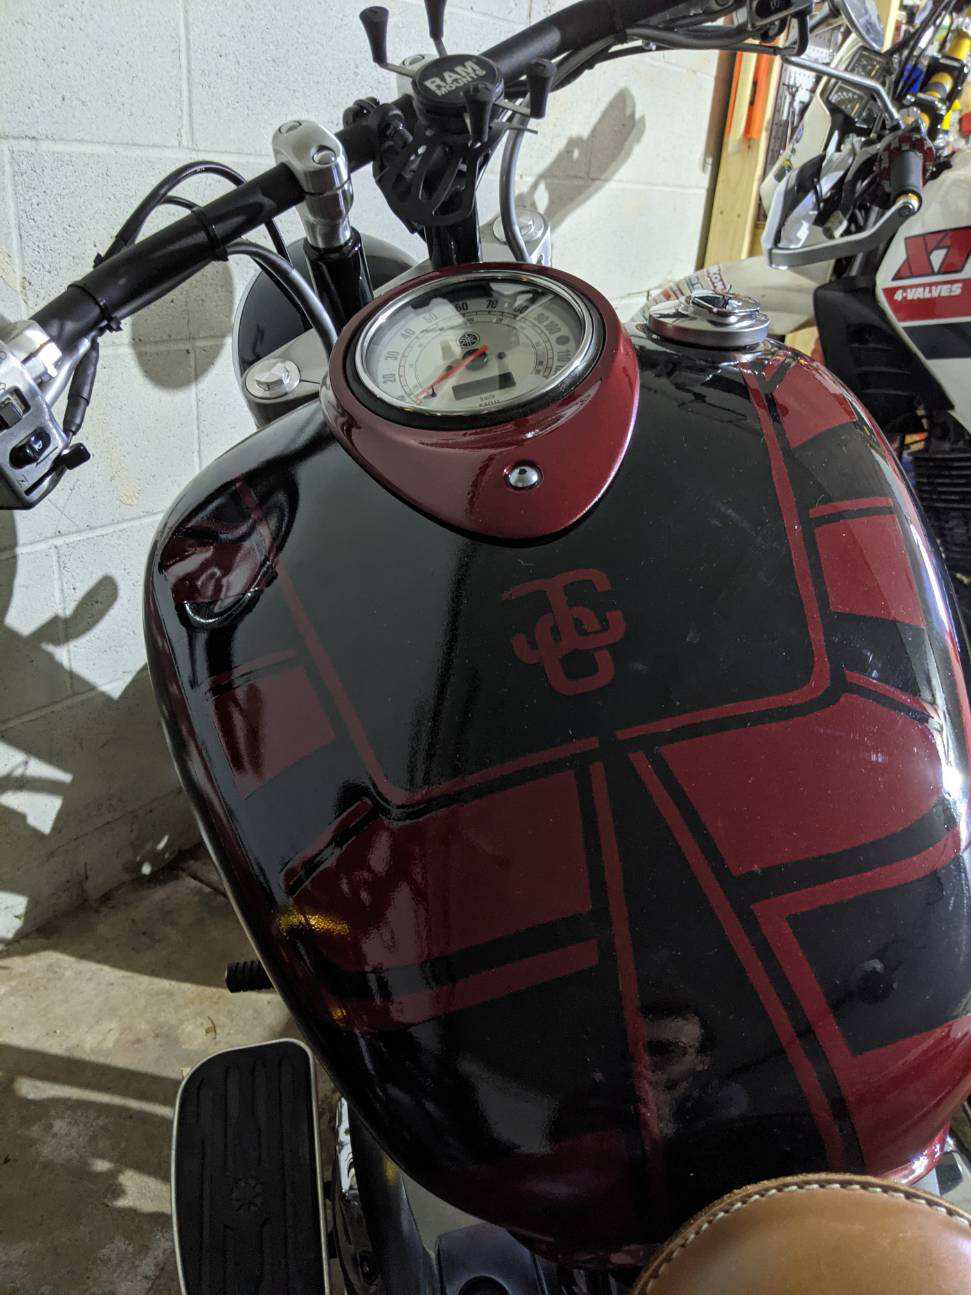
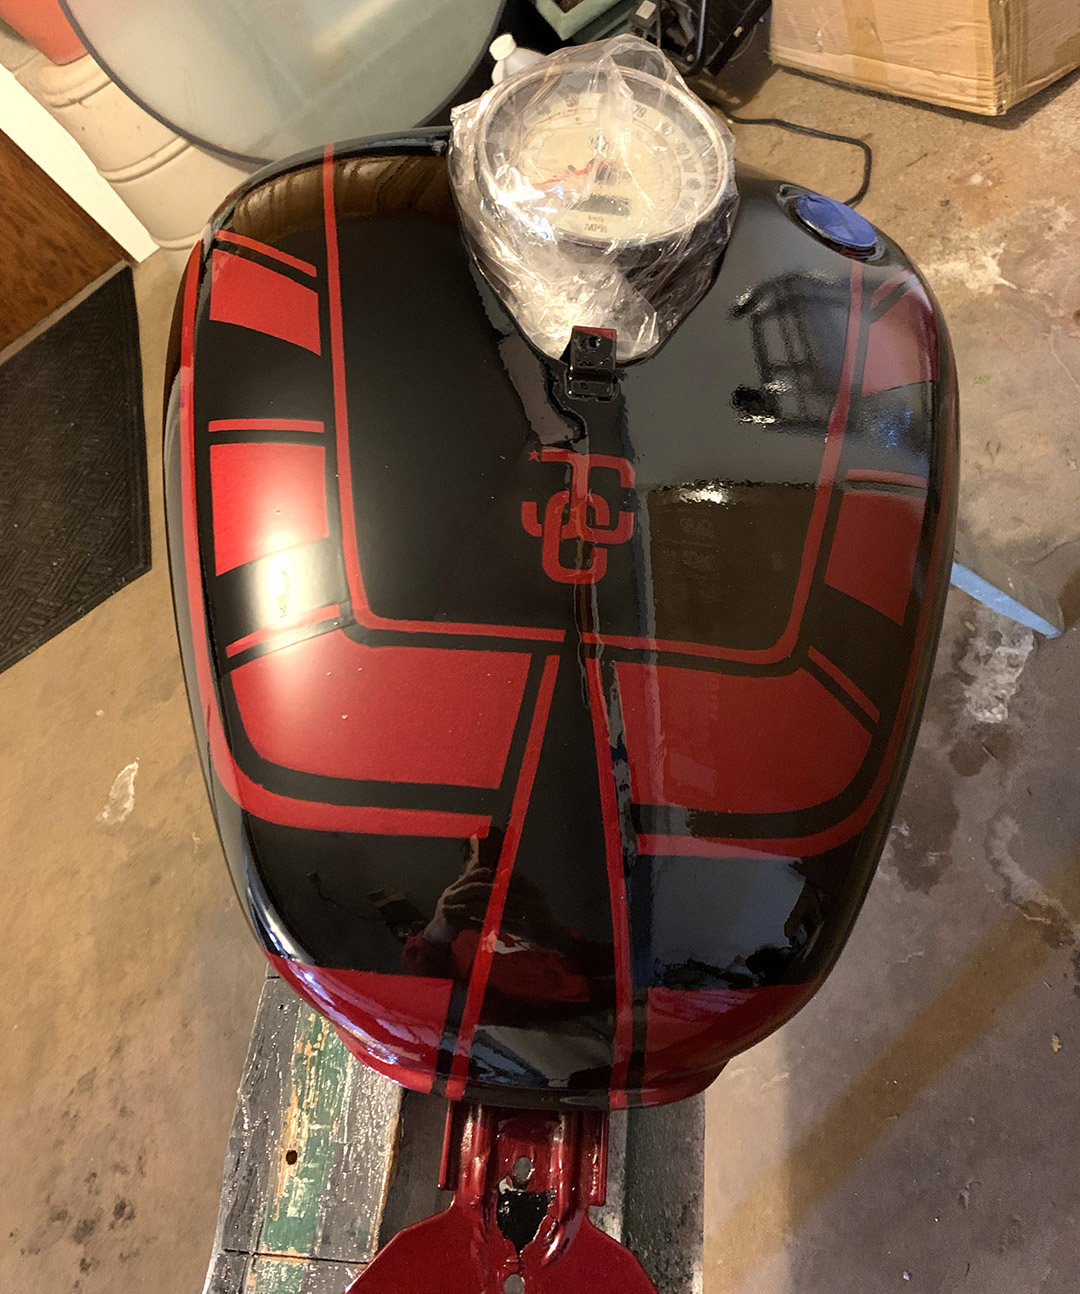
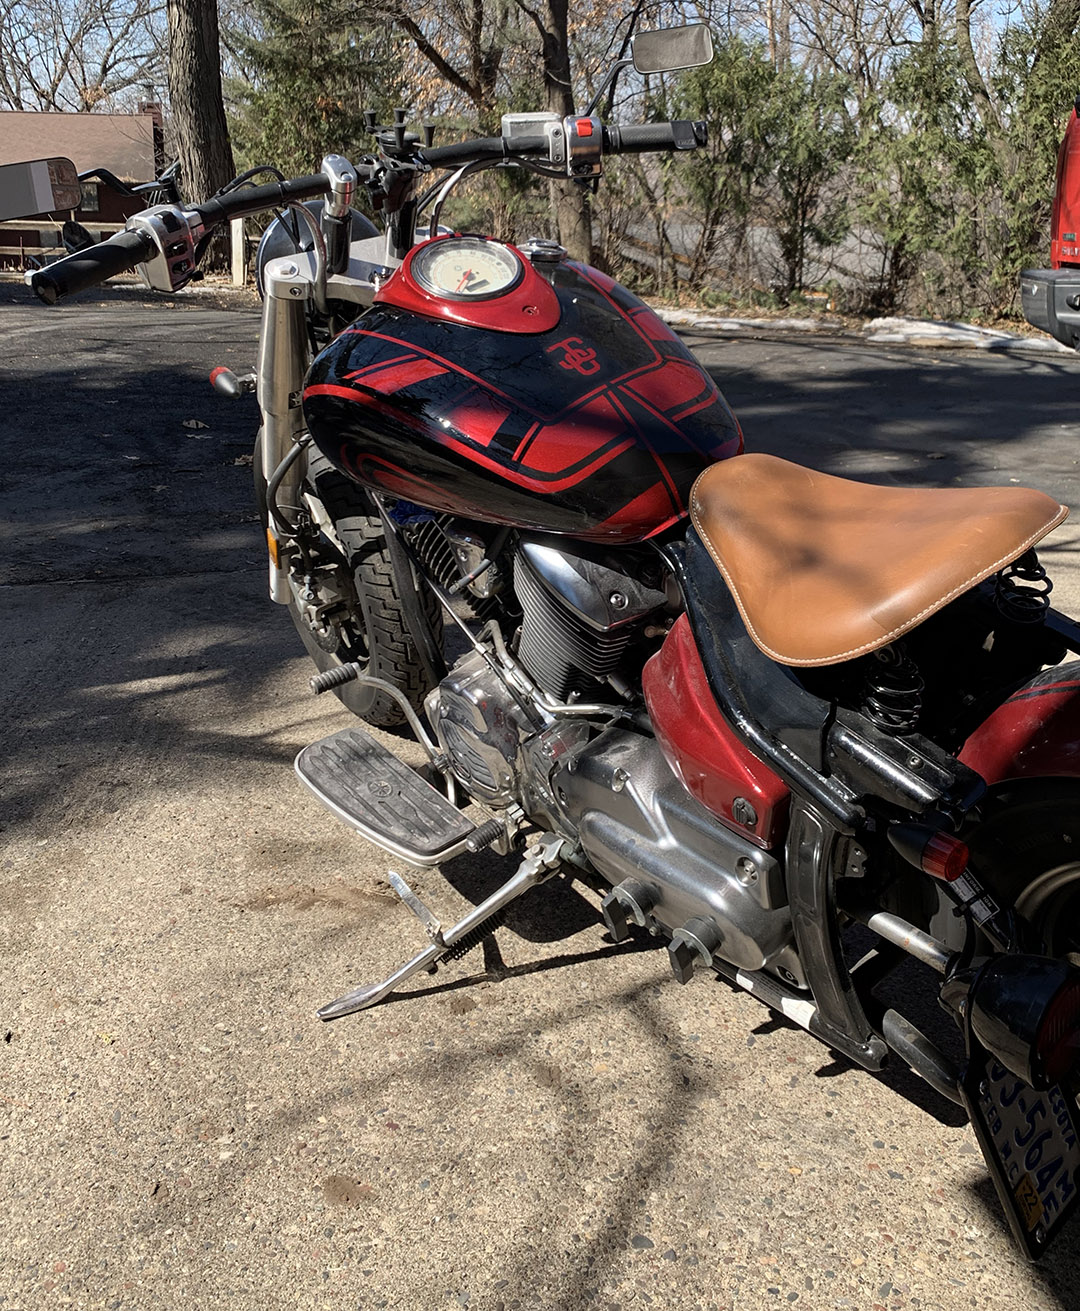
The completed project came out pretty good, I must say. I was really worried that the fix was going to be super obvious over the old paint since I elected to not repaint the entire tank. The fix is really only noticeable if you know where to look and if you are within a foot or so of the tank. As my brother and his friend always like to say, “it’s a good 3-foot bike,” meaning it looks great from 3 feet or more!


Do you have any projects you are working on? Drop me a note in the comments! I love hearing of other DIYers out there that make things happen in their garage.
