We have finally arrived at the part of a bike build I love the most: PAINT! I first got into customizing vehicles by spray painting different designs on my snowmobile hoods. I never had money to buy nice things, so the best I could do was make my turds look a little better. Each project I took on advanced a little more in complexity until I got into minor fabrication and part swaps. But even then, doing the paint was always what I looked forward to.
For me, the paint is really where you can showcase the personality of the bike and rider. While stock bikes look fantastic, they lack a bit of character. Color choice, design style, flake vs flat, and everything in between are so unique to the individual. I had looked at a LOT of different bobber projects as well as other bike builds to get a good sense of what I would like in a bike for myself. It needed to be something that required a bit more thought and work to accomplish. Since I had never done something with metal flake or candy, I thought that would be the perfect choice.

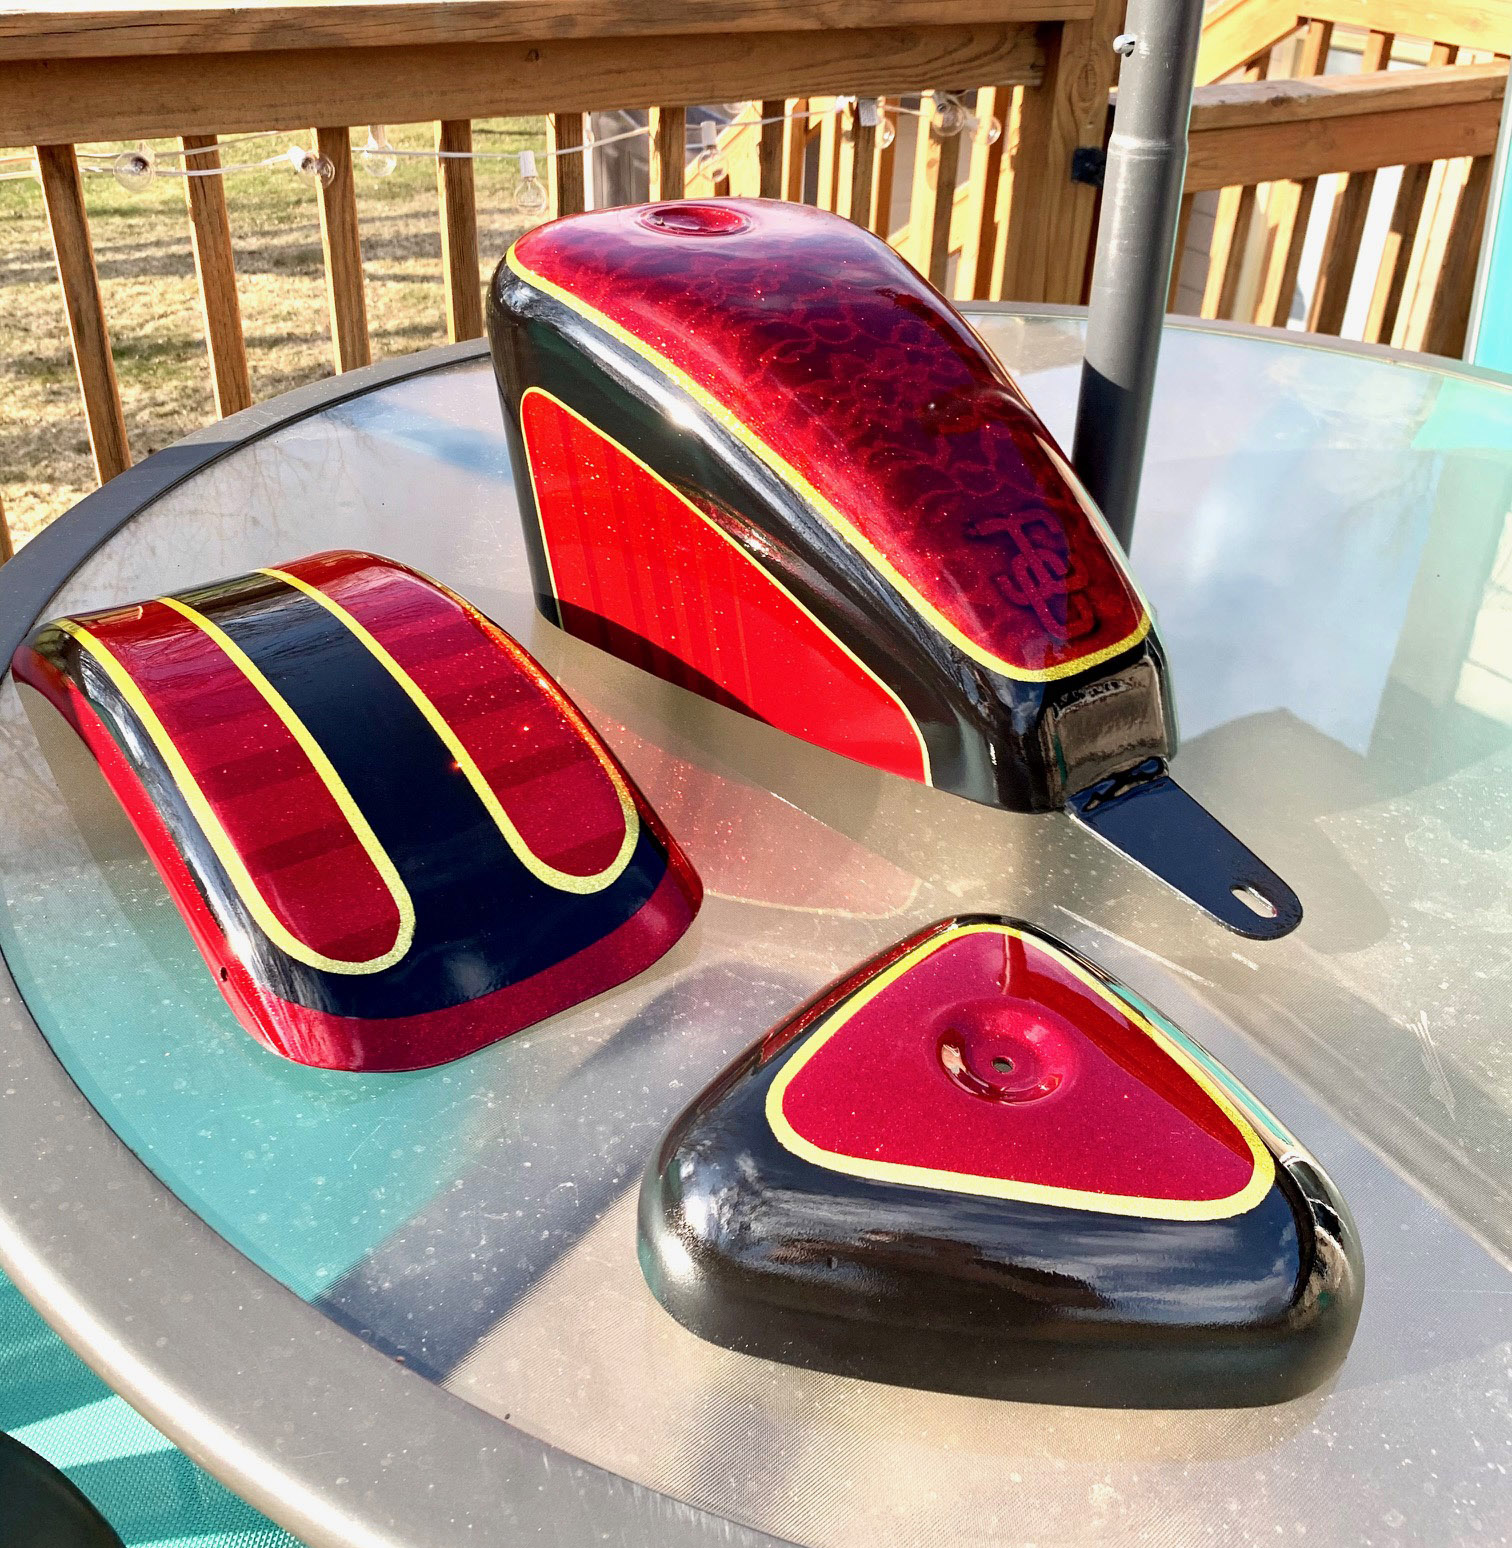
Doing a bit of research, I found that there are quite a few different ways people lay down metal flake. Some people like to spray a really dark base coat that heavily contrasts with the flake color. Some like to do a base coat that matches the flake color as close as possible. I decided to just do my flake coat over straight primer since the gray was a good neutral color. Chrome Silver – Medium Flake .008 Micron was chosen for the flake itself. Then I had to decide if I wanted to mix my flake in with clear or to dry spray it over a wet coat of clear.
I ended up mixing it in with some clear (it seemed easier and would self-level better), but I wasn’t really sure just how much I needed to get good coverage. When the flake is in the mixing container, it’s easy to think it’s a lot more saturated with flake than it actually is. The first few layers I sprayed were not covering quite as I had hoped, so I had to keep mixing in more and more flake and layering more coats to achieve the effect I wanted. In the end, the sides could have used a little more coverage, but once under the candy, it wouldn’t be as noticeable.
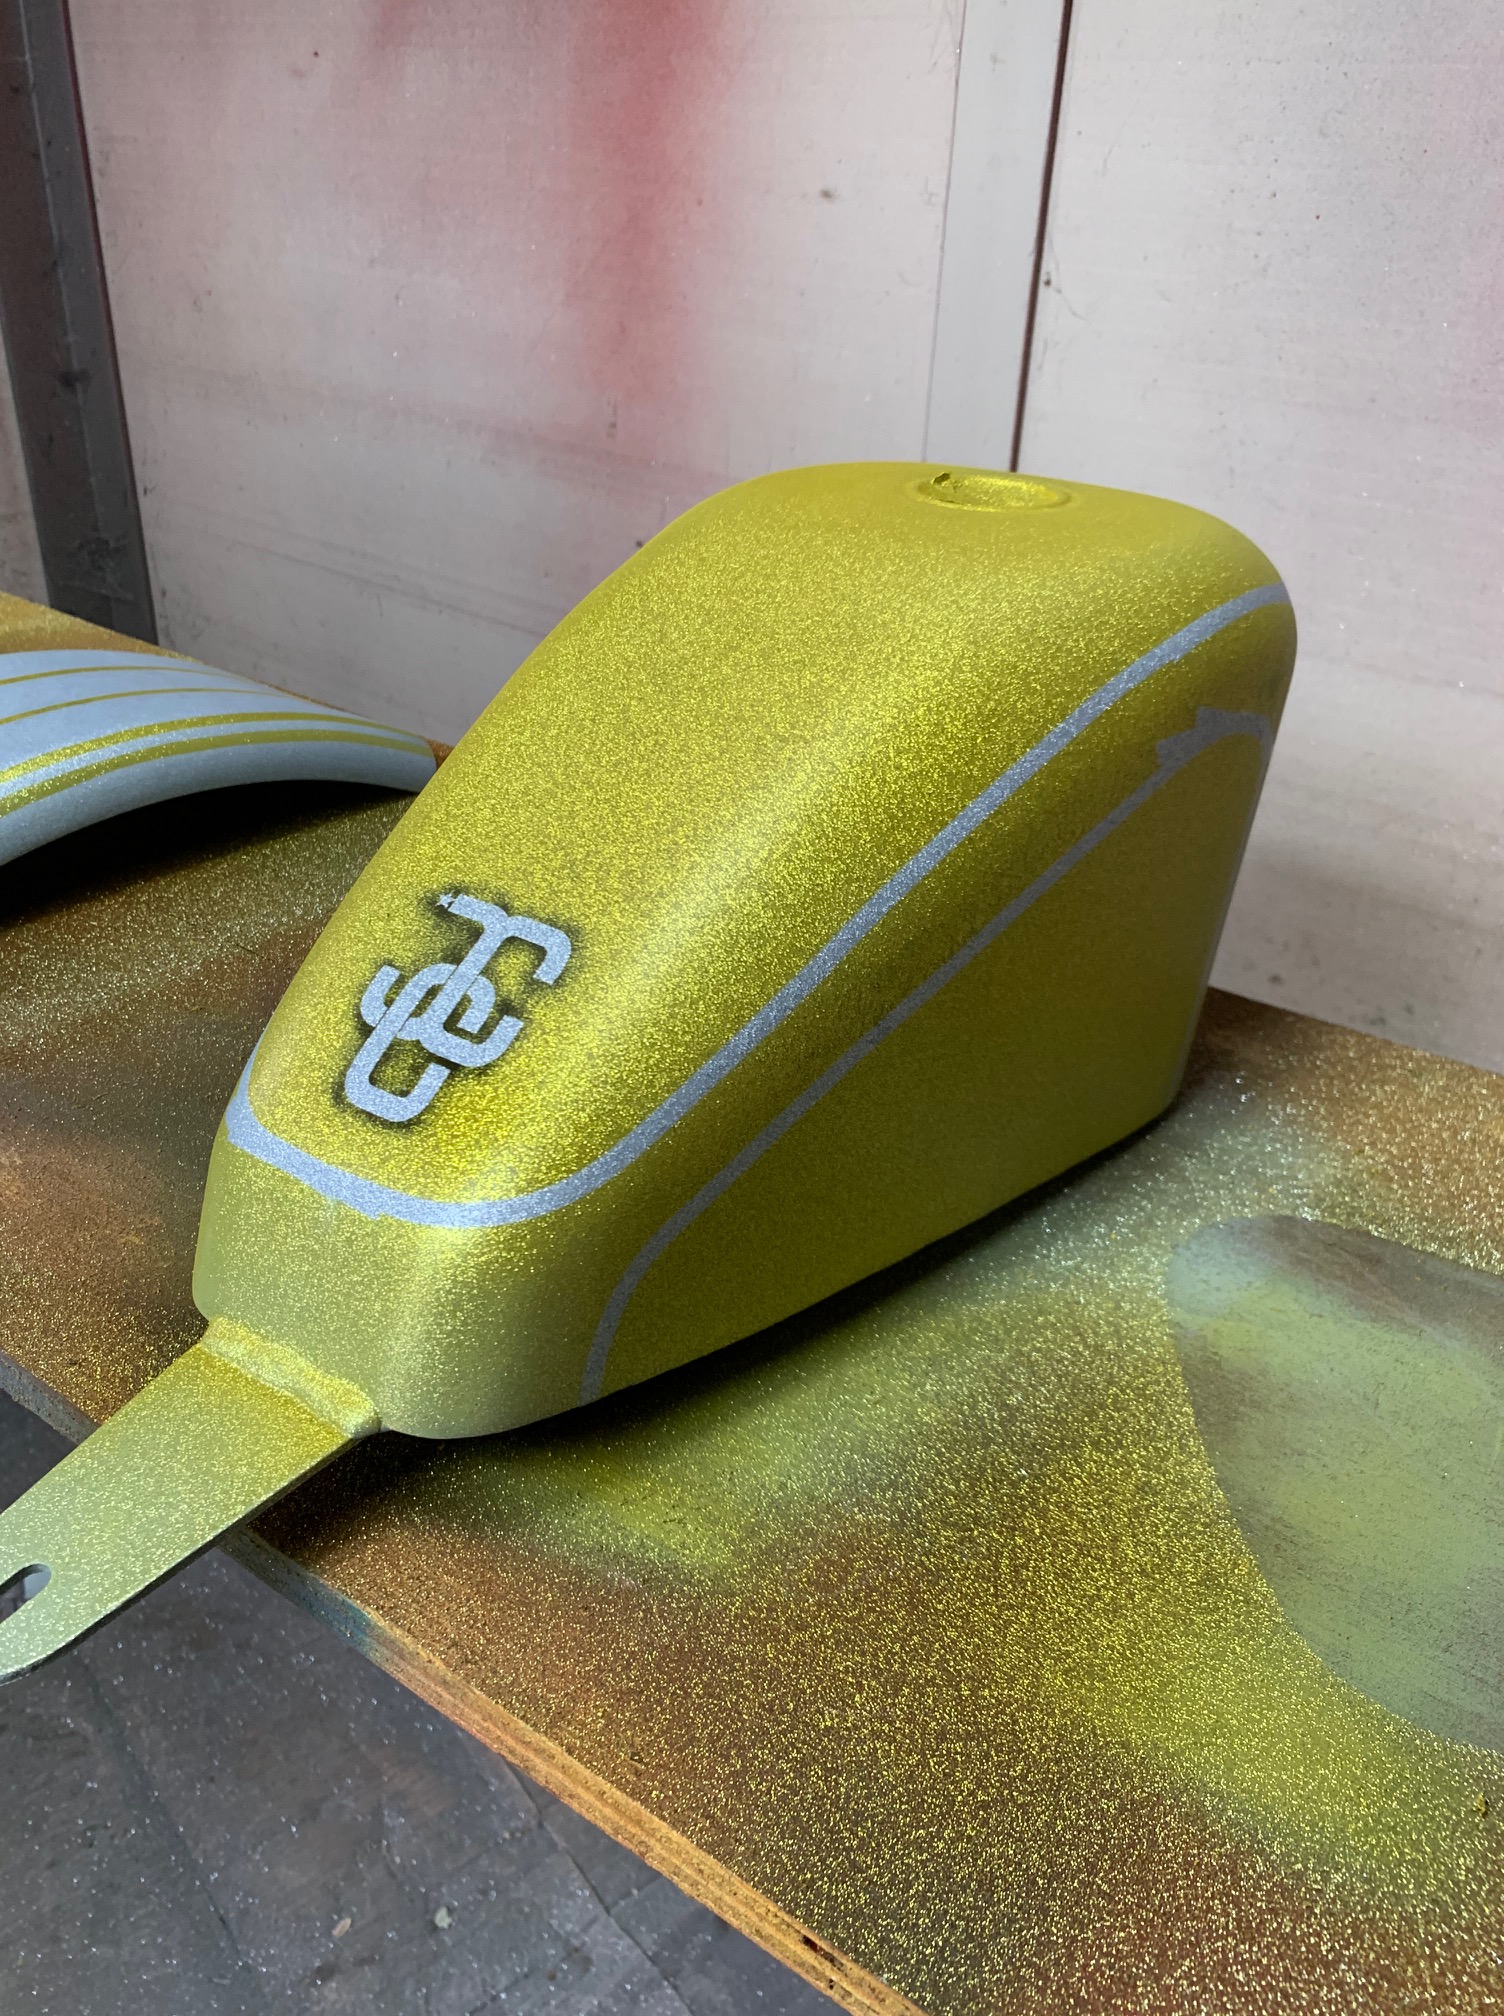
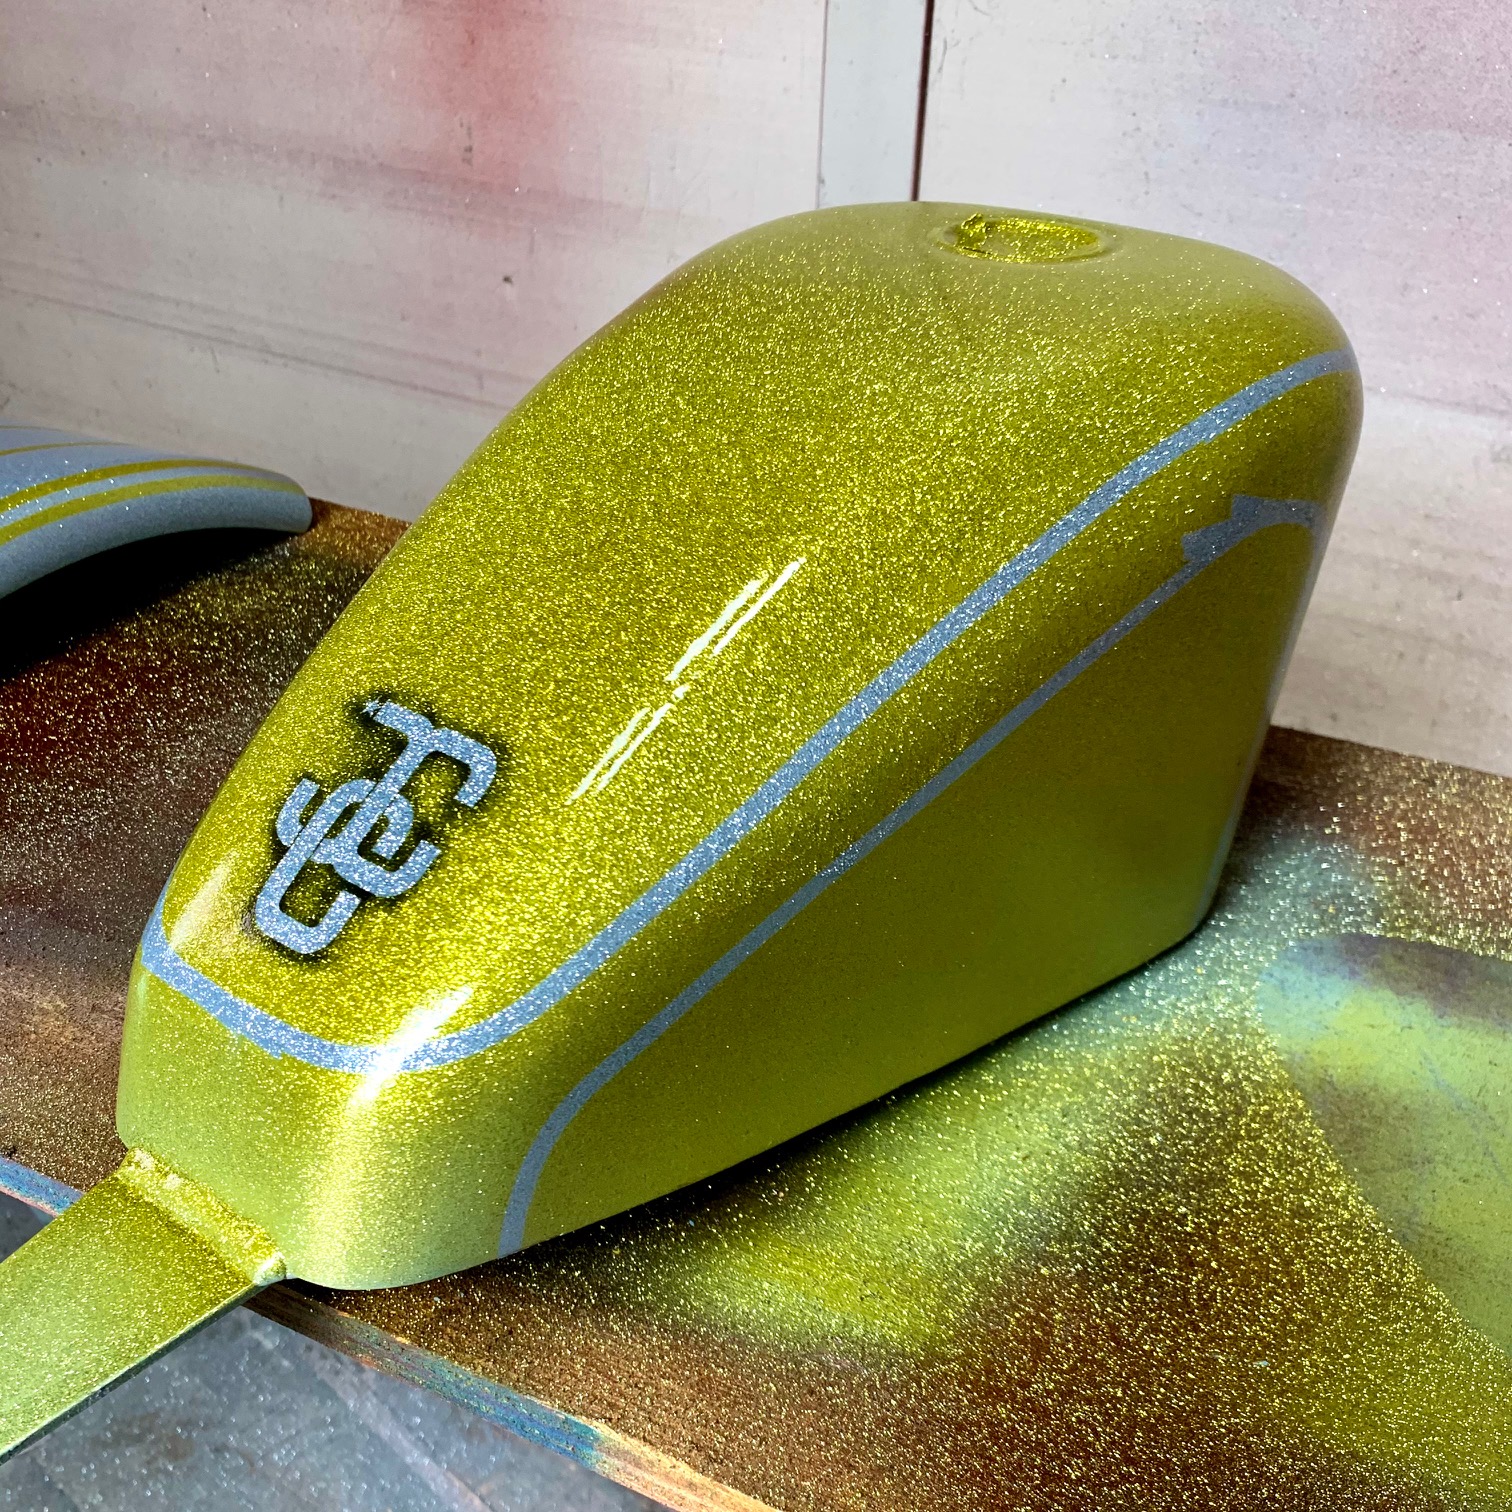
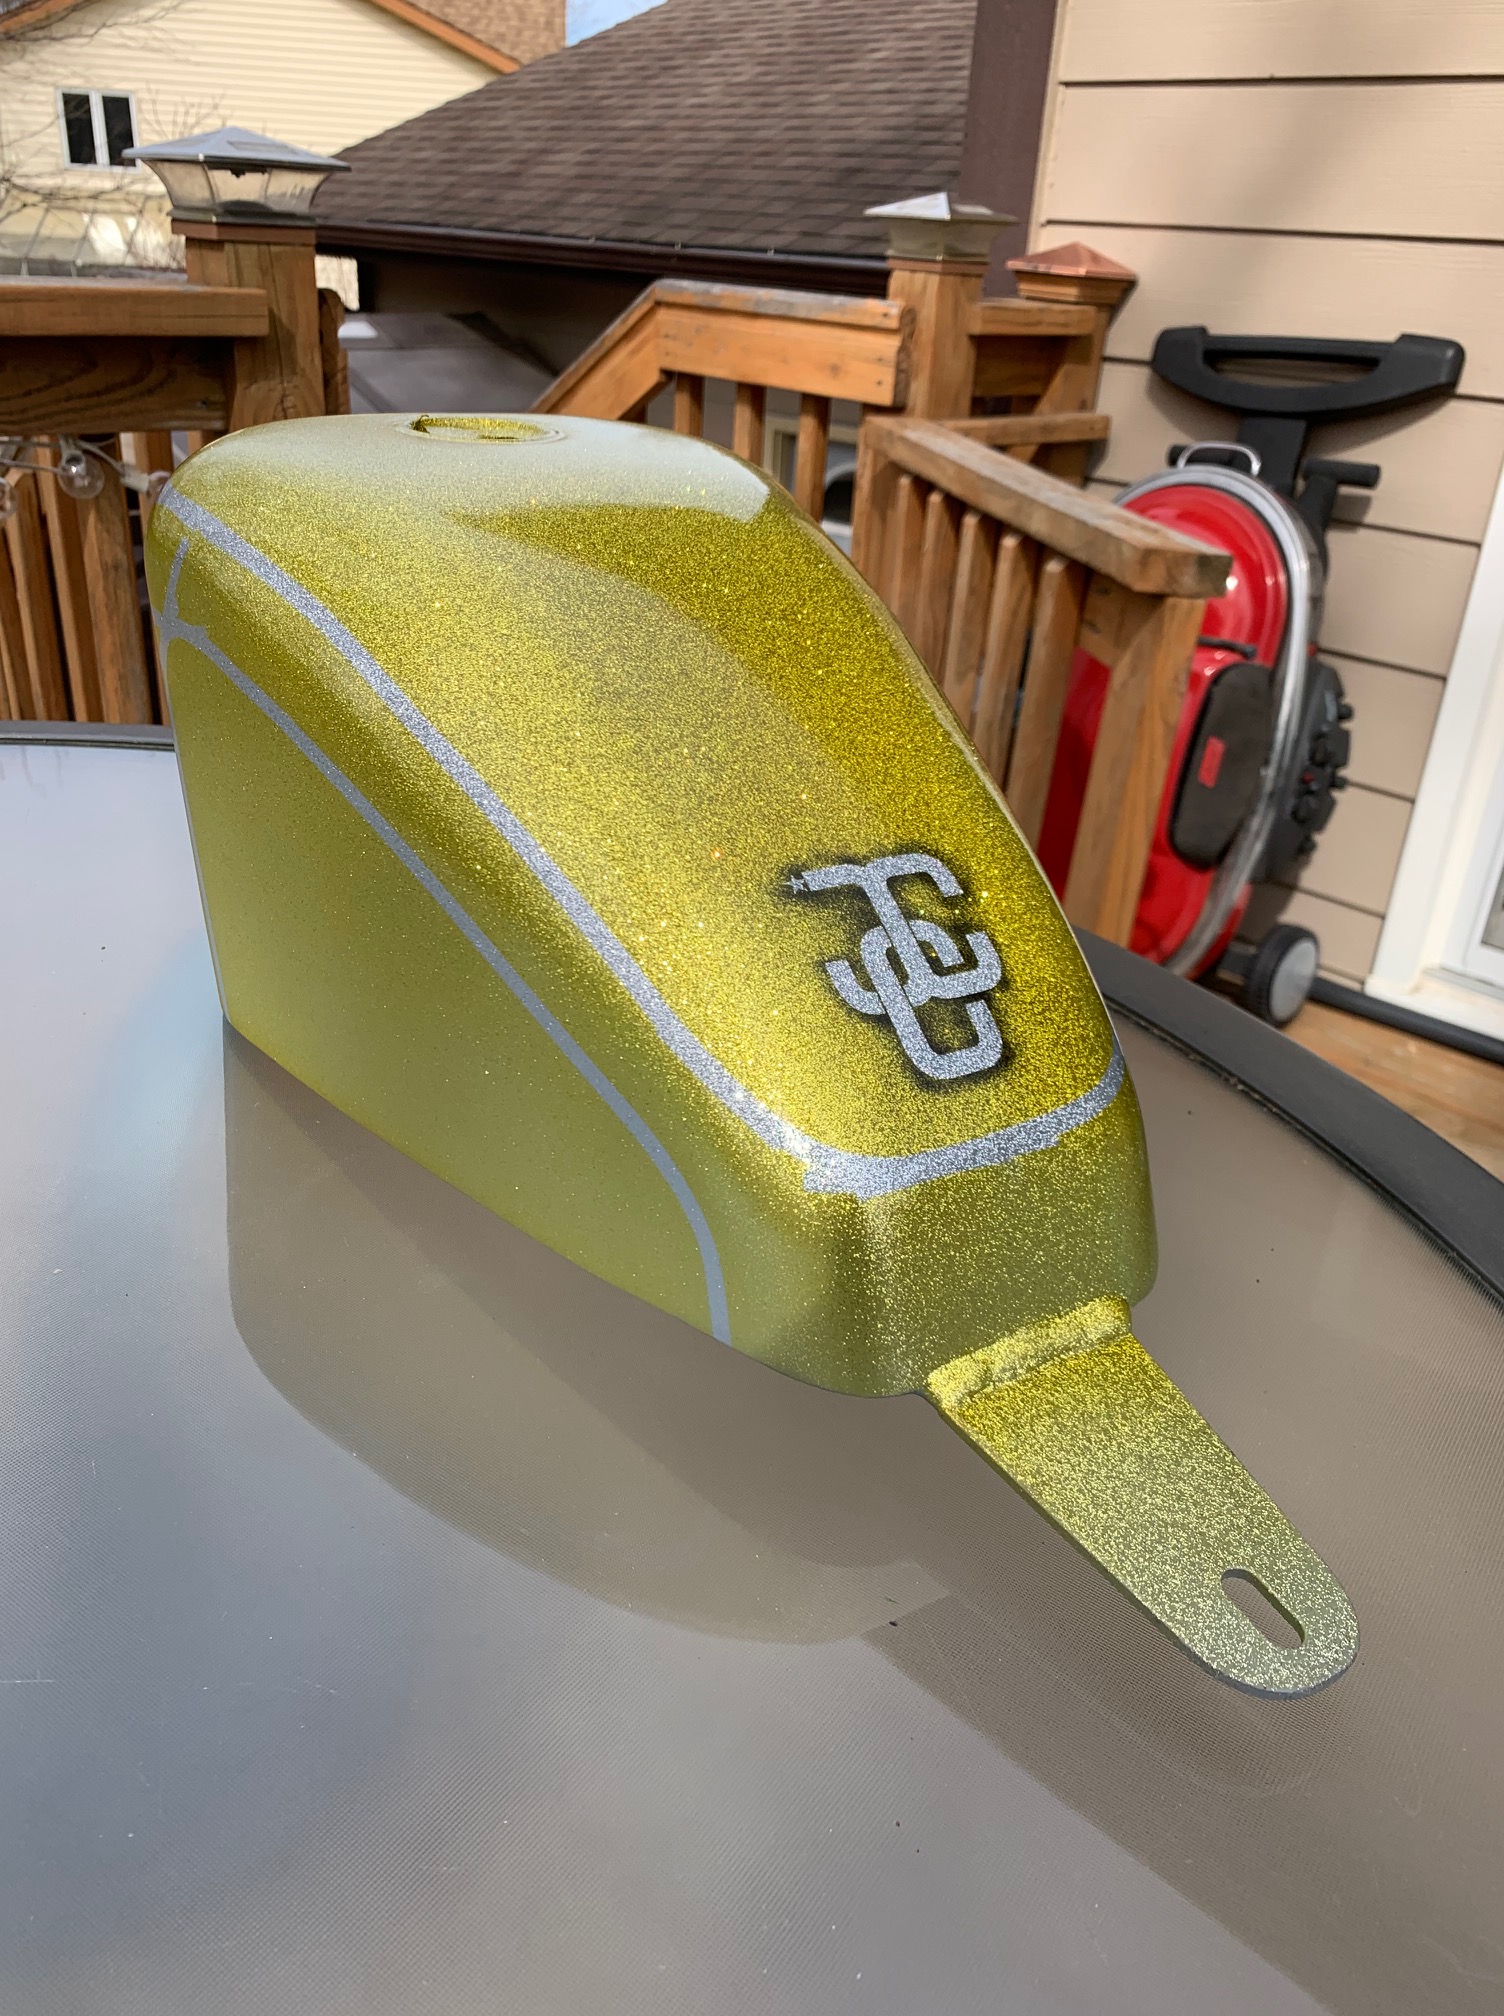
Once I had the silver flake laid down, I decided to cover the whole tank in House of Kolor Pagan Gold Candy. One thing to note here is that candy needs to be mixed with intercoat or clear in order to carry the color and give that transparent effect. I used House of Kolor C2C-SG100 Shimrin Intercoat Clear. Laying down the gold first was in preparation to do some pinstripe taping rather than having to go back and do a bunch of back-taping. I didn’t want to have to rely on air-brushing a bunch of details since my airbrush is kind of junk. Once the gold had been laid down, I could go back and start laying out the design I had planned.
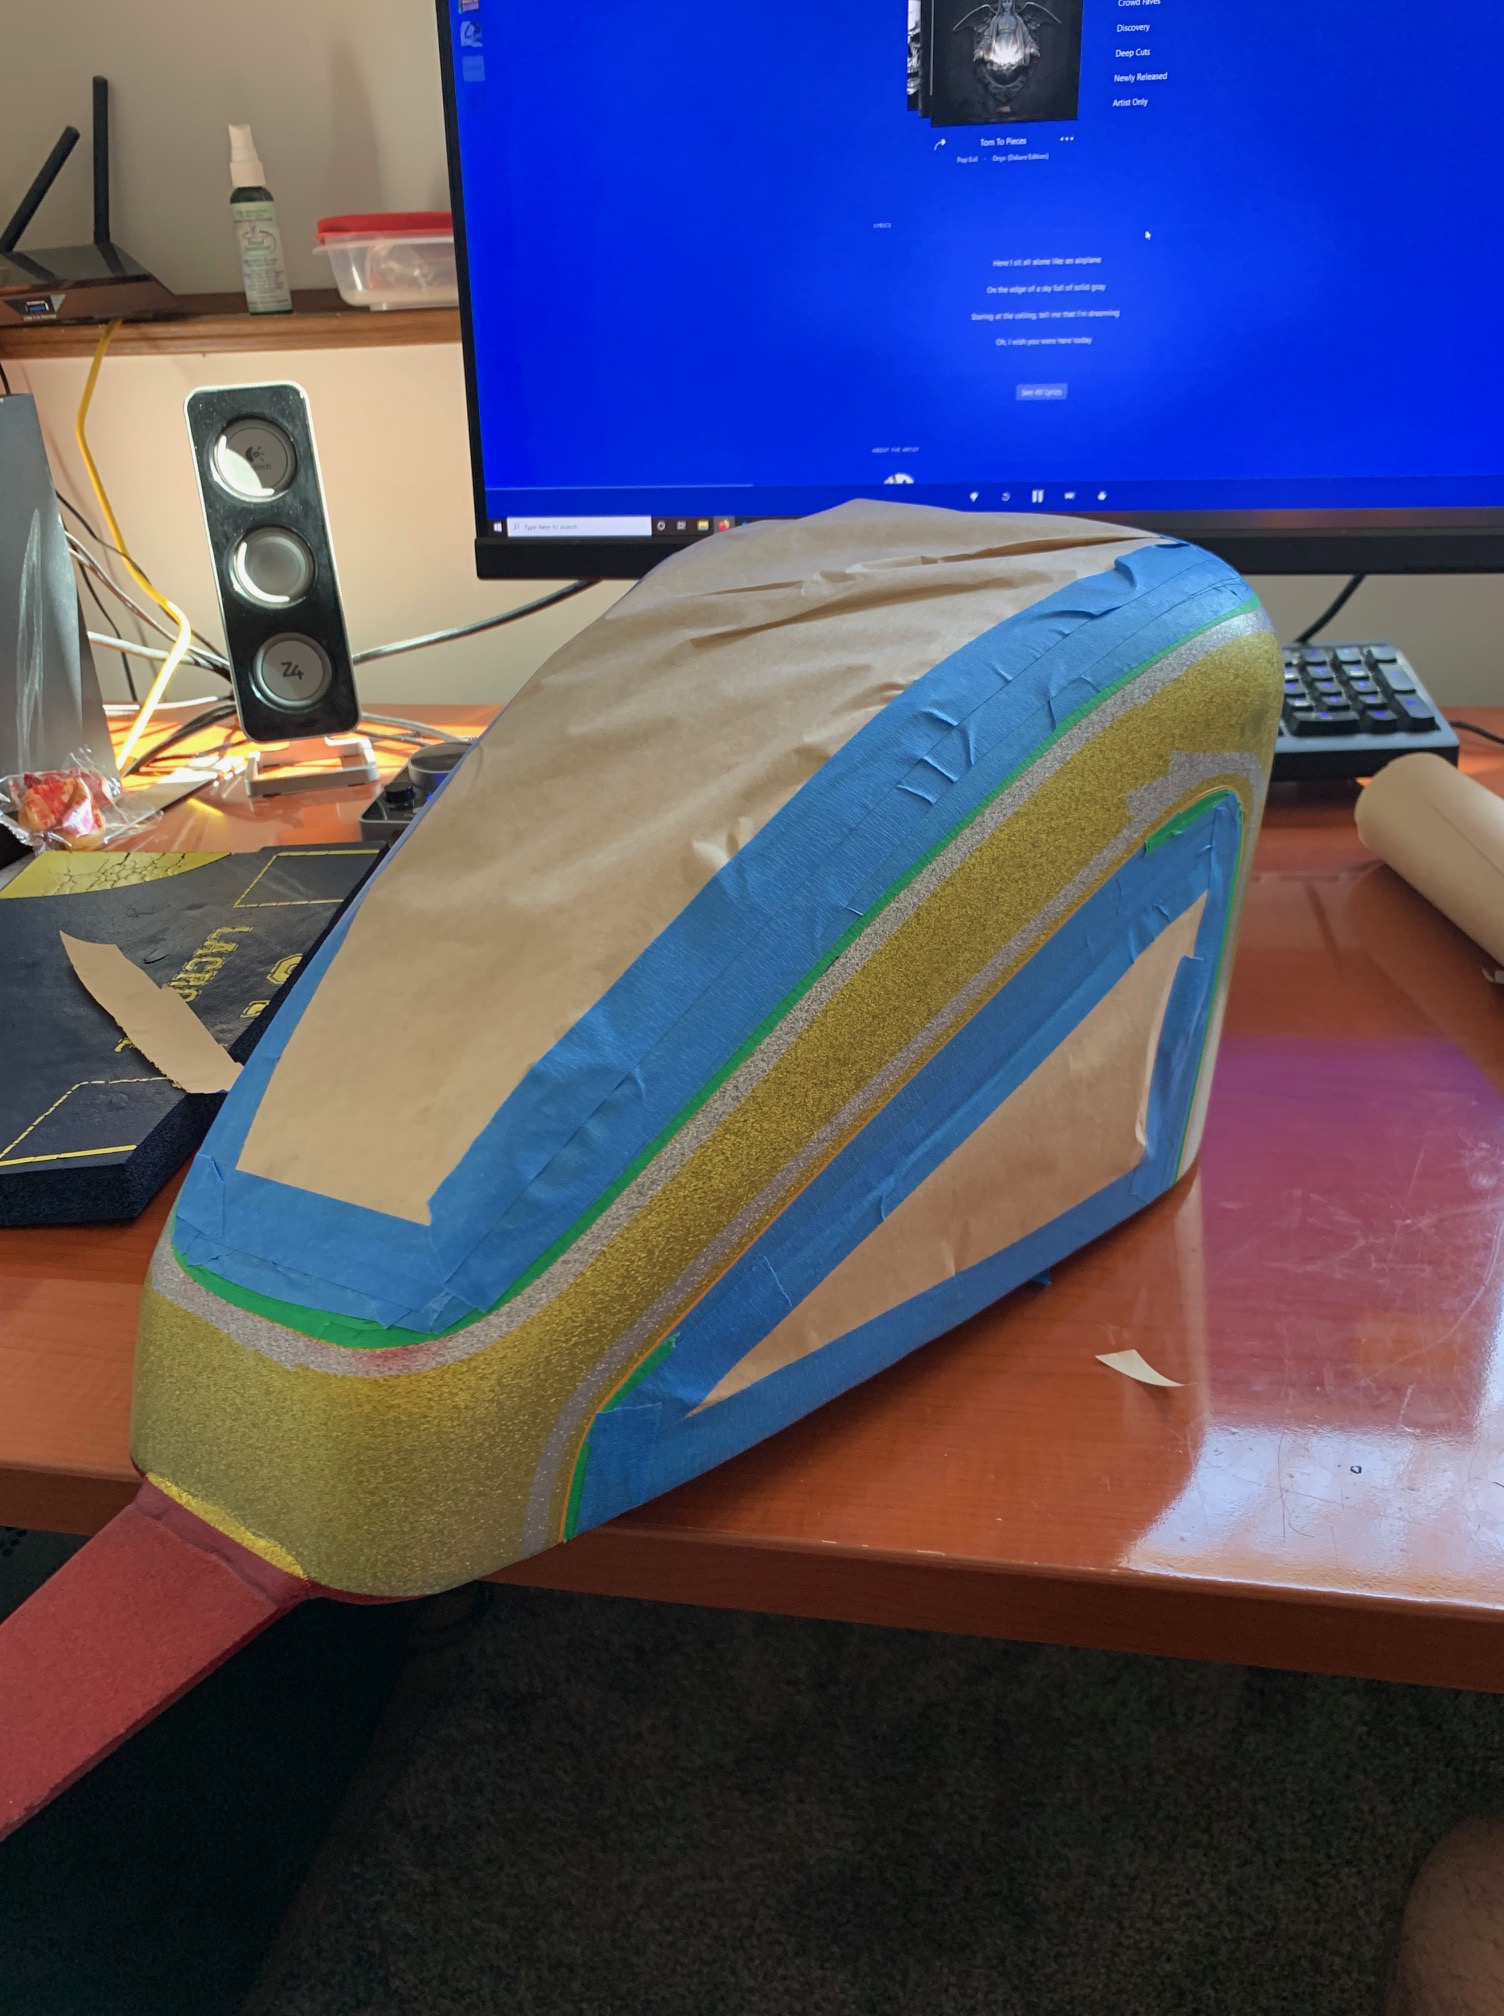

I started by taping over the areas that I wanted to stay pegan gold. Then, due to wanting some texture on the top of the tank, I decided to use lace fabric that you can pick up at any fabric store to use as my stencil. Those edges were then taped. Then, I went over the stencil with House of Kolor Brandywine Candy. I did some light coats knowing that I was going to peel up the stencil and then go over the whole area with more Brandywine to add depth. I didn’t want the lace to stay completely pegan gold as that would have been a bit too harsh for what I was going for, but I did want some of the gold to show through depending on the angle you looked at the tank.
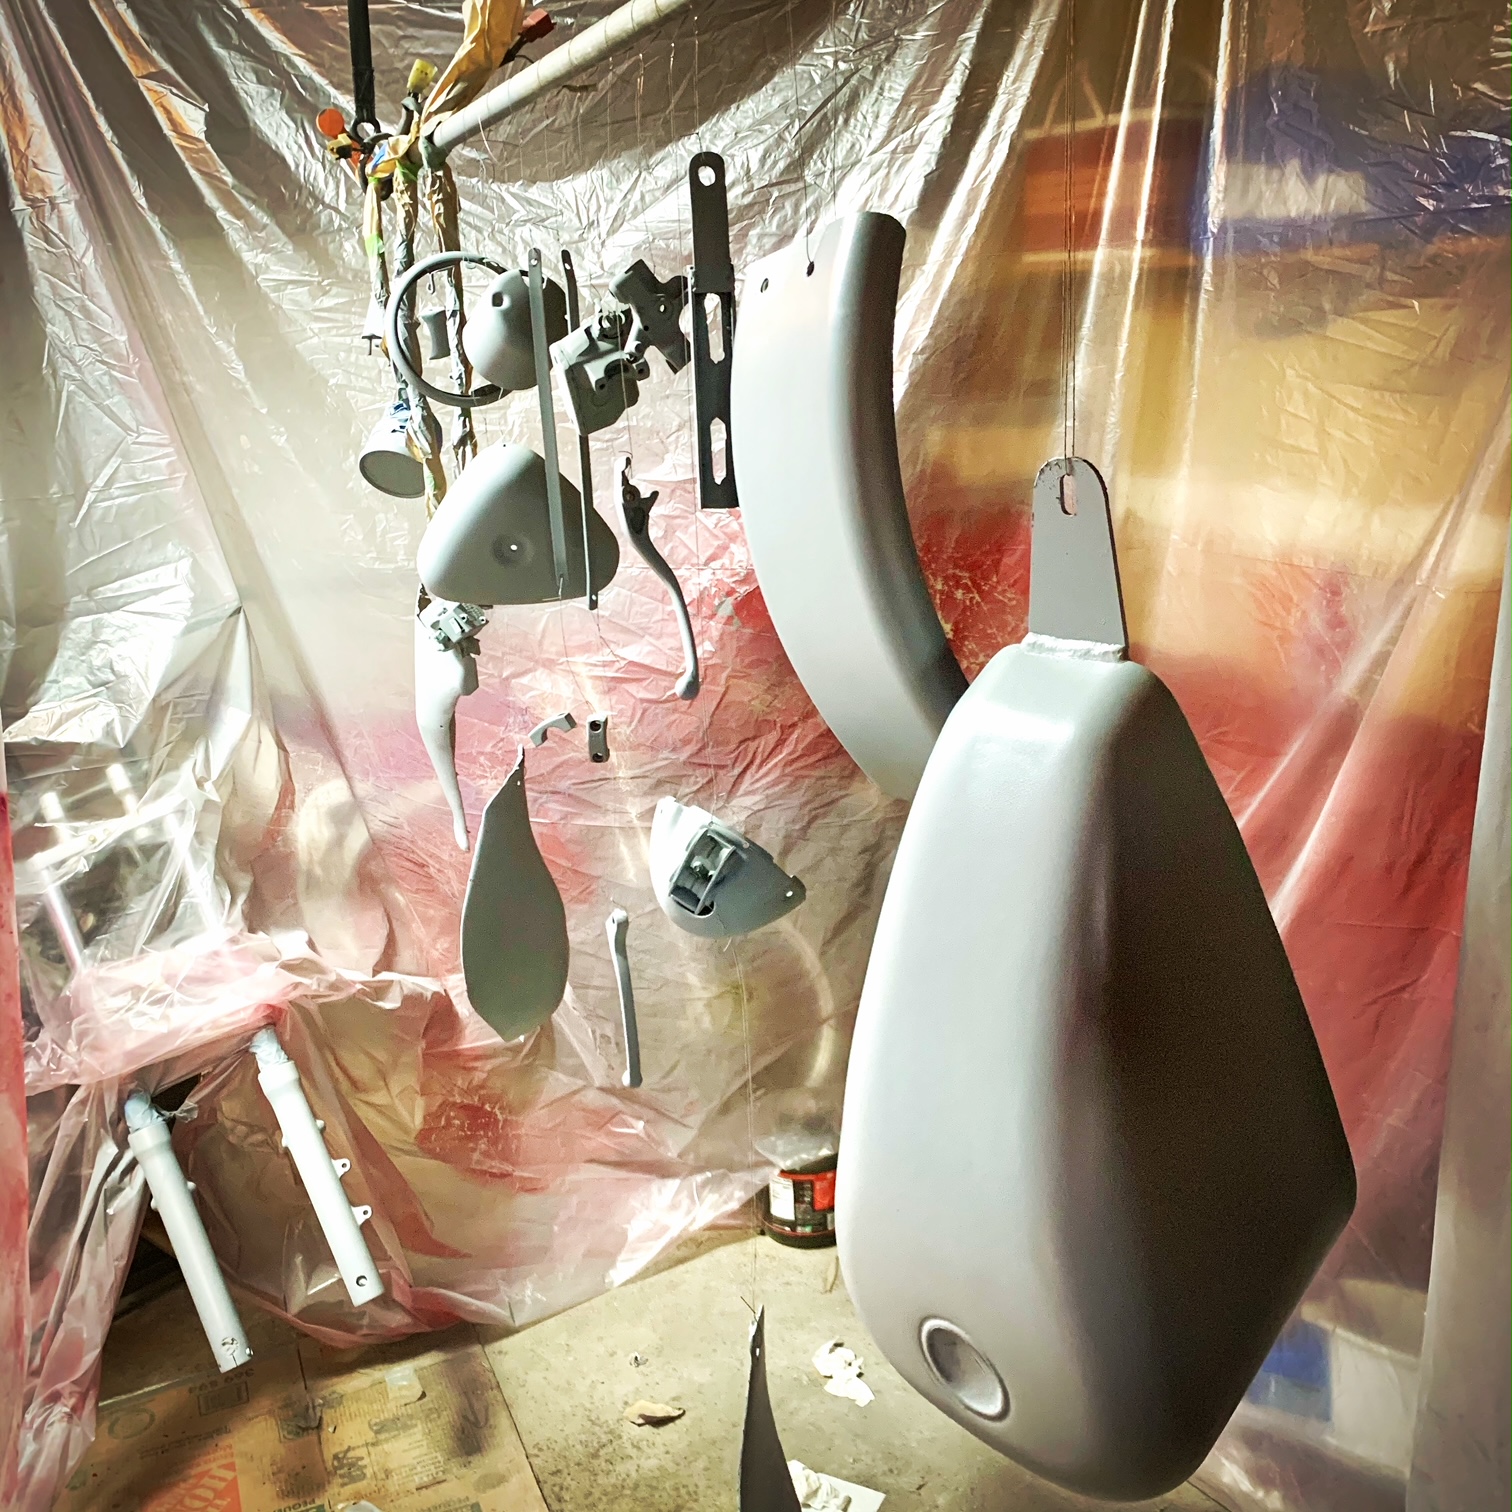
It is now worth noting that each time you paint a new color layer, you have to seal it in with a new layer of clear. Once that is done, you want to go back in and lightly sand to level out the paint as well as give the next paint layer something to adhere to. This is a tricky process since the candy coats are so thin, if you are not careful, you could end up removing a lot of your hard work from earlier. This is why the clear layer is so important. It gives you a little buffer for the sanding and also allows you to add new taping elements without ruining the paint.

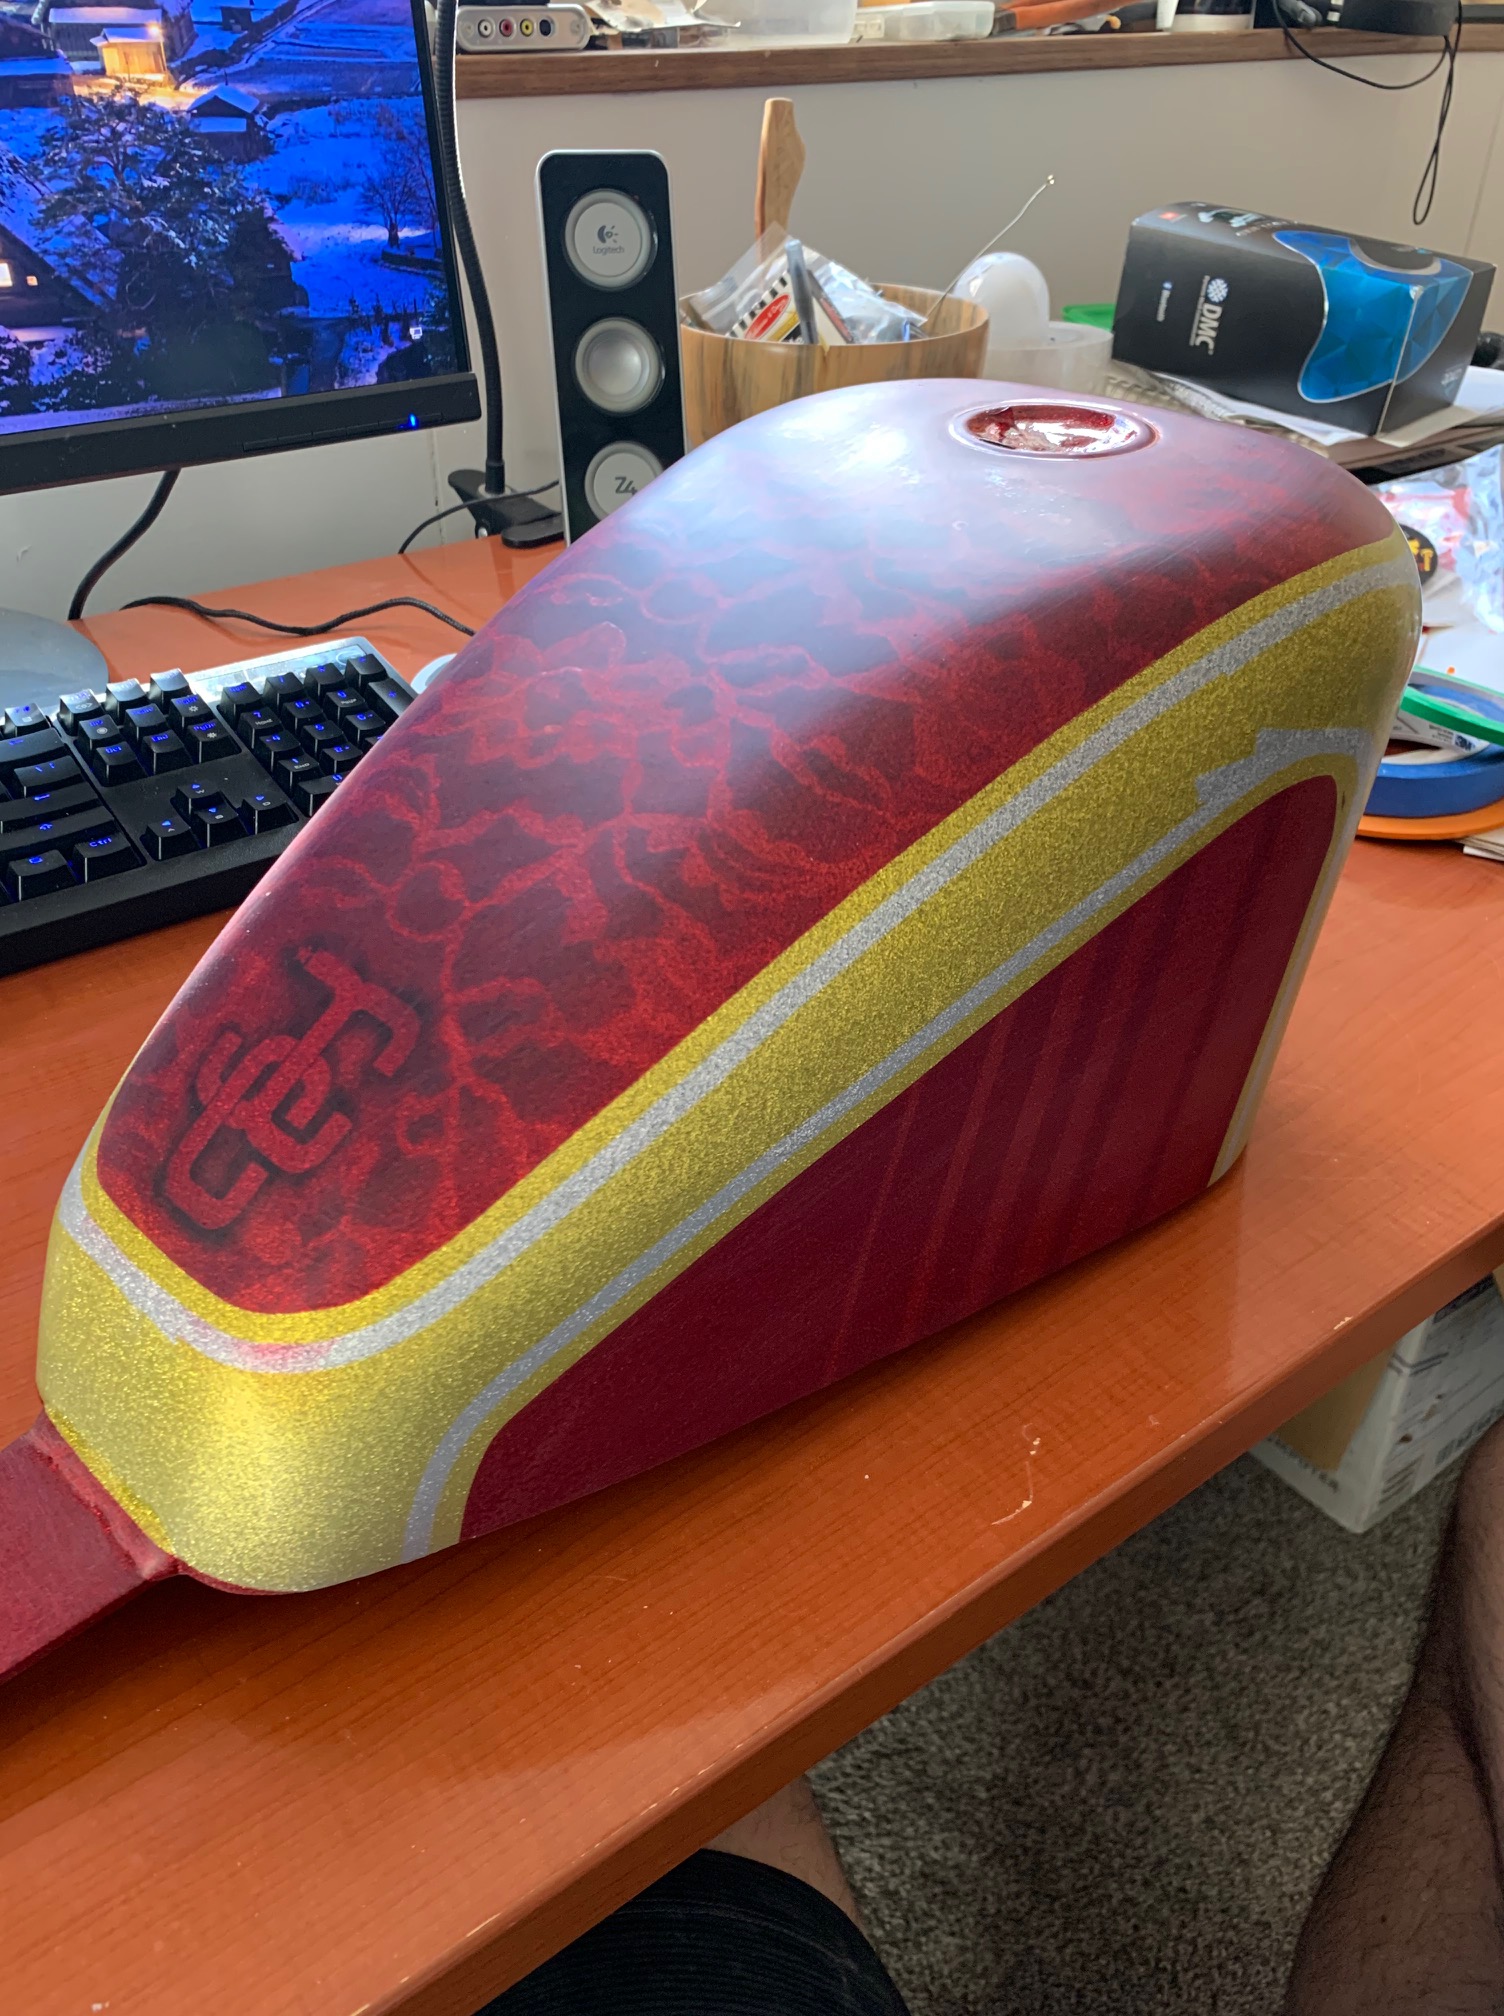

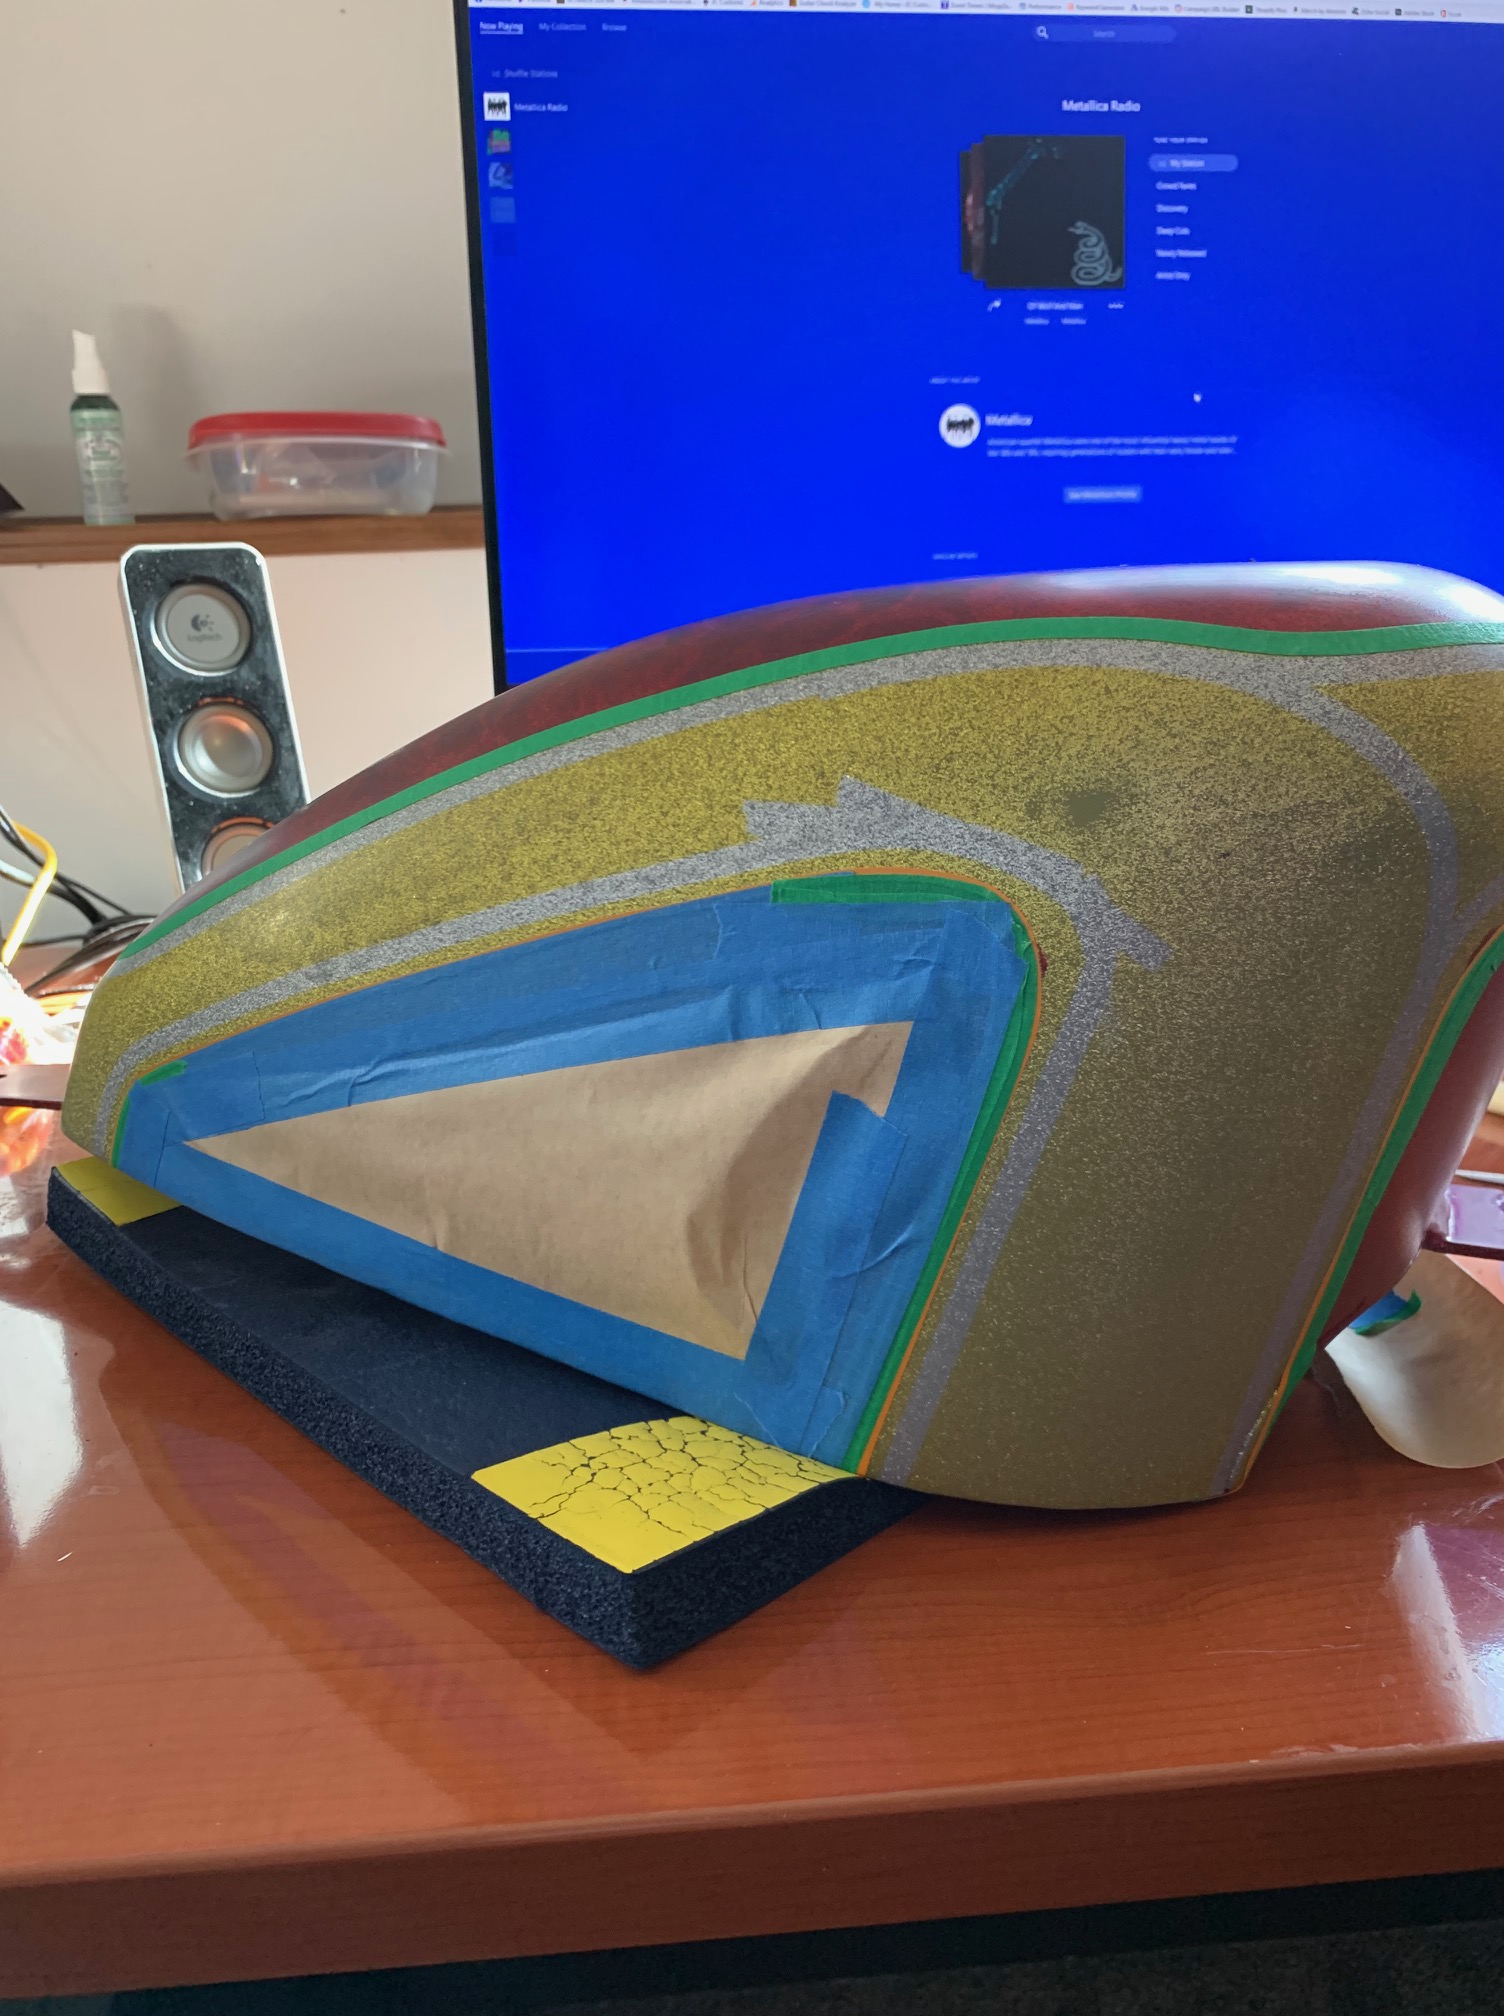
Now, after removing the stencil and going back over the tank with the Brandywine, I found that the contrast was not quite as stark as I was hoping. I decided to try and match up the lace pattern as close as possible to the tank and go back over the areas I wanted shaded with a more concentrated Brandywine to make the texture pop. It ended up coming out really well. It remained subtle enough when looking at it from certain angles or in certain light, but became very clear under different conditions. Once the Brandywine was done for the lace as well as some minor striping on the sides, I taped off a design to accent with black to give the bike a bit more of a “tough” look.
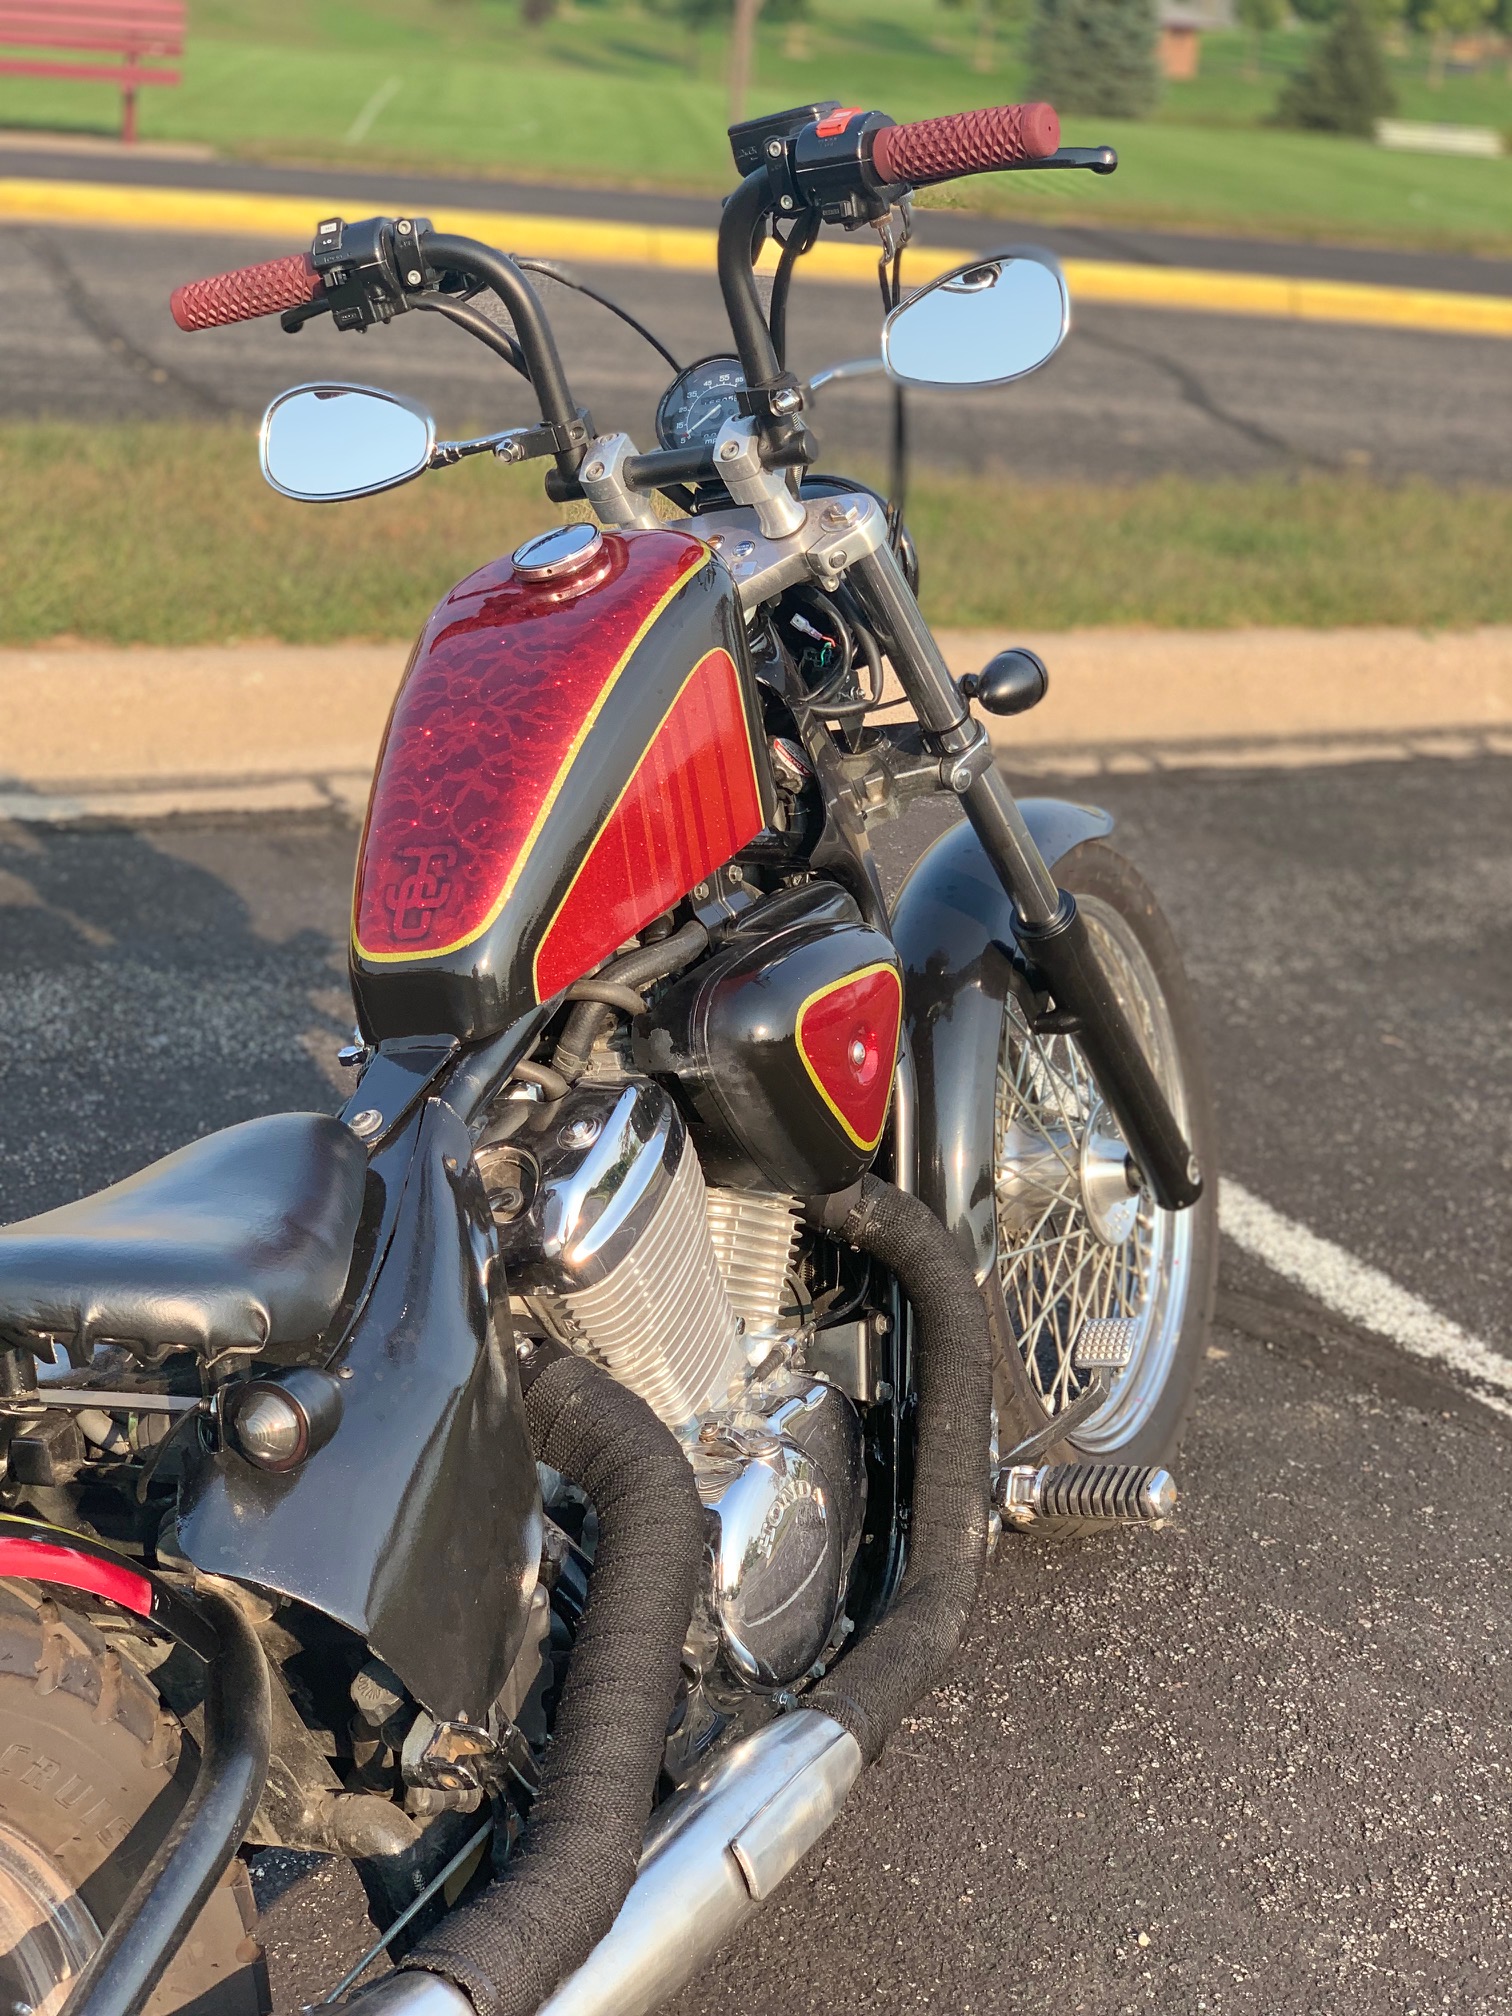
I always like the tank to be the focal point of any project, but I also wanted the rear fender to have a bit of flash to it as well. Rather than add more lace to the back, I continued the pinstriping and black accents through to the rear. It is a bit more understated than the tank but maintains the overall cohesiveness of the design.
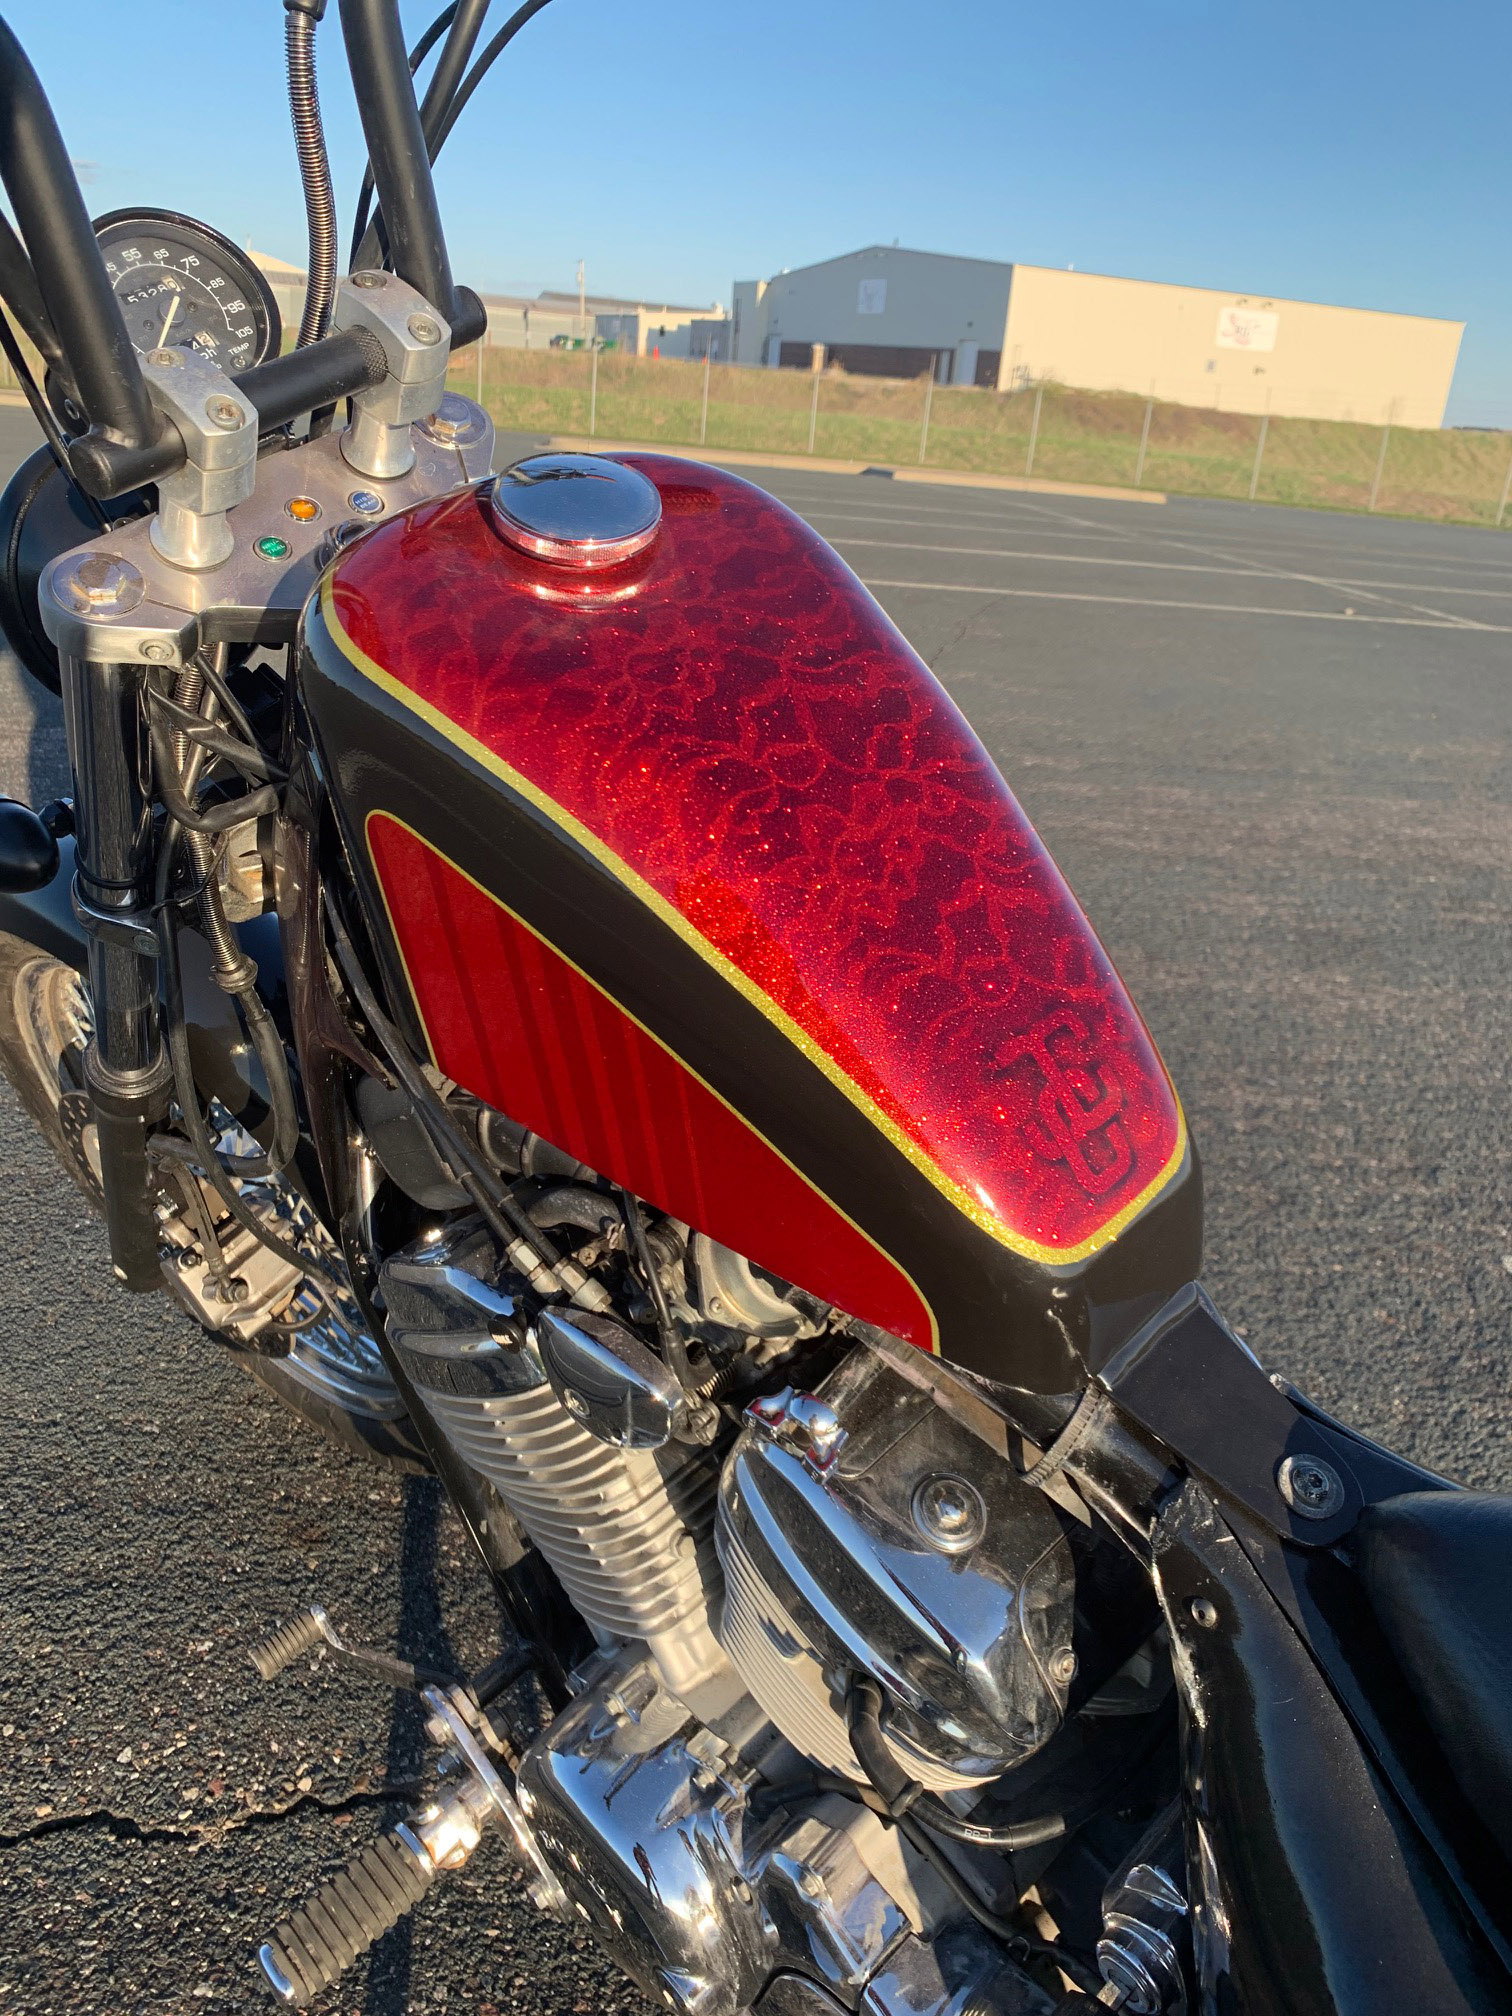
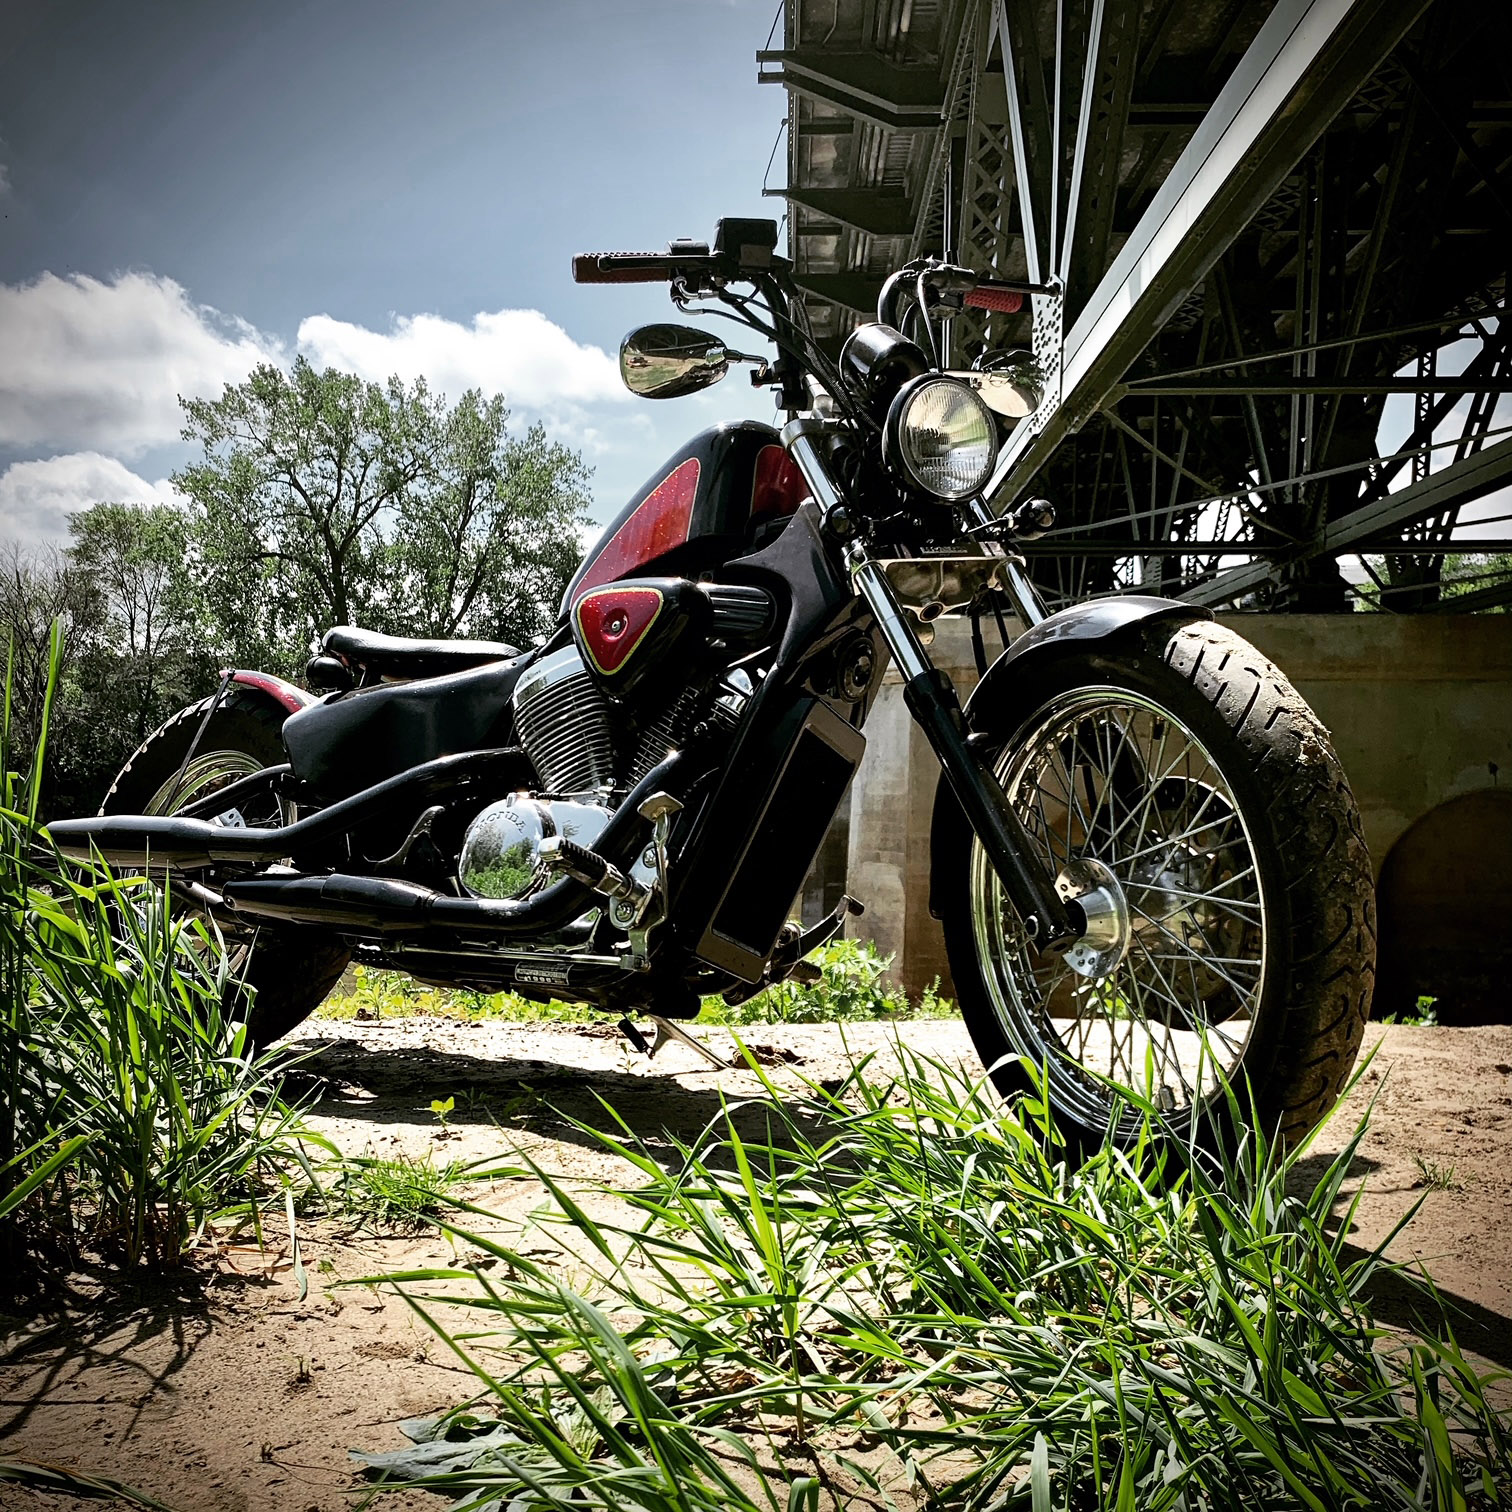
Since this was my first time trying metal flake and candy paints, I was a bit apprehensive about how each step of the process would go. I was pleasantly surprised when the candy paint laid down even easier than the regular basecoats I have used in the past. It went down super smooth and flowed well from the gun. The only trouble I really had was with the flake and getting the mix right. But what I can say is that the end result was totally worth it. It’s really hard to capture in photos just how much the flake pops in the sun.

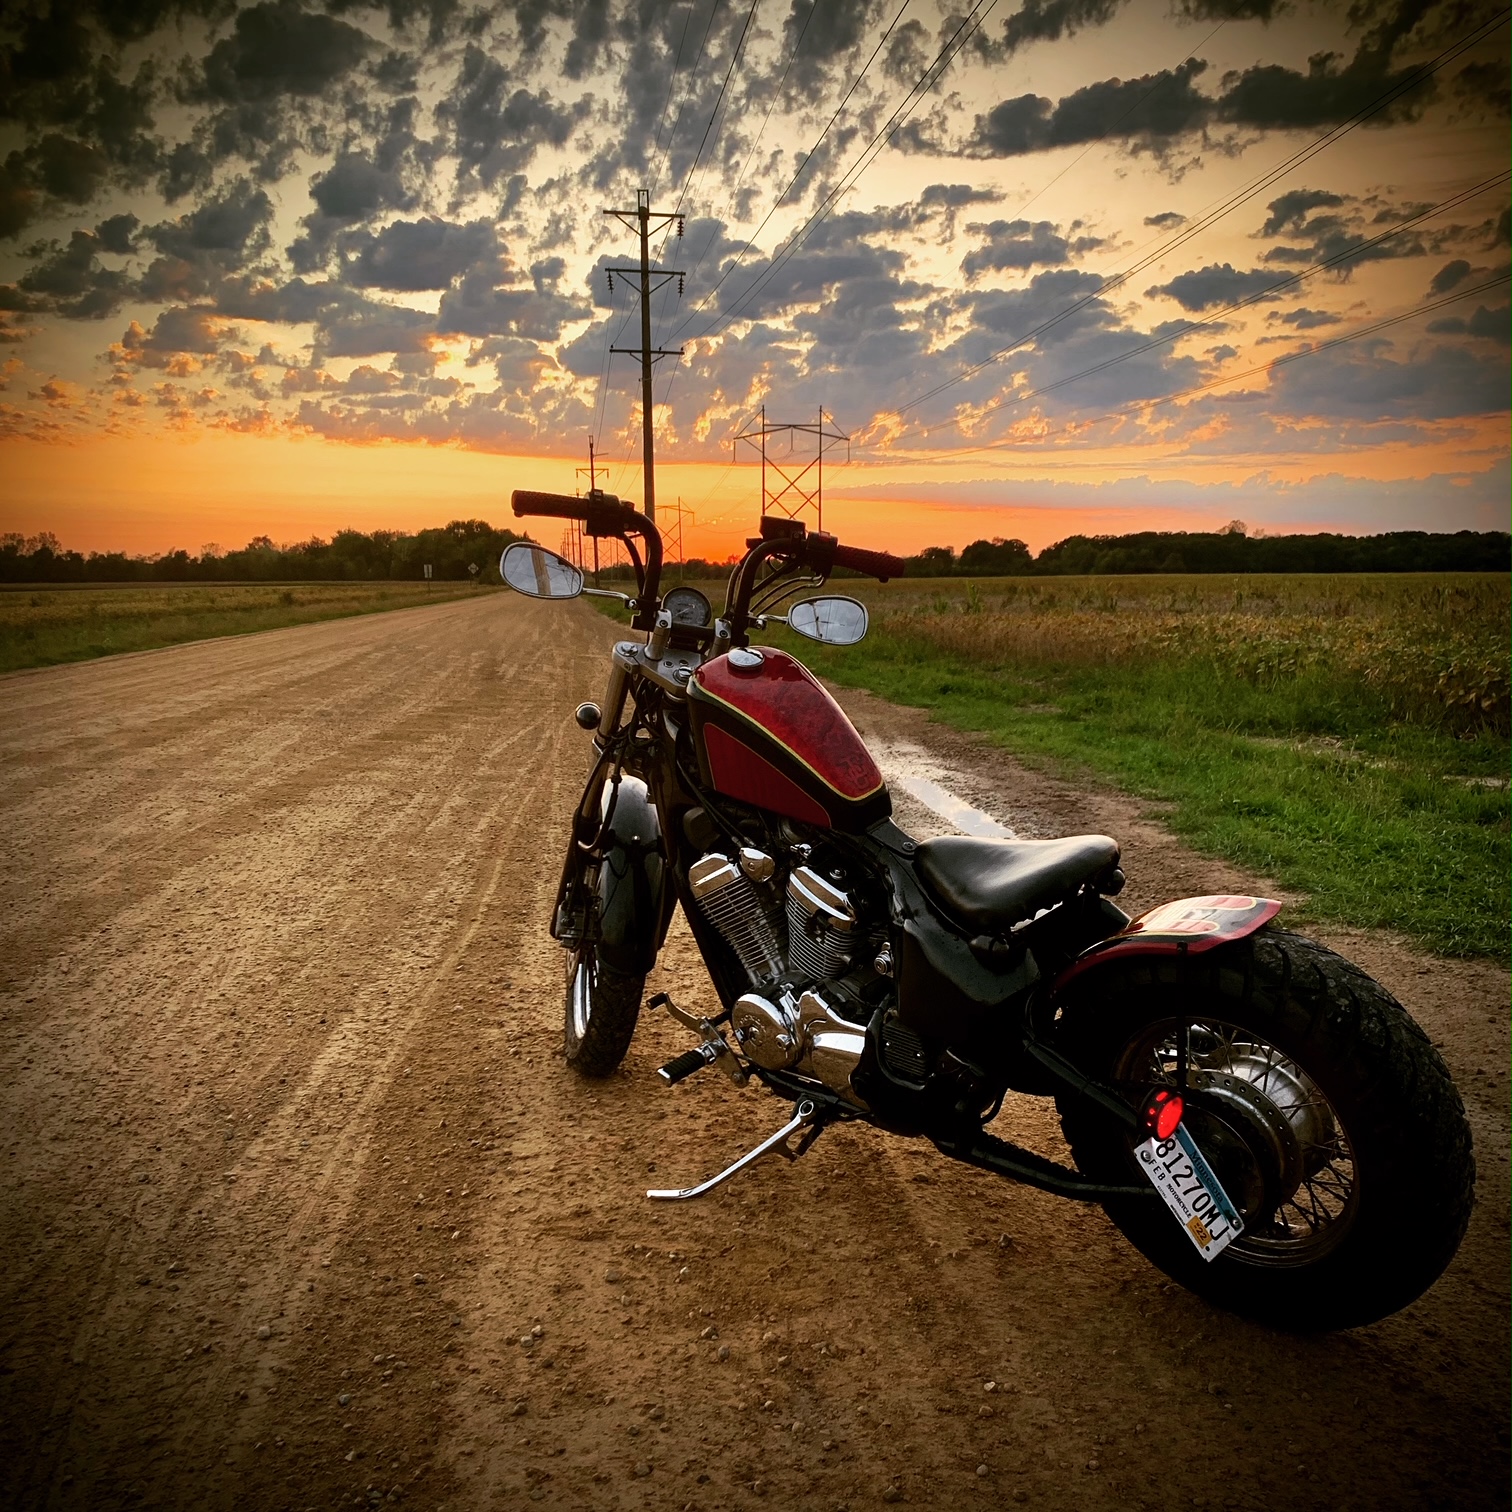

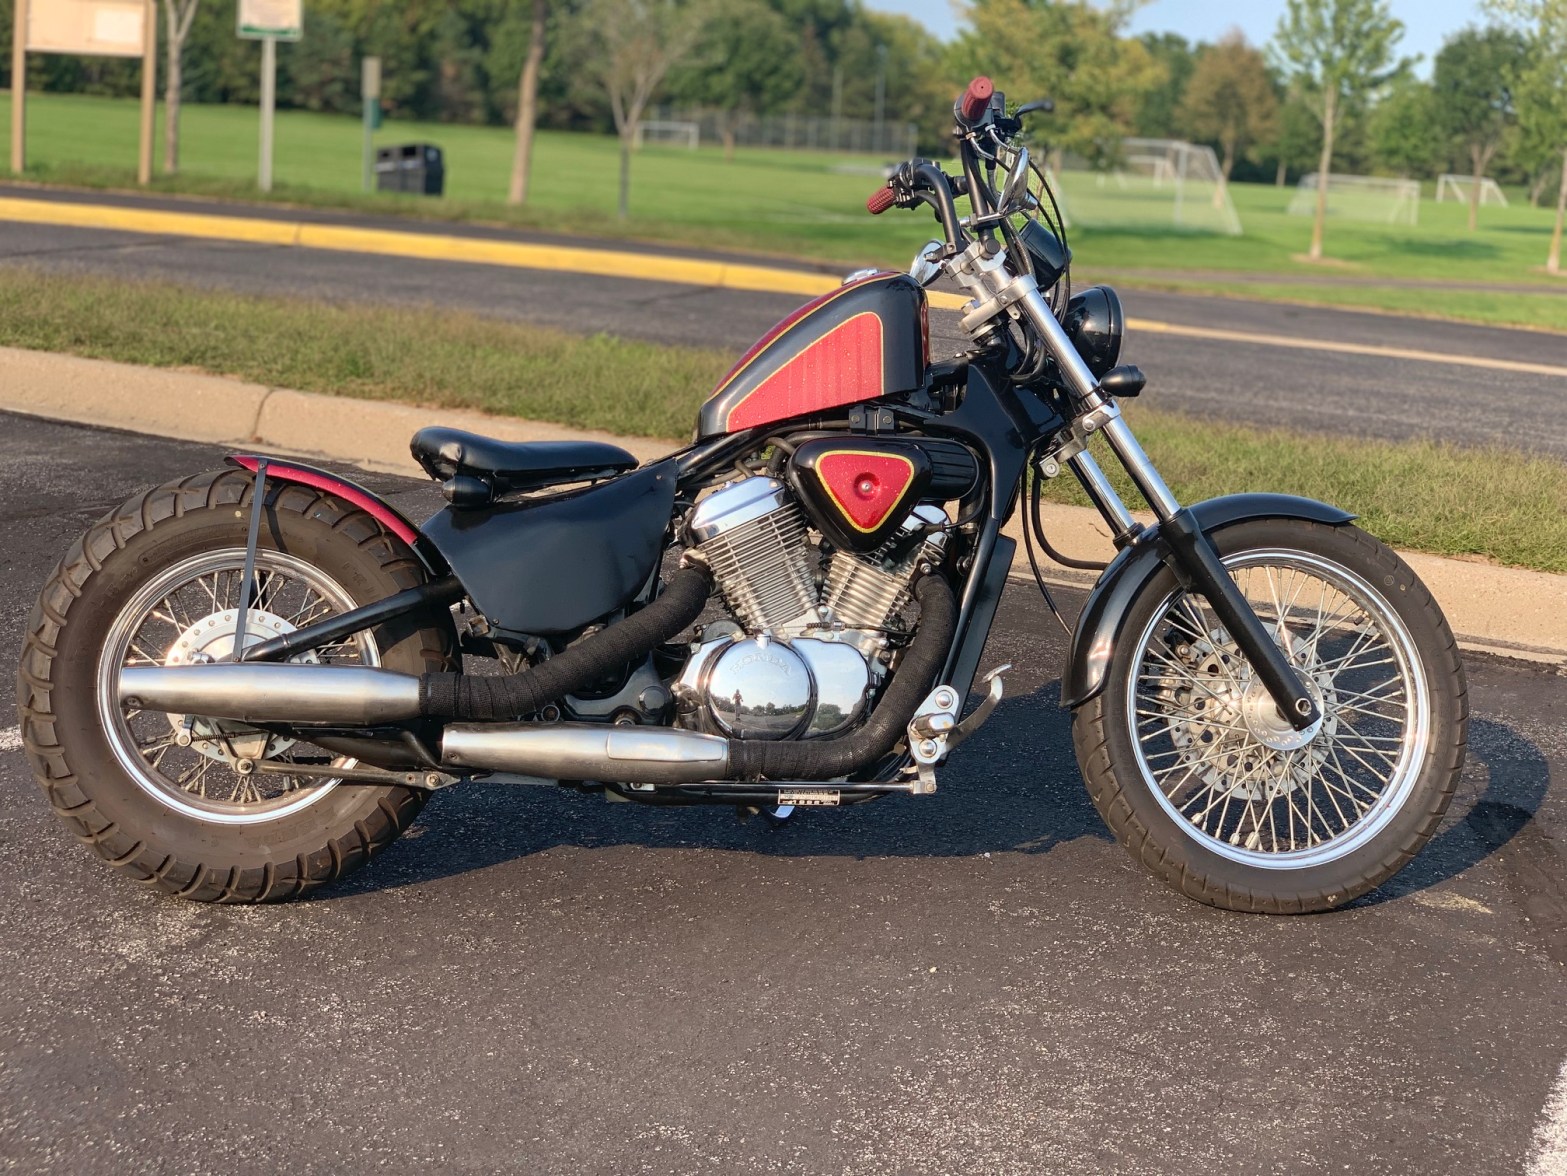
So there is it, the completed Shadow Bobber build! I hope you all enjoyed this builder’s blog installment and will subscribe for future projects! Next up? Most likely a new custom carved bass guitar…unless I can find another motorcycle project for the winter. Stay tuned!

One thought on “Jackpot – 1996 Honda Shadow VLX 600 Bobber Build: Finished!”